Latest news from Club, Journals, Expos,
other websites, etc.
(always click on photos to see close-up and next photo in line)
May 24, 2019
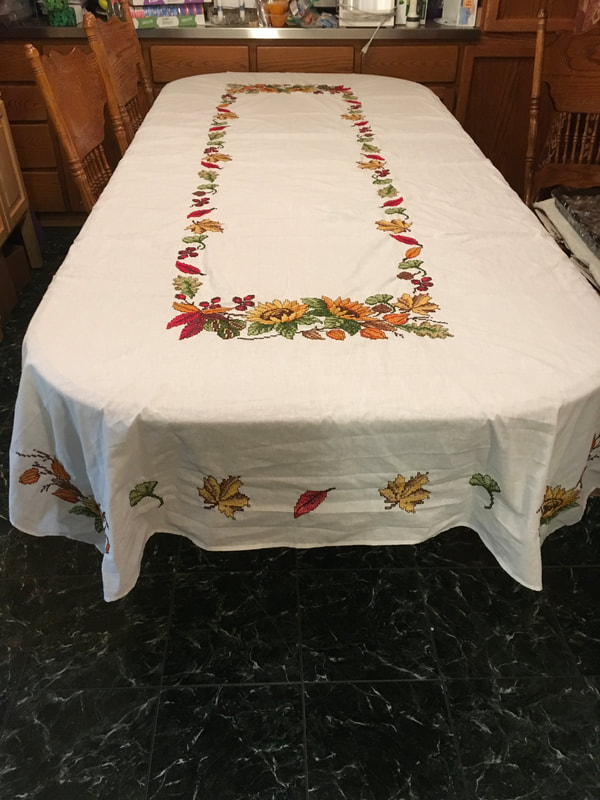
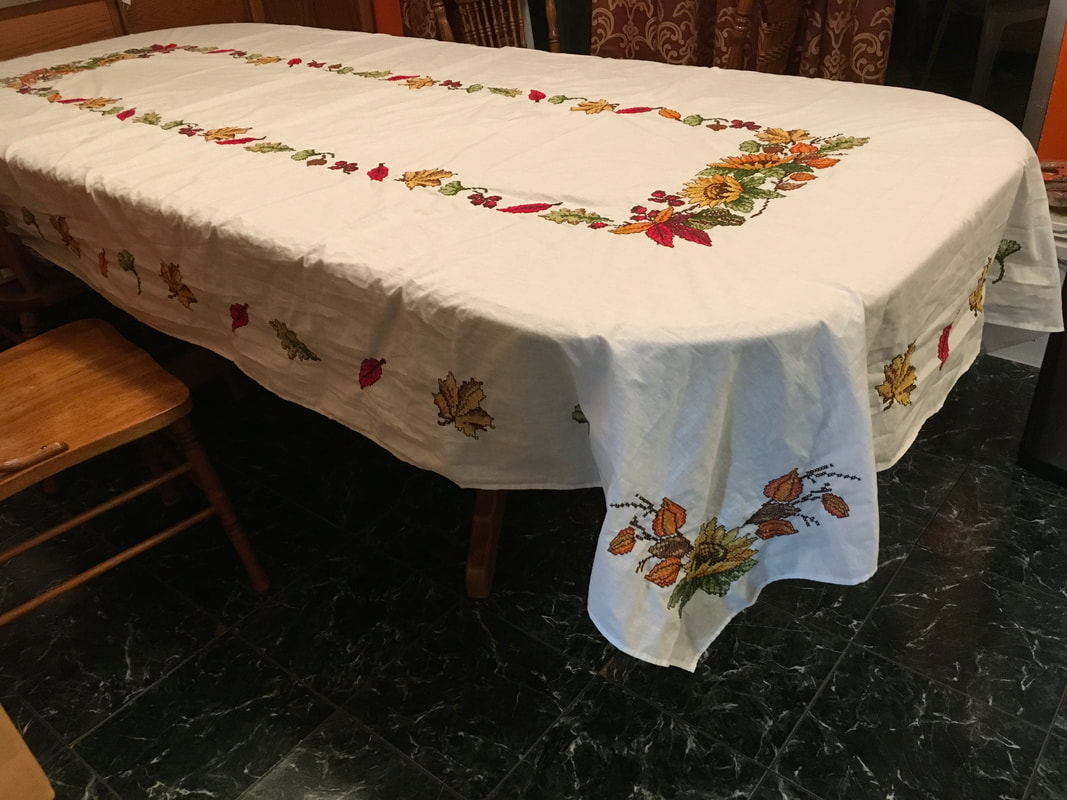
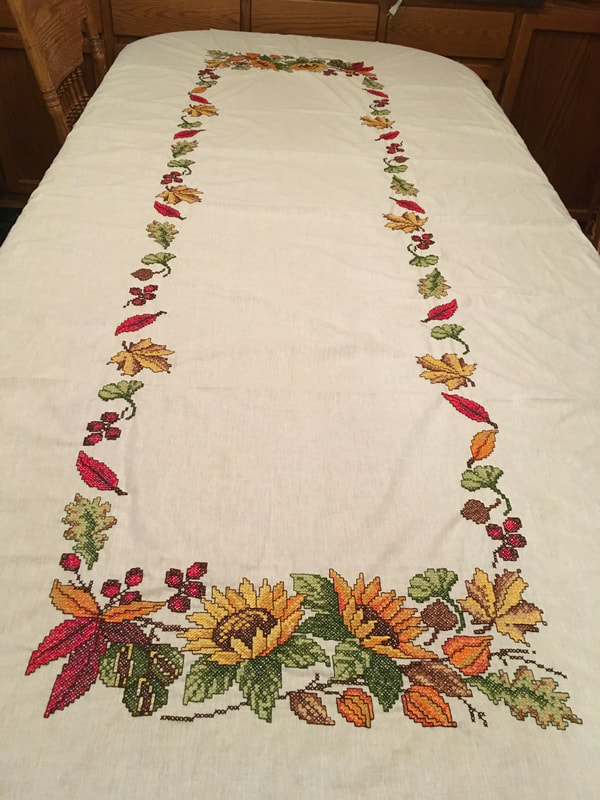
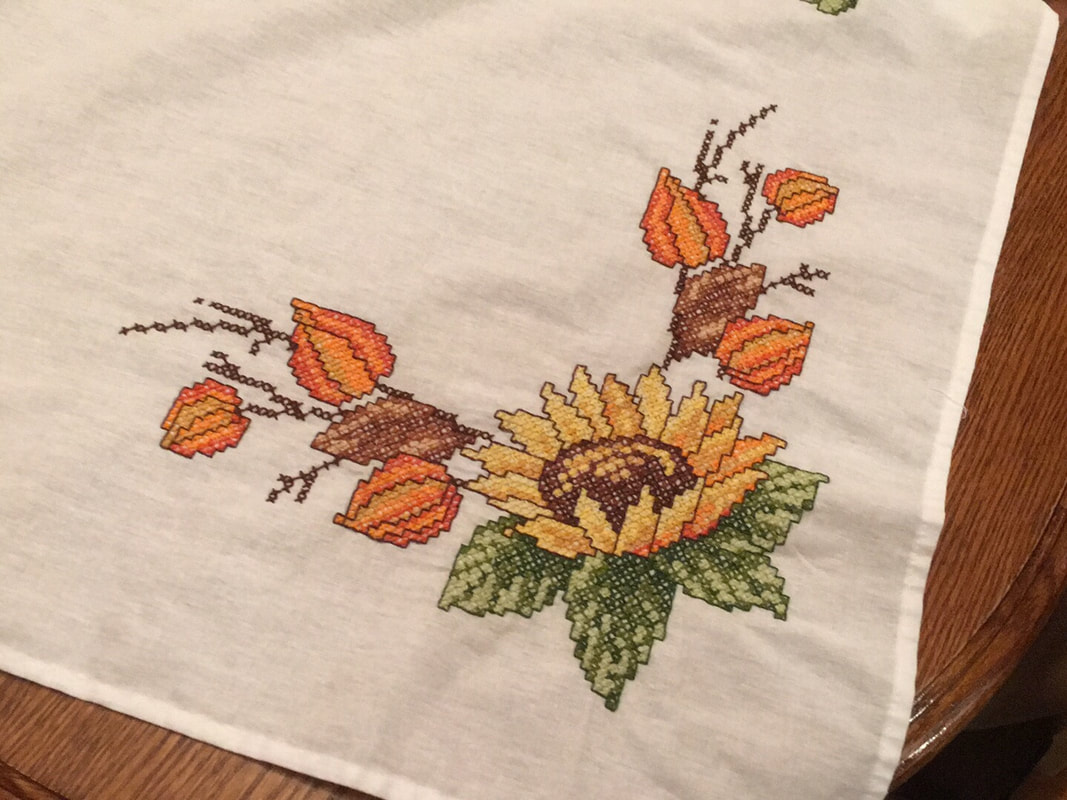
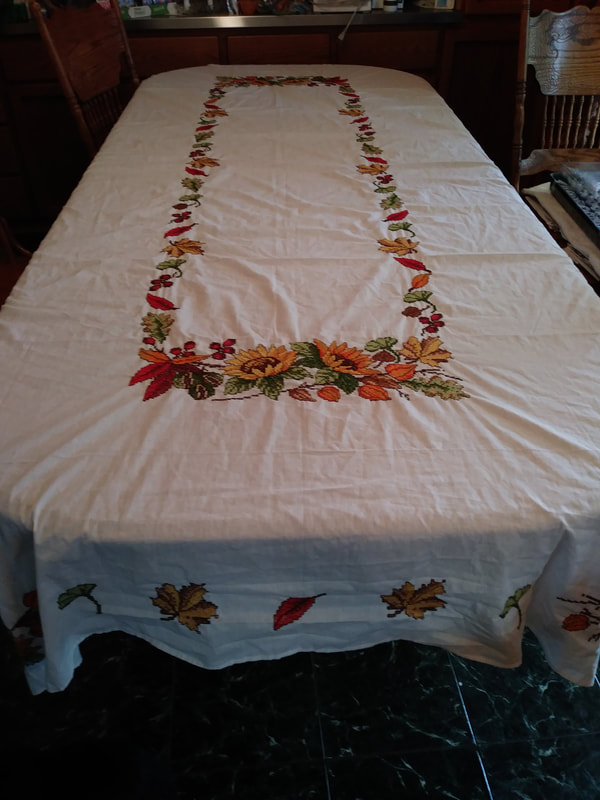
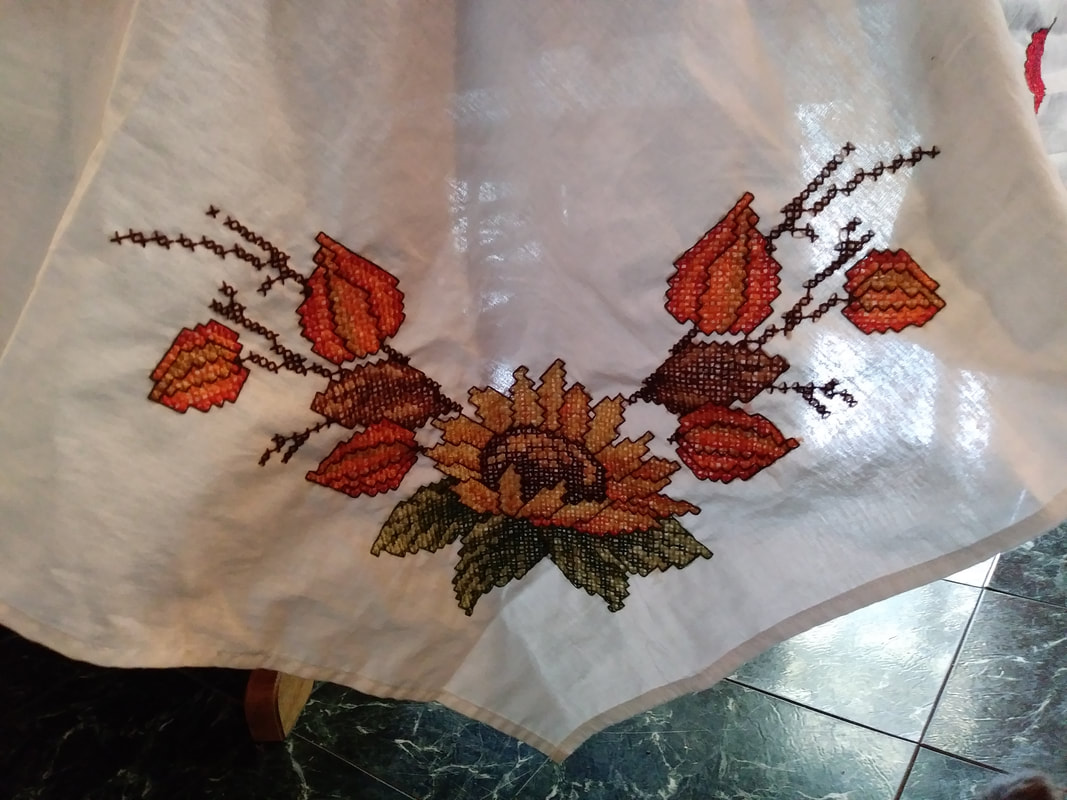
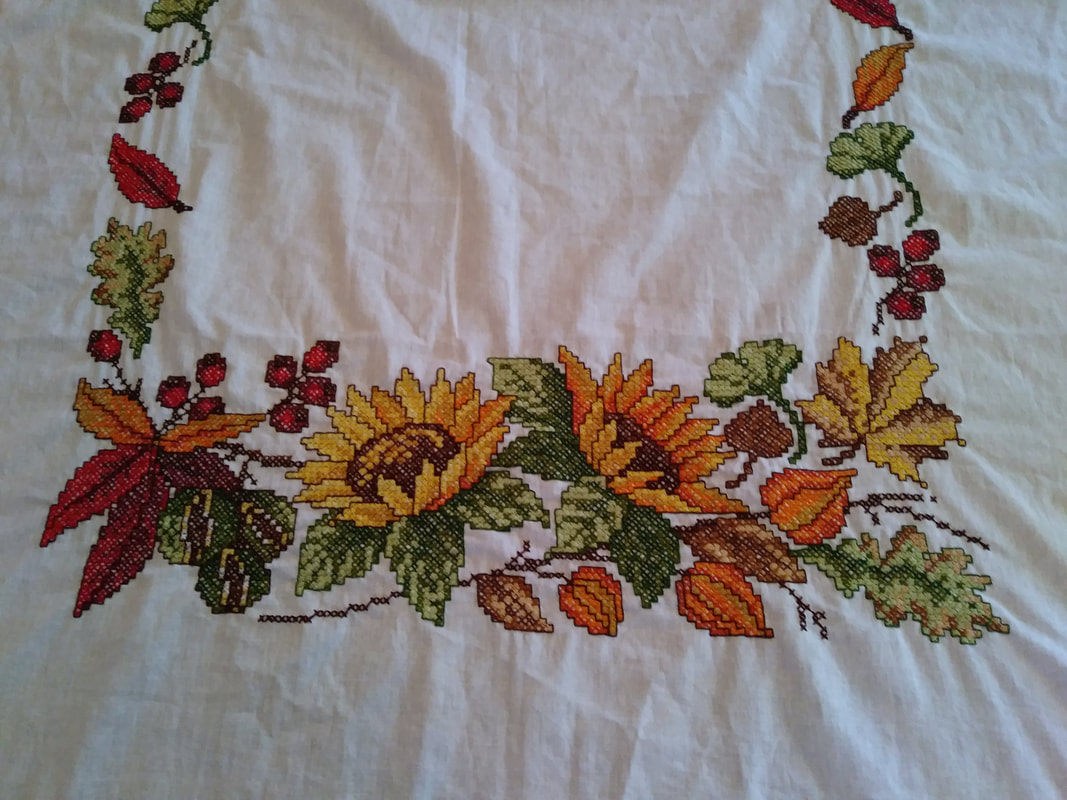
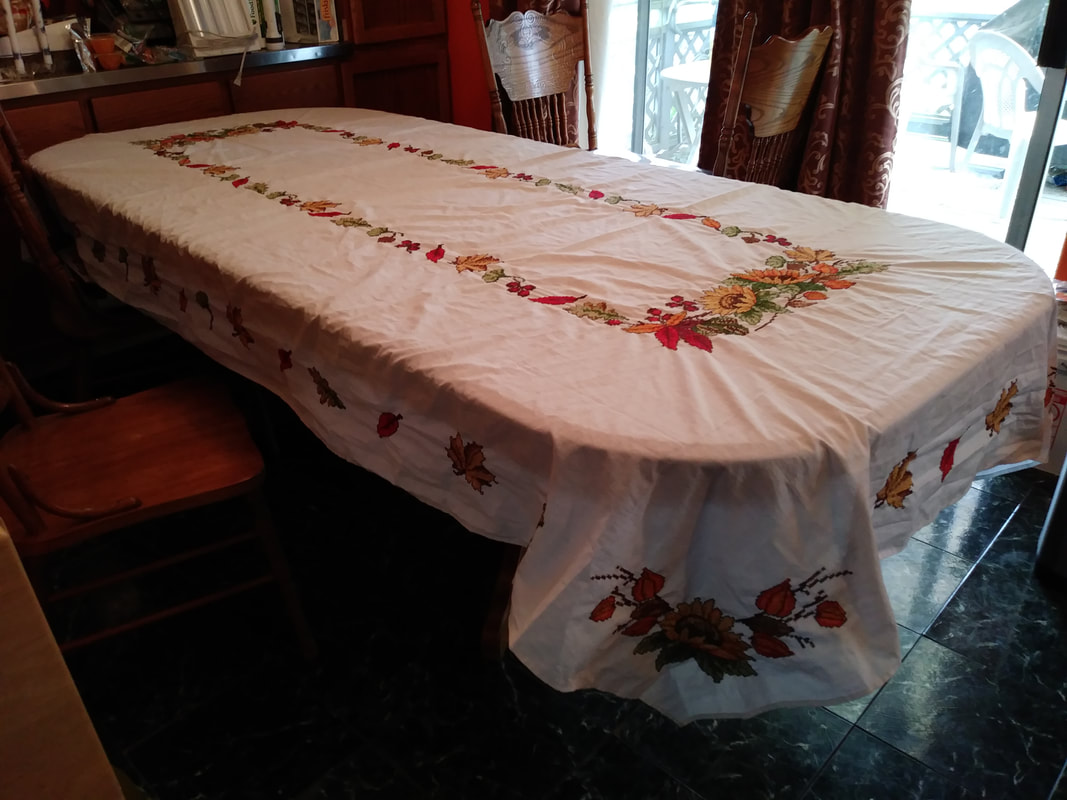
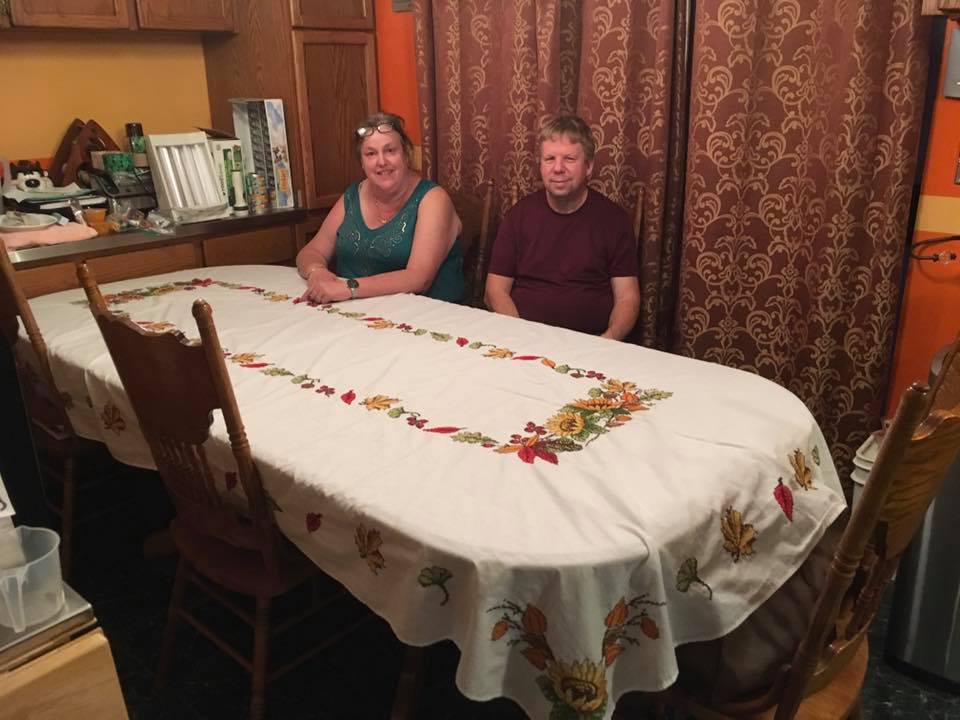
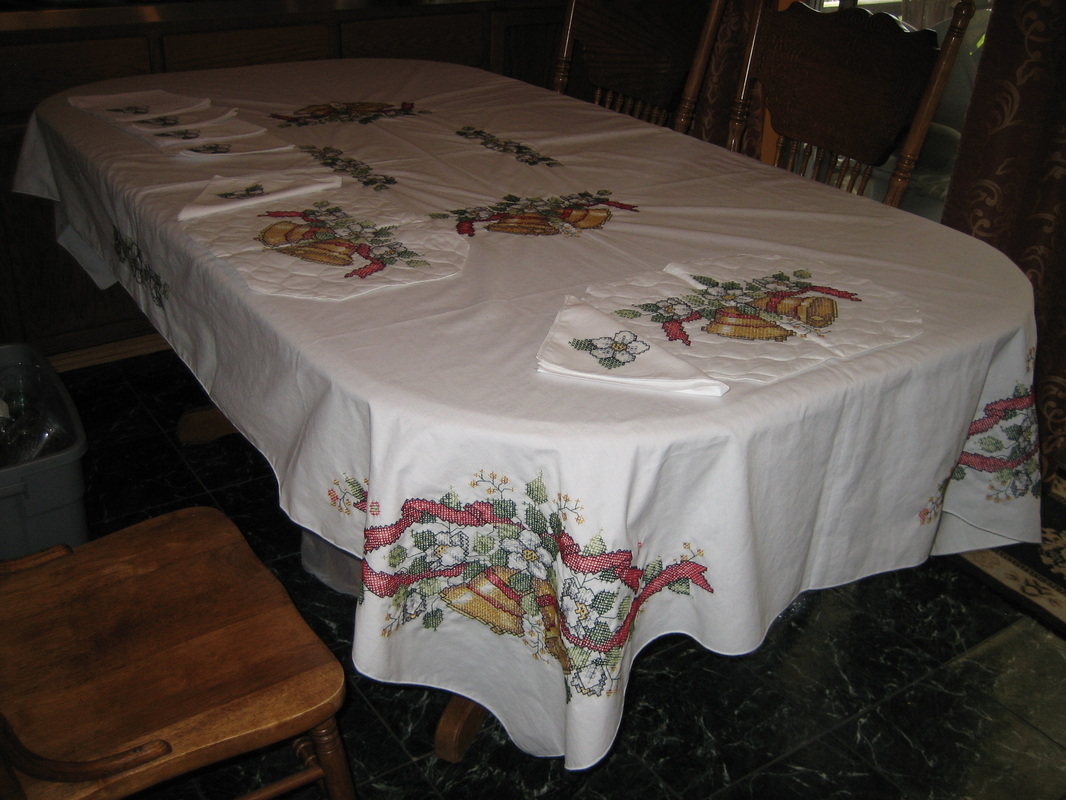
Hi All! A couple more weeks of physical therapy and ankle bone spur treatment will hopefully be done. In the meantime, I took advantage for 10 days in late April to do a stitching marathon in order to get the tablecloth for our Belgium friends done in time for their May visit. I spent 6 to 10 hours each day working on the tablecloth to get it done; otherwise, it would not have been done until mid-to late June working on it only 2 - 3 hours a night. Also made multiple trips to JoAnne's and Michaels to get floss as I kept running out. Maybe there's a "black hole" in my front room somewhere.....This is a large tablecloth, 106 inches length, oval. It took 300 hours to complete.
Here are some photos of the tablecloth and a photo of the finished product with the recipients:
Here are some photos of the tablecloth and a photo of the finished product with the recipients:
Now that they are back in Belgium, I am working on my next to-finish project, a Christmas gift. I started it back in late 2010. I stitched on this project only when traveling or sitting in on my husband's extensive medical appointments. I think after this long, it is time to get it done. I will show photos when completed. It is for a family member and unsure if they follow my blog or not, so I do not want to spoil the surprise.
I haven't given any tips from stitching journals in quite a while as I no longer receive the magazines. In cleaning my office, I did find this one:
For Adding Seed Beads to Your Stitched Designs
Well, I really need to do #4. Each time I clean under my recliner, I find all kinds of beads. There are probably more in the recliner that haven't dropped down yet.
I love using beads in stitching. It just adds that extra flair that is sometimes needed. (That said, I did not add any beads to the large tablecloth above. It really did not need any.)
Happy Stitching everyone!
I haven't given any tips from stitching journals in quite a while as I no longer receive the magazines. In cleaning my office, I did find this one:
For Adding Seed Beads to Your Stitched Designs
- To attach your seed bead, use two strands of thread. Come up in the fabric as if you're making a normal stitch, then thread a bead onto your needle and slide down the thread. Work the first arm of your cross stitch as usual. Then, as you come up to make your second arm, separate the strands of thread either side of the bead to anchor it in place.
- A beading needle makes attaching beads a lot easier, as it has a thinner shaft and can pass through the eye of the bead more smoothly. You can also use a size 26 or 28 tapestry needle instead.
- If you're stitching on plain fabric, pick the base colour, or if you're attaching a bead to existing stitches, match their thread shade.
- Spread a cloth underneath your stitching, so you can catch any beads that fall off.
Well, I really need to do #4. Each time I clean under my recliner, I find all kinds of beads. There are probably more in the recliner that haven't dropped down yet.
I love using beads in stitching. It just adds that extra flair that is sometimes needed. (That said, I did not add any beads to the large tablecloth above. It really did not need any.)
Happy Stitching everyone!
March 8, 2019
Wow! What a difference a year makes. I survived my back surgery in October 2017, it did take 6 months to heal before I could do things, in physical therapy for several months, and a full year for full recovery. Obviously, I've been posting to our Facebook page more than here. It just seems easier.
The 2019 meeting schedule is posted below. We have had an unusual winter here in the Pacific Northwest of the USA. Loads of snow -- all in February with some in March. It was so gorgeous to see and I got to enjoy it from my recliner after ankle bone spur surgery!
The club has been actively working on projects, keeping ourselves busy. Projects have been completed and new ones started.
This year, my goal is to finish all projects that I've started in the past. Yes, it is March and I am still on track. I am working on a tablecloth that is a gift. I will finish a cat quilt that will be a Christmas gift. I also have two Labrador and Dolphin stitching projects to complete and frame for gifts. It will be SOO nice to get those projects completed! Then it will be time to do something for me. Hmmm....out of two tubs of projects, I wonder what I will do....
Happy stitching everyone!


Northwest Stitchery Club 2019 Schedule Since October 2006
January 16th and 29th – Wind Storm and then Rain Storm, respectively
February 12th and 26th – 12th cancelled due to 14 inches snow
Valentine's Day, Thursday 14th
February 28 – March 3 Sewing & Stitchery Expo in Puyallup, WA
https://www.sewexpo.com/ Advanced tickets $12; at the door $14
March 12th and 26th
Day Light Savings starts, Sunday 10th
St. Patrick’s Day, Sunday 17th
April 9th and 23rd
Easter, Sunday 21st
May 14TH and 28TH
Mother's Day, Sunday 12th
Memorial Day, Monday 27th
June 11th and 25th
Father's Day, Sunday 16th
July 9th and 23rd
Independence Day, Thursday 4th
August 13th and 27th
September 10th and 24th
Labor Day, Monday 2nd
October 8th and 22nd
Halloween, Thursday 31st
This month we celebrate 13 years!
November 12th and 26th
Daylight Savings ends Sunday 3rd
Veteran's Day, Monday 11th
Thanksgiving, Thursday 28th
December 10th and 24th – Do we want to meet on 17th instead?
Christmas, Wednesday 25th
March 3, 2017
Have we been away that long? That is what happens when you post to Facebook and forget (or do not have time) to post on the website. Be sure you Like our Facebook page so you can keep up to date on quick posts.
Our members have been busy since our last posting. Lots of goodies have been created for gifts, charities and/or ourselves. I will post some here in a slide show for you to enjoy!
Our members have been busy since our last posting. Lots of goodies have been created for gifts, charities and/or ourselves. I will post some here in a slide show for you to enjoy!
Aren't those all just adorable?! Feel free to go to our Facebook page, Like us and then post your wonderful creations! We would really love to see your work.
Our new meeting schedule is now posted. If you are in our area, feel free to pop us a message (so we know you are coming), bring your project and spend some enjoyable time working on your project.
I just returned from our local annual Sewing & Stitchery Expo. It was wonderful to see once again the terrific vendors we see each year and meet some new vendors. We missed some of the regulars who were not able to attend this year. It was great seeing all the new creations and still wonderful to see the older creations. Everything was beautiful (and the Peach turnover was great for lunch!). It was a relaxing yet exhausting day. Hope you can get out to visit your local annual Sewing & Stitchery Expo this year!
Have a great stitching year everyone!
August 1, 2016
Hi Everyone! I've been delinquent in posting to our website, but if you have been following us on Facebook, you know what we have been doing. If you are not on our Facebook page, please pop on over there and "Like" us!
What our members have been up to:
Kimberly has crocheted a number of baby afghans for various family members and co-workers. She just finished an afghan for one of her granddaughters and is now crocheting one to match her granddaughter's doll. She does great work!!
Carol Anne has been working on various sewing and crocheting projects, including the table runner shown in the slide show below. This table runner has flecks and strings of gold threads throughout -- very lovely to see in person, and quite clever!
Wendy is still working on her counted cross stitch Wolf sampler. It is coming along so beautifully! I can't wait to post it here for everyone to see. It is almost done!
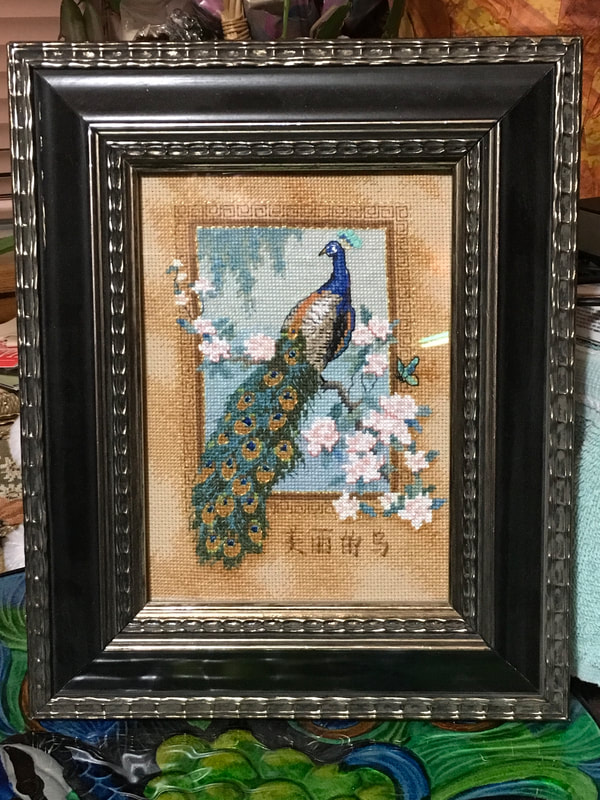
Carol finished her Peacocks and Pecotee sampler! Love it! She added some metallic floss in various areas for that added "pop". Looks great and can't wait to see it framed! She has been working on a bunch of small projects, like the Rabbits, Cats, Komodo Dragon, Hedgehog, Elephant and Turtle items shown. I've also included a photo of a Rabbit greeting card she stitched for. Card designs can be simple and quick like this Bunny, or can take up to 16 hours! But the cards make for an outstanding gift!
What have you been working on?
Have a great summer everyone! And remember to check our Facebook page frequently as we do more postings there (so much quicker and easier)!
What our members have been up to:
Kimberly has crocheted a number of baby afghans for various family members and co-workers. She just finished an afghan for one of her granddaughters and is now crocheting one to match her granddaughter's doll. She does great work!!
Carol Anne has been working on various sewing and crocheting projects, including the table runner shown in the slide show below. This table runner has flecks and strings of gold threads throughout -- very lovely to see in person, and quite clever!
Wendy is still working on her counted cross stitch Wolf sampler. It is coming along so beautifully! I can't wait to post it here for everyone to see. It is almost done!
Carol finished her Peacocks and Pecotee sampler! Love it! She added some metallic floss in various areas for that added "pop". Looks great and can't wait to see it framed! She has been working on a bunch of small projects, like the Rabbits, Cats, Komodo Dragon, Hedgehog, Elephant and Turtle items shown. I've also included a photo of a Rabbit greeting card she stitched for. Card designs can be simple and quick like this Bunny, or can take up to 16 hours! But the cards make for an outstanding gift!
What have you been working on?
Have a great summer everyone! And remember to check our Facebook page frequently as we do more postings there (so much quicker and easier)!
February 18, 2016
Well bugger! Towards the end of our busy holiday craft fair season, I caught a bug, in bed for four days, another 10 days to get my strength back and still another two months to get rid of the resulting cough. I hope you were able to avoid the bugs this year.
Now, on to what we've been doing:
Now, on to what we've been doing:
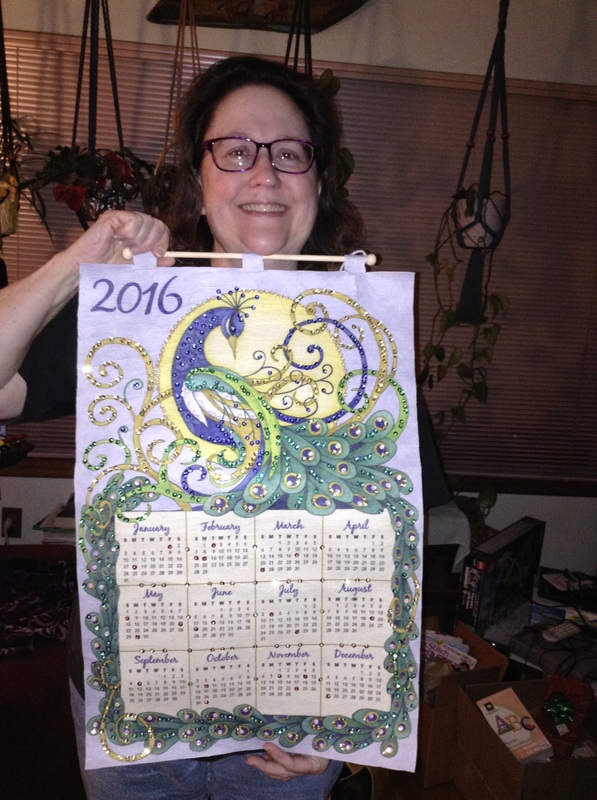
My husband did this bead and sequin 2016 calendar for me for Christmas. He knows I love Peafowl!
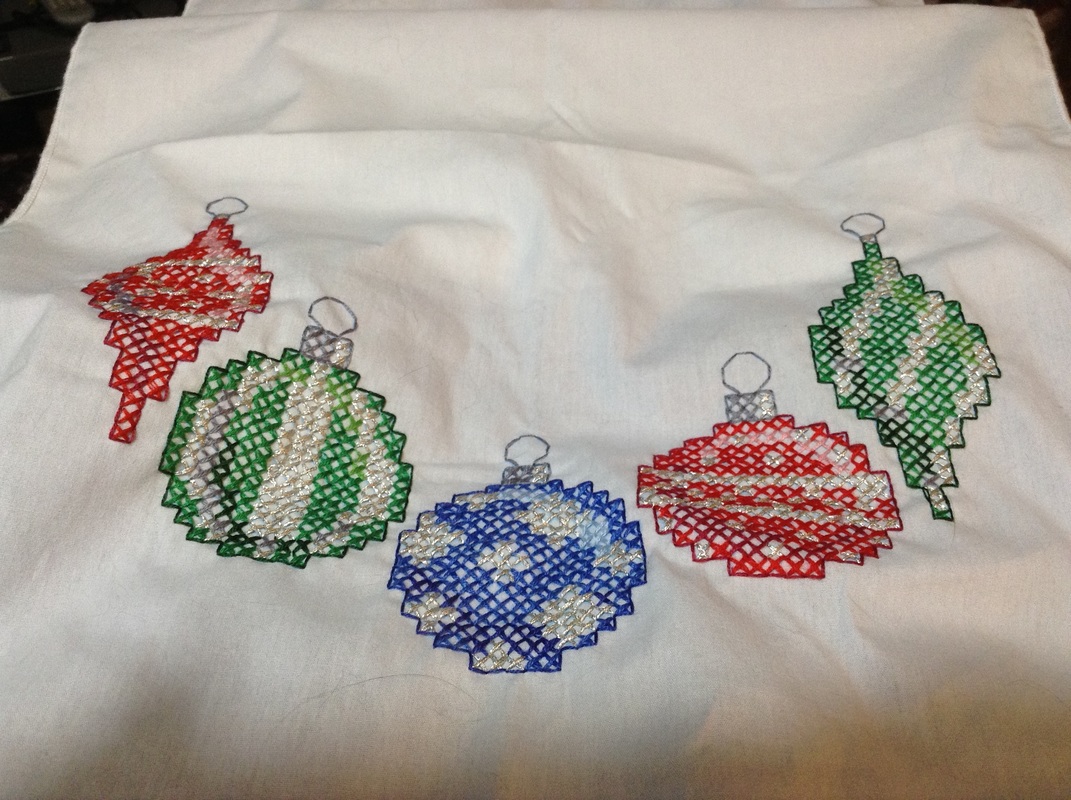
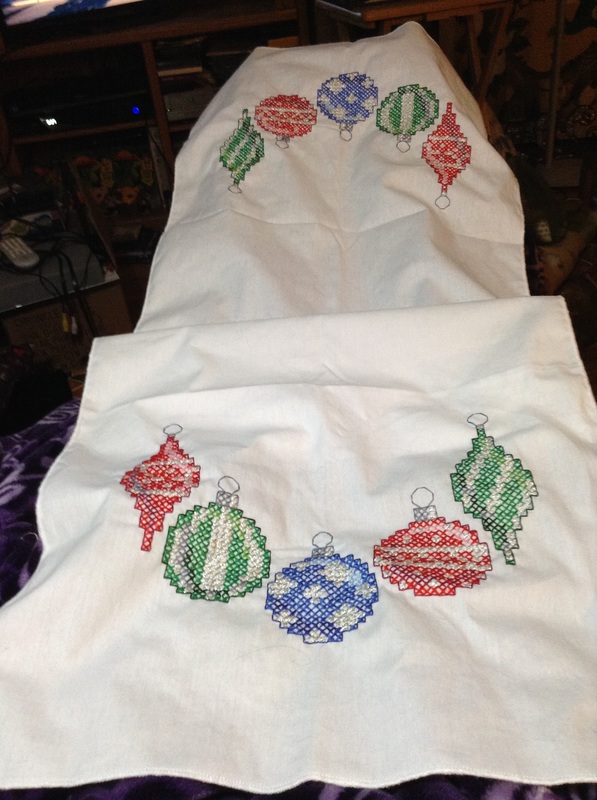
If you saw our Facebook posting, you know that I had trouble finding the Silver metallic floss when I ran out doing the last (green) ornament on this table runner. I finally had to get if through a website, but they had fast delivery, so it was wonderful being able to complete this project in a reasonable amount of time.
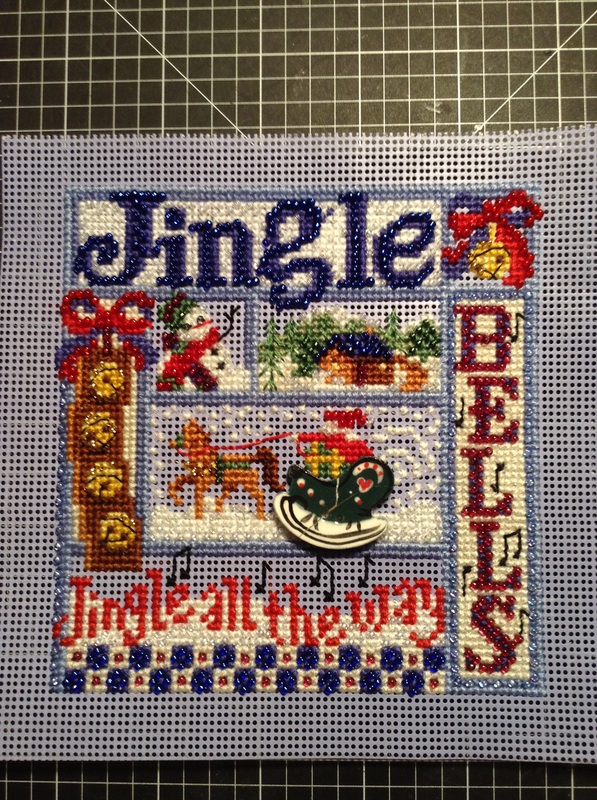
Very time consuming to do this Jingle Bells stitch and bead project. It will be framed.
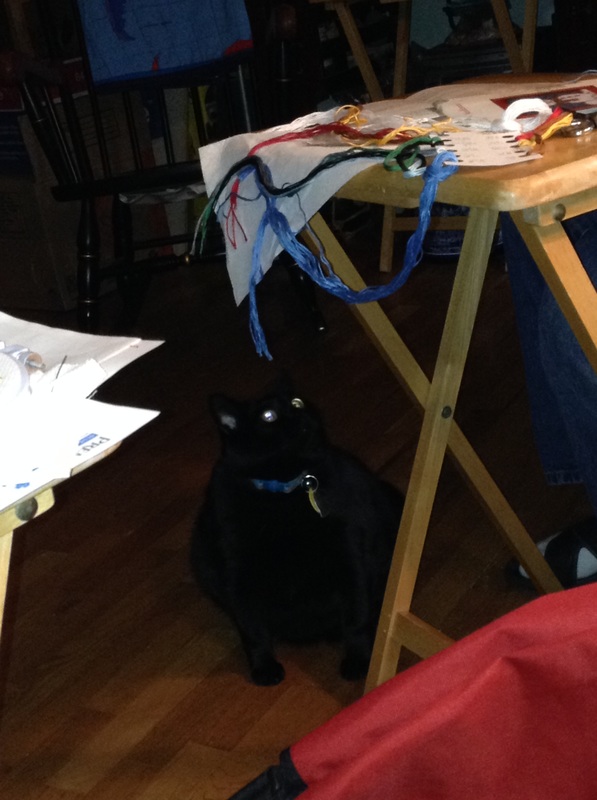
Midnight Raven wondering how she can "help" me complete the Jingle Bells project.
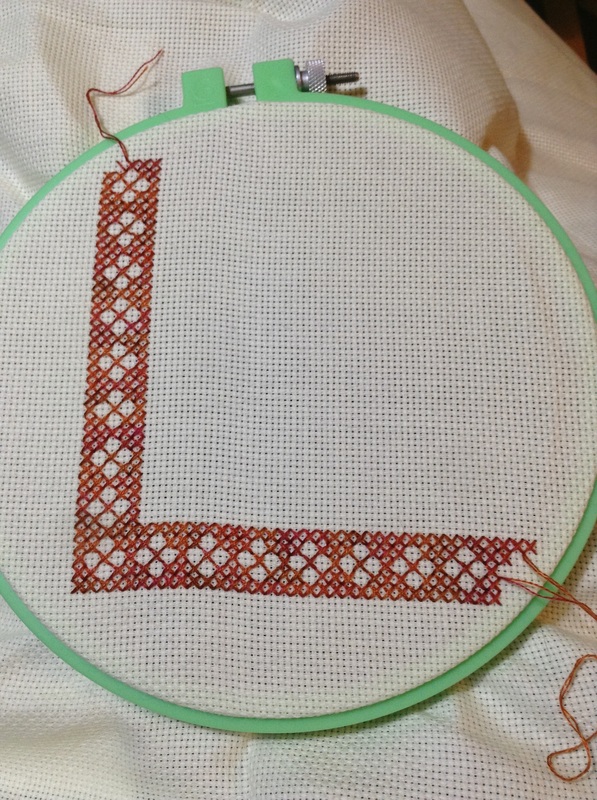
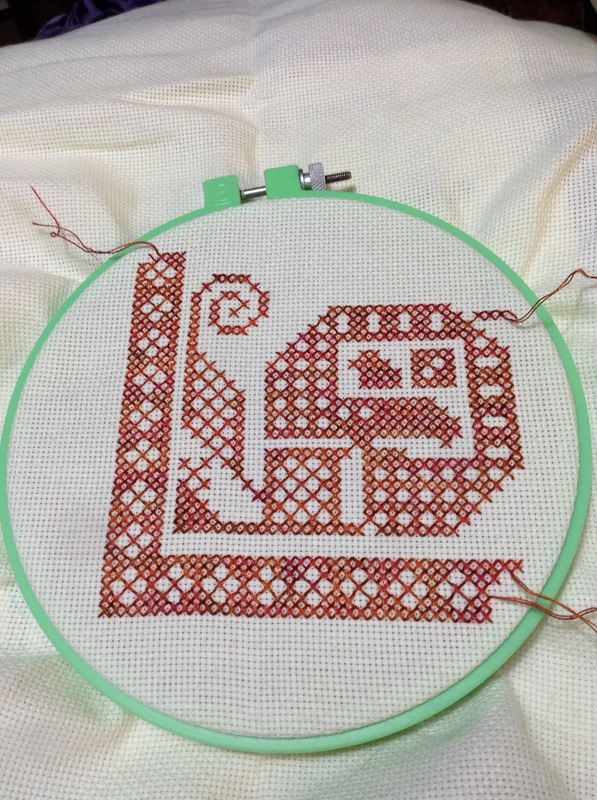
Some of you enjoy following me on a work in progress. Here is one I started, but need to set it aside as I have cards and such to stitch. Here are the first three sections completed. I am using a varigated floss. It is flowing quite quickly and I am thoroughly enjoying it. Hate to put it aside to do the smaller projects.
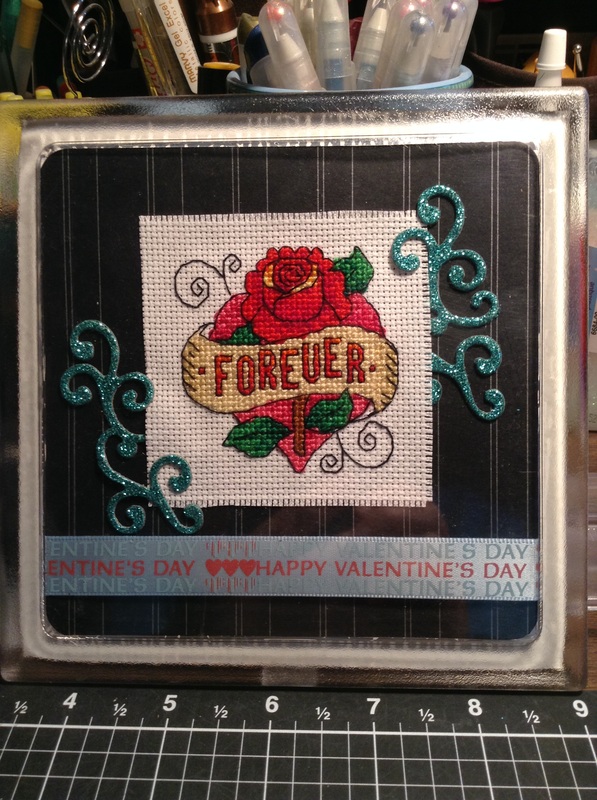
Stitched for my husband for Valentine's Day. Put in a trivet so he can enjoy it each day.
I met up with one of our stitchers a couple of weeks ago and she showed me her projects that she's been working on since we last met up -- a nice afghan and doll clothes that she has knitted, crocheted and sewed. Nice job Heidi!
Till next time, Happy Stitching!
Till next time, Happy Stitching!
November 11, 2015
Happy Veteran's Day! We give Thanks to all the dedicated Service Men and Women (and Military Dogs) who protect our country.
A few completed items were shown off at last night's Stitchery Club meeting:
A few completed items were shown off at last night's Stitchery Club meeting:
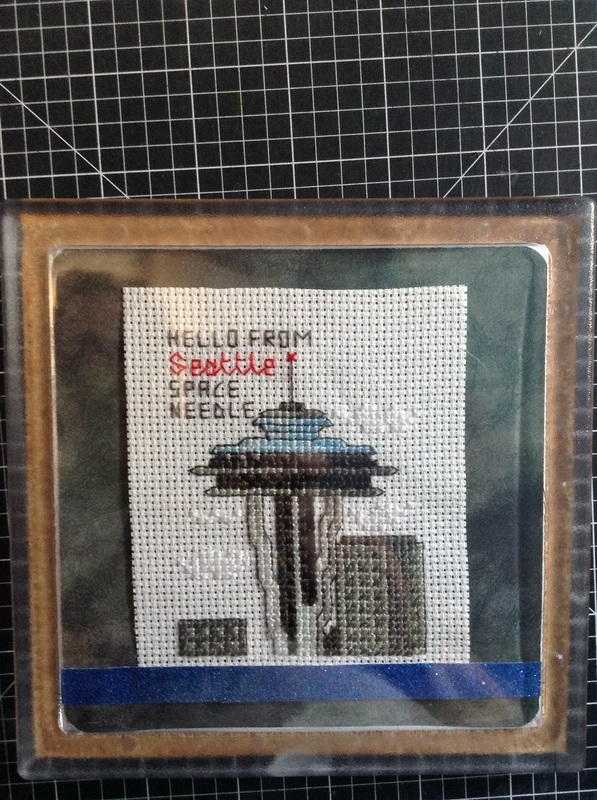
This counted cross stitch Space Needle was completed by Carol. She did several quick-stitch items over the past couple of weeks. This design is small enough to fit into a card, but she decided to make it into a 5 X 5-inch trivet (hot plate).
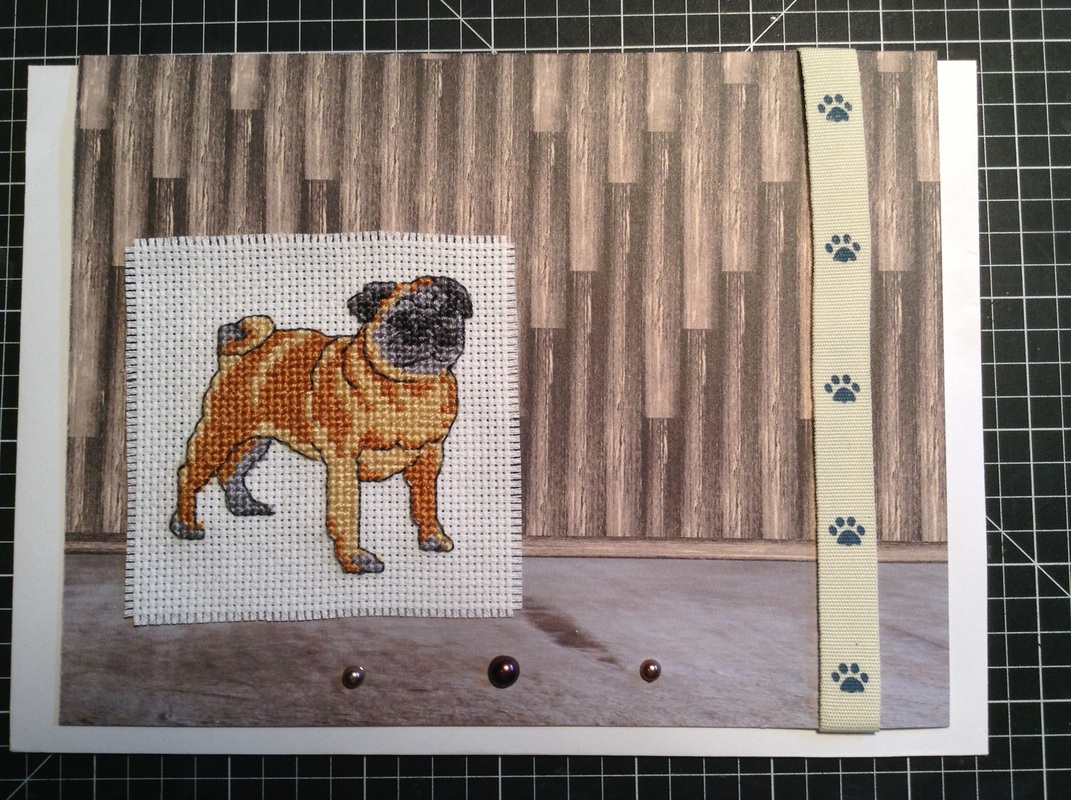
This adorable Pug makes a great greeting card!
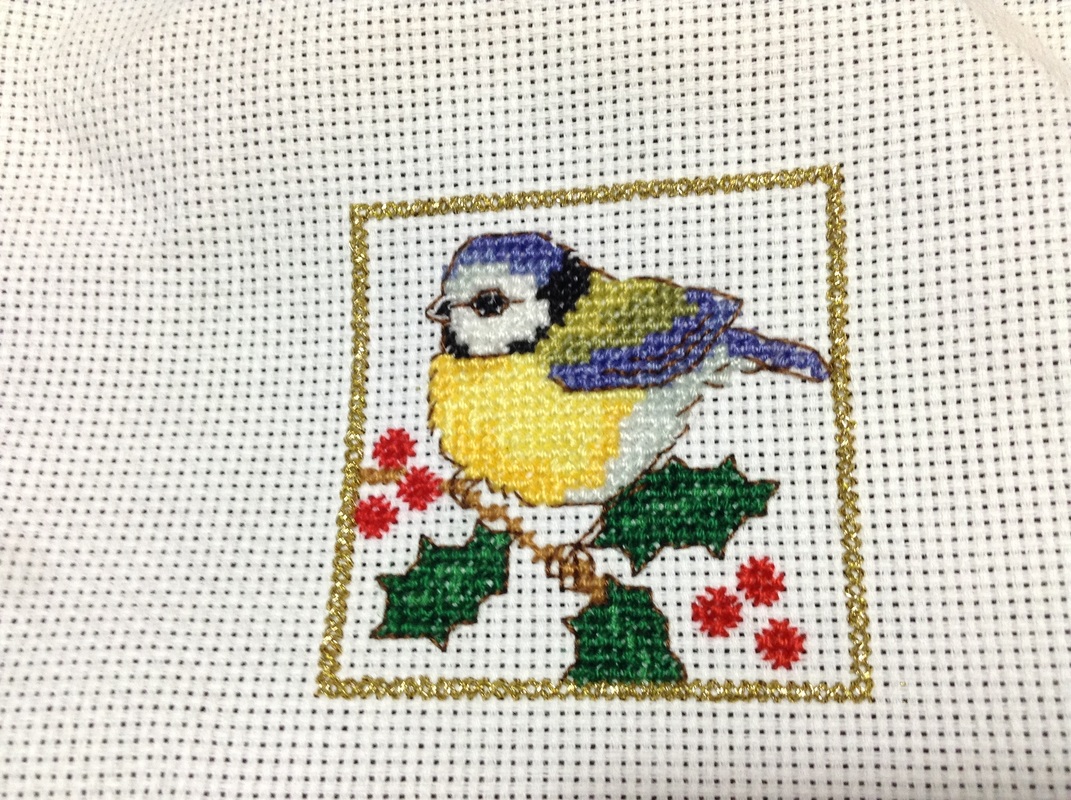
Lastly, this little BlueBird is now complete and waiting to be turned into a jar topper.
November 2, 2015
Can't believe the year is almost over. So many things going on, time just flies. And I remember as a kid when time dragged on for so long....wish those days were back.
But our Stitchers have been busy.....
But our Stitchers have been busy.....
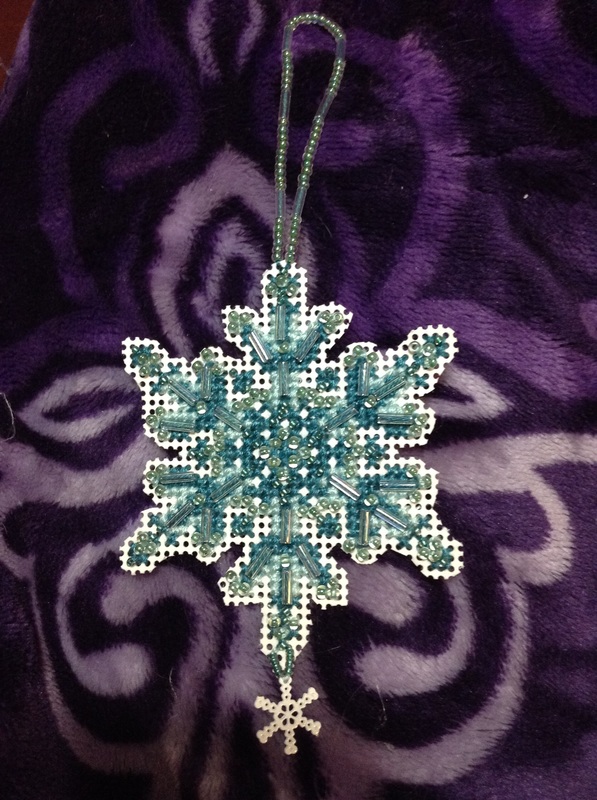
Carol E started this snowflake a year ago. This is the first time she has stitched on paper. She brought it out again a week ago in order to complete it -- which did not take very long!
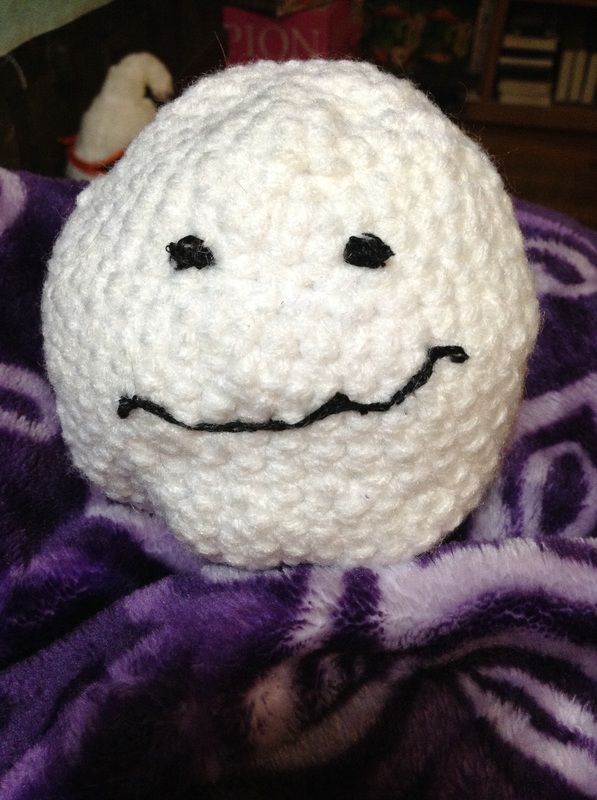
Of course, our creative Carol Ann comes out with the most adorable items!
Hello Mr. Ghost!
Hello Mr. Ghost!

Carol E is back to doing cross stitch greeting cards. After a rough start, the Pug is completed. Now to make him into a greeting card.
For Adding Letters to Cross Stitch
from Cross Stitch Crazy, October 2015, Issue 207
- Find the middle of both your fabric and the lettering you want to add to make sure it's centered. There's nothing worse than running out of space for the last letter!
- Keep the spacing even between letters when working on a word or name -- work it out on graph paper first if using individual letters.
- Stitch each letter separately. Don't run thread from one letter to the next, as it'll show through and spoil your finished work.
- On narrow numbers and letters, it's important to fasten threads inside the character, weaving ends in carefully at the back.
- Add motifs or details around the initial letter to make it more interesting.
- Search online and you'll find a variety of free alphabets you can use to personalize your stitching.
from Cross Stitch Crazy, October 2015, Issue 207
October 19, 2015
We are celebrating 9 years of stitching! Wow! Great job everyone with all the gorgeous projects you've done over the years!
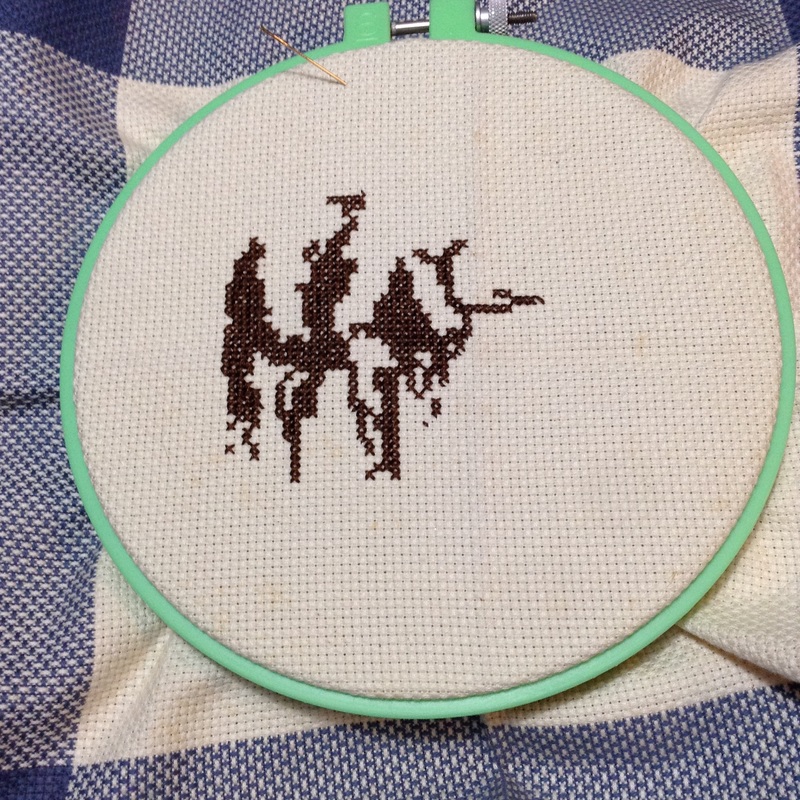
Here is the latest project by Carol E. She is showing it in stages as she posted it on Facebook.
Here is the latest project by Carol E. She is showing it in stages as she posted it on Facebook.
We have updated the Club Meeting Schedule for the remainder of 2015. See you at the meetings!
September 26, 2015
It has been a busy second half of the summer with the stitching.
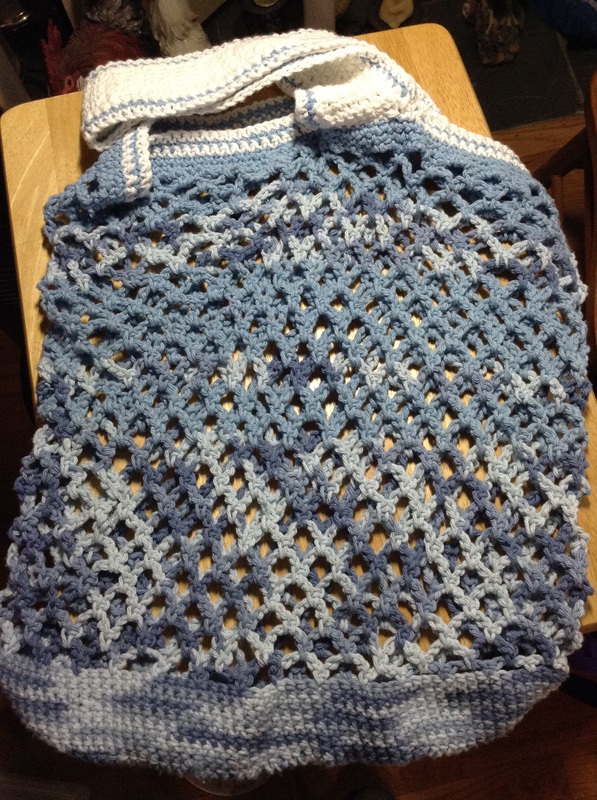
Member Carole Ann crocheted this bag. She will line/felt the inside and use it as her Farmers Market bag. Love the colors!
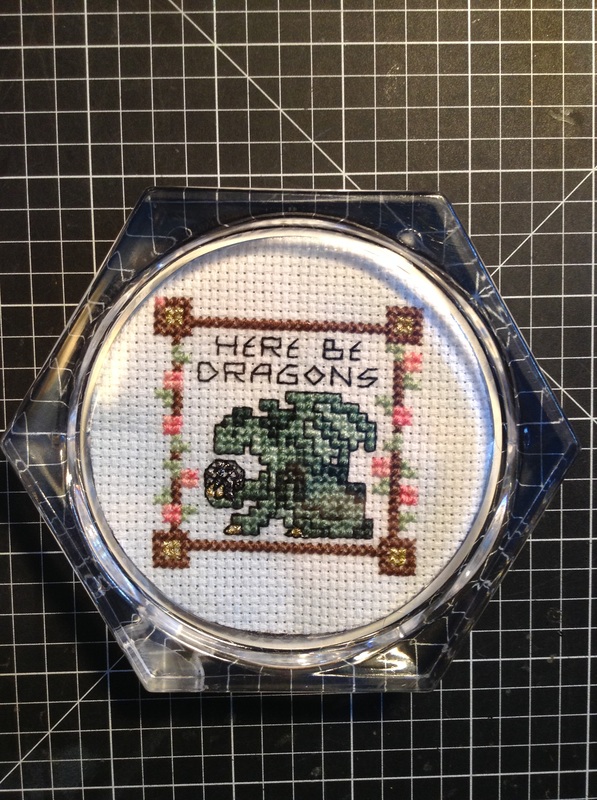
I stitched this Dragon last year. He is now mounted in an acrylic coaster.
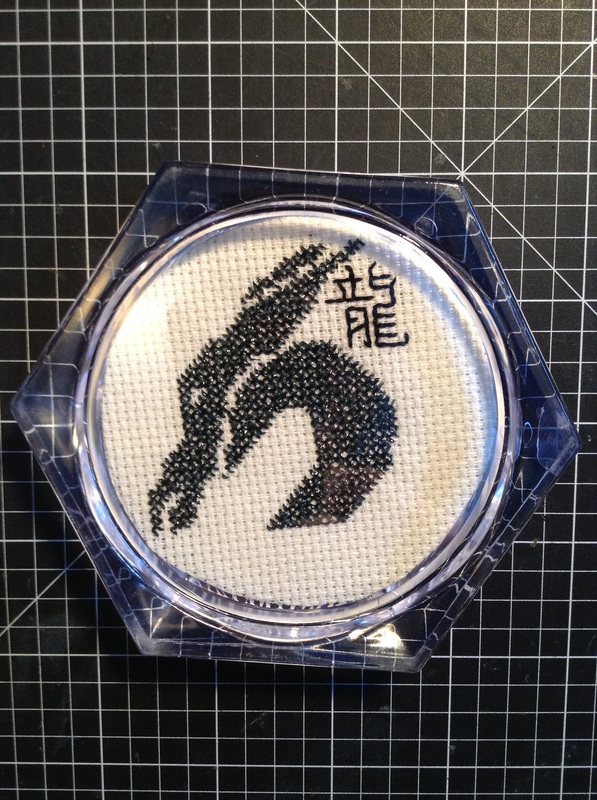
The other Dragon in an acrylic coaster.
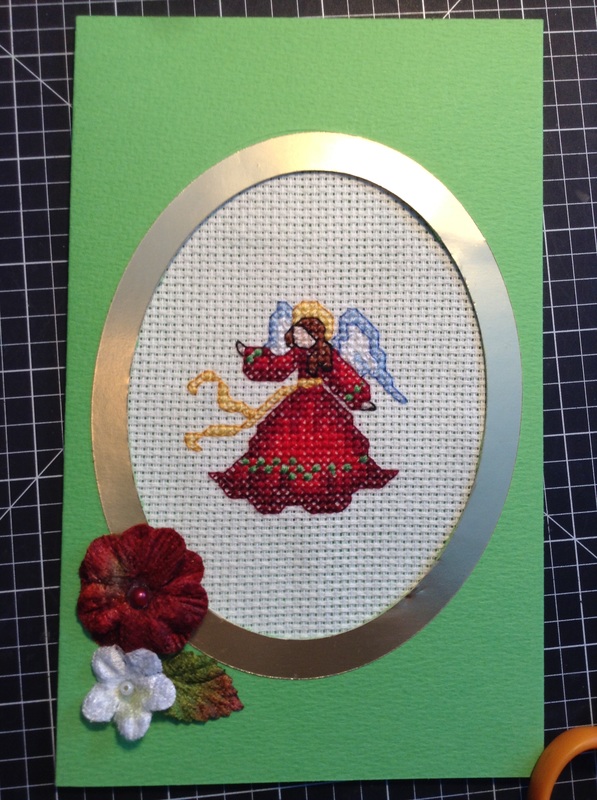
This Angel has been completed for a couple of years. Finally got her mounted in a greeting card.
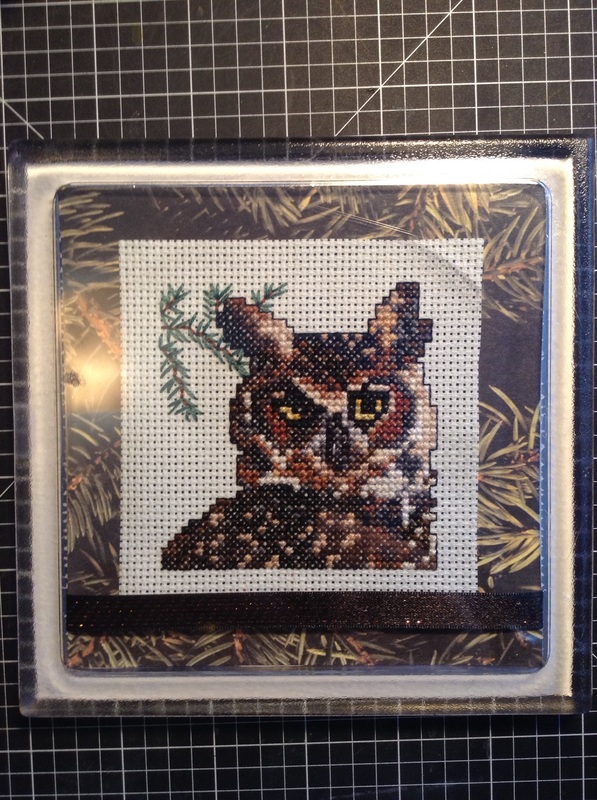
Owl in an acrylic trivet (hot plate) for my husband.
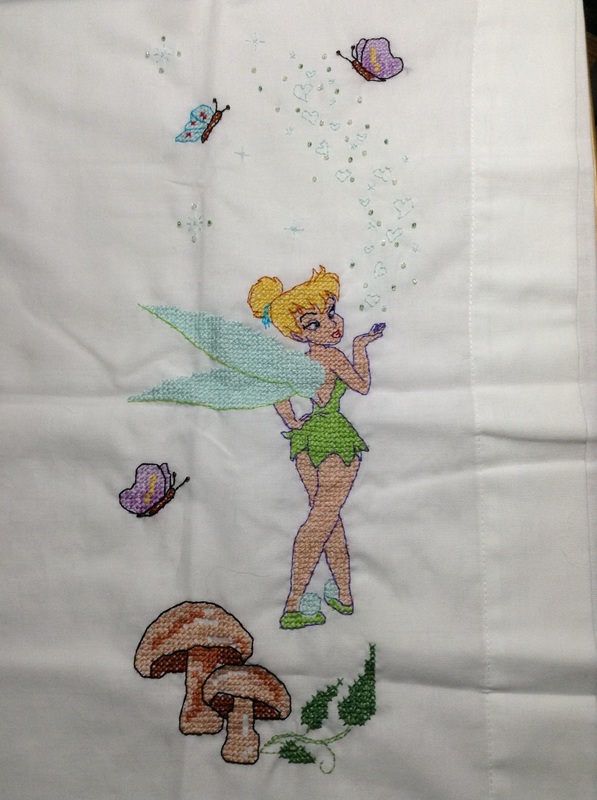
My niece loves Tinker Bell, so I cross stitched and beaded this pillowcase. I sent a photo to my sister who informed me my niece no longer is a Tink fan. *sigh* Guess I'll put it up for sale.
August 4, 2015
Gardens are doing well, berries are yummy and produce is on -- zucchini, bush beans and tomatoes. Love eating fresh produce!
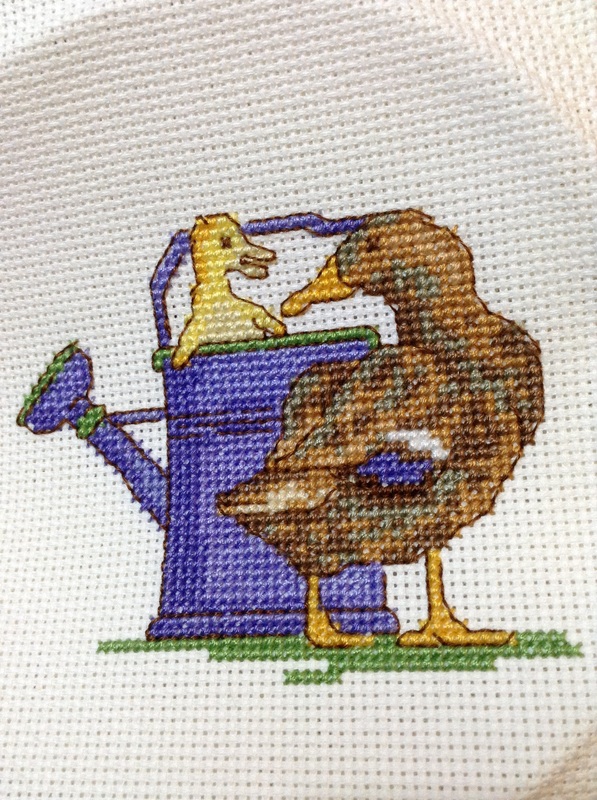
A friend wanted me to stitch 7 Chicken towels, one for each day of the week. She now has the first three shown below. She loves them! In the photos below, the first photo is the chicken(s) on the towel, the second photo is a close-up of the stitching.
A friend wanted me to stitch 7 Chicken towels, one for each day of the week. She now has the first three shown below. She loves them! In the photos below, the first photo is the chicken(s) on the towel, the second photo is a close-up of the stitching.

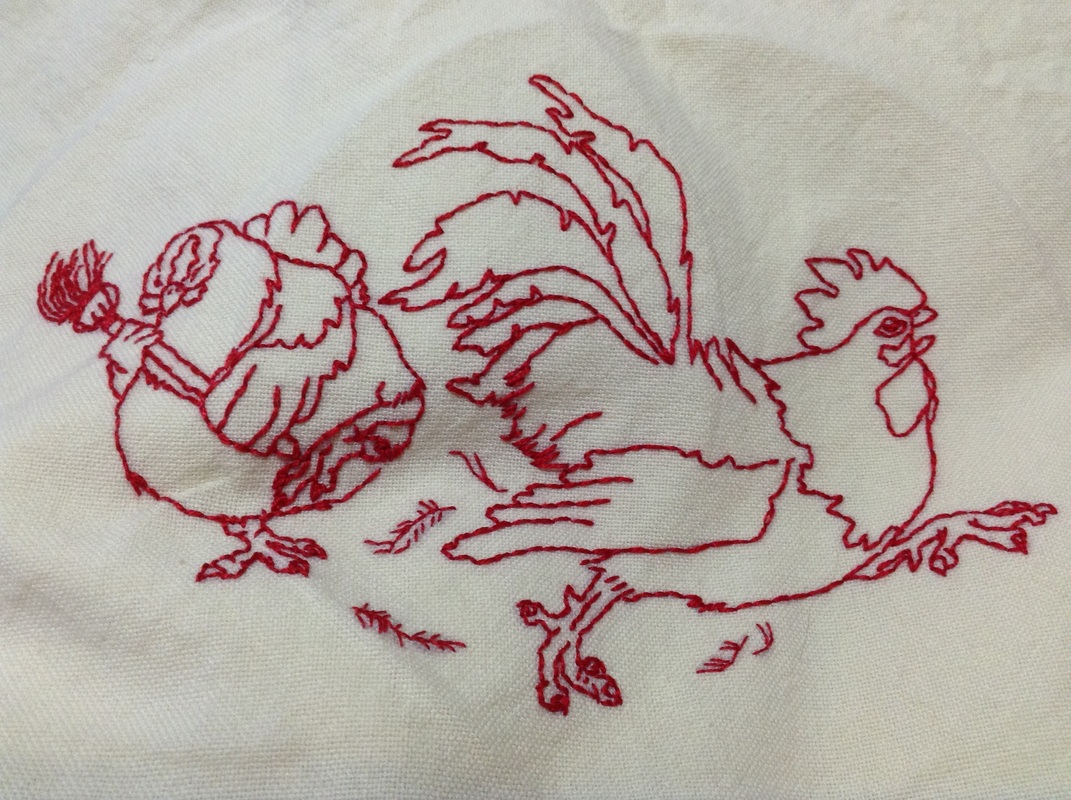
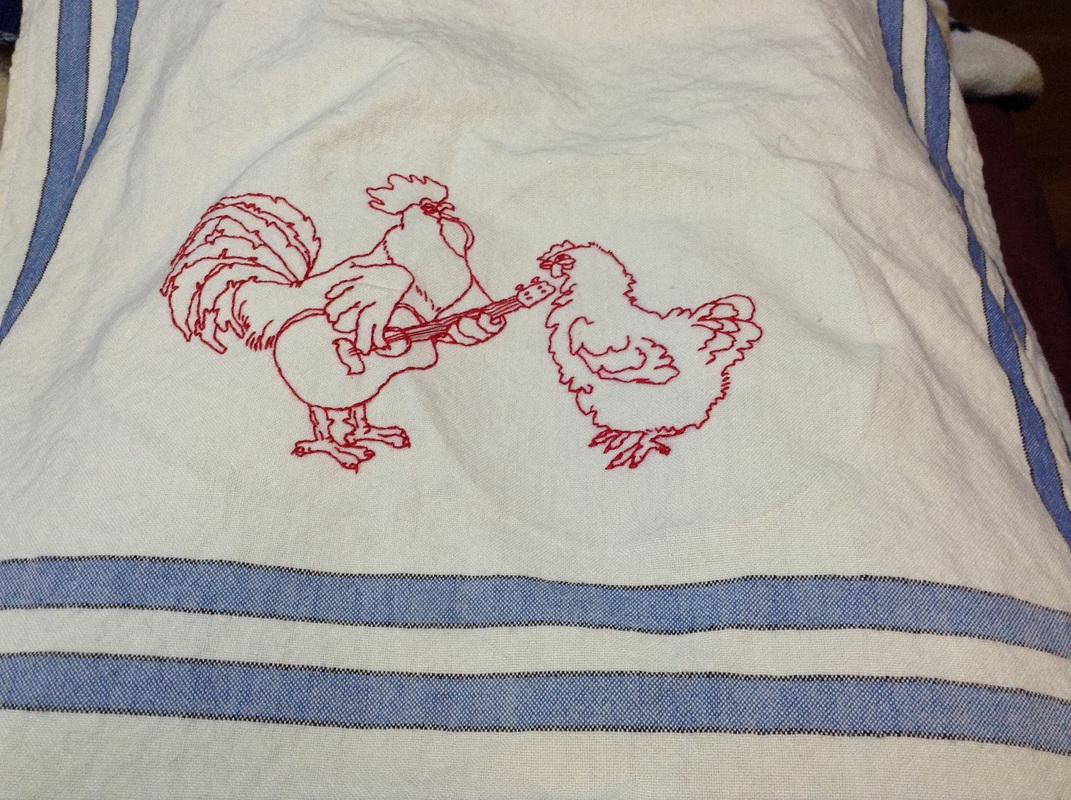
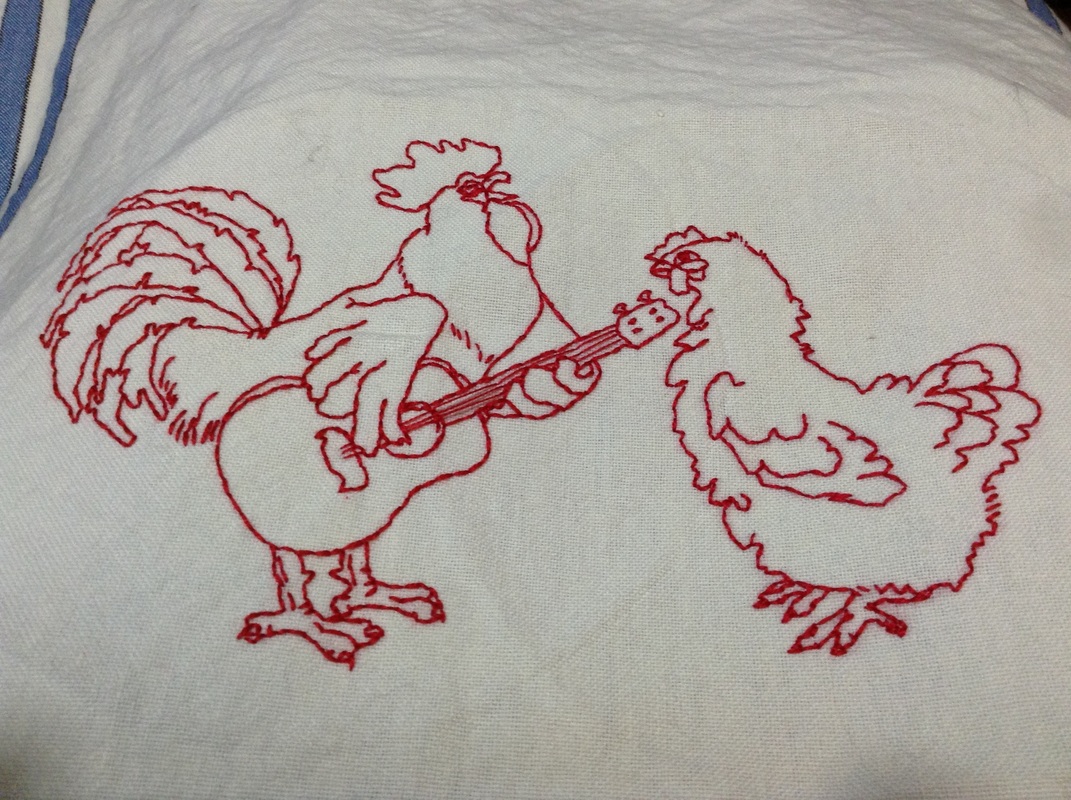

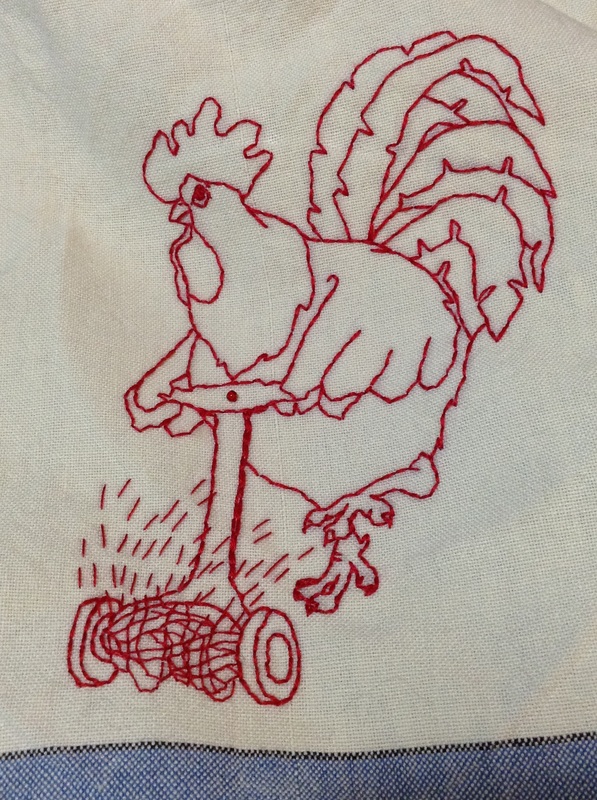
Aren't these just too cute?! Fortunately, they are easy and quick to stitch -- though I admit the lawn mower and grass clippings was a bit of a challenge.
I am taking a break from the chickens for a while and working on another project I started a while ago and want to work some more on it.
What have you been doing lately?
I am taking a break from the chickens for a while and working on another project I started a while ago and want to work some more on it.
What have you been doing lately?
June 24, 2015
Hi Everyone! It's been a busy summer so far. The gardens have been in full bloom for over a month. Even though the Irises are done for the season, when the weather cools down a bit, I need to divide them up as they are getting quite full. The vegetable garden is growing like mad -- tomatoes, bush beans, zuchinni, and not sure what else (a bit of a mystery garden this year as I neglected to label the seed pods correctly). Lots of flowers on the plants, but no produce yet. Right now, I am spending every other day in the gardens picking strawberries (that the birds and critters have left for us), blueberries and raspberries. Since we are having a bit of a drought on the West Coast, I am watering them as much as I can to keep them producing, and still conserving water.
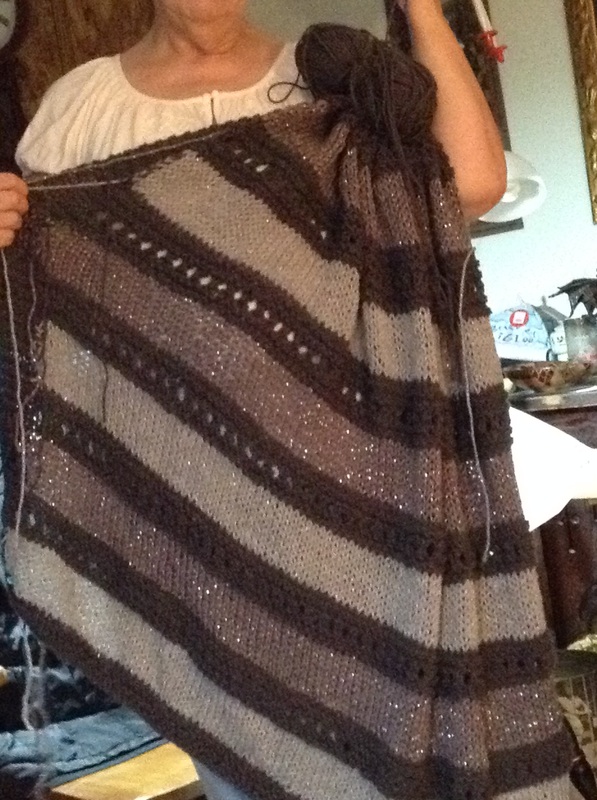
Of course, in the evenings, we are all stitching away on various projects. Stitchery Club was last night. Kimberly shows us the two afghans she knitted/crocheted for young nieces:
Of course, in the evenings, we are all stitching away on various projects. Stitchery Club was last night. Kimberly shows us the two afghans she knitted/crocheted for young nieces:

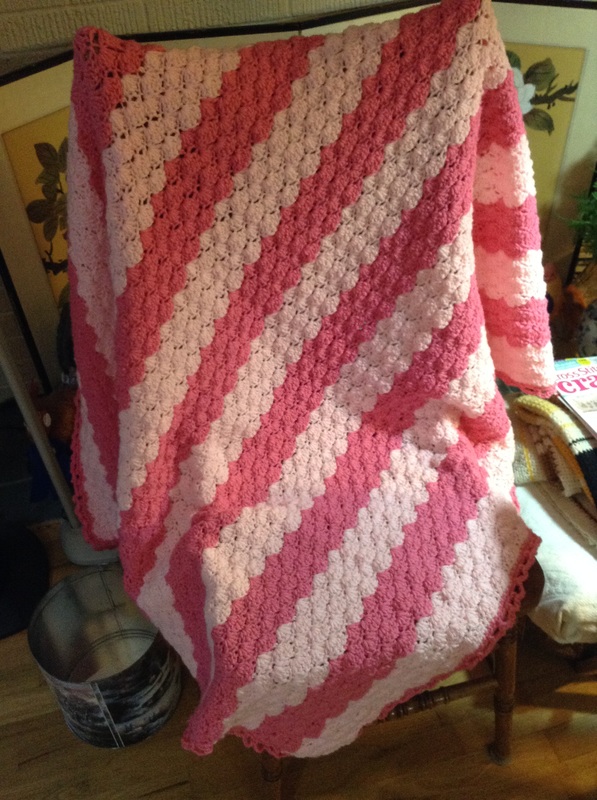
The purple afghan is both knit and crochet. Love the ruffle! The pink one is crochet. Both are just adorable! She is working on a third afghan for another family member -- then her boss wants her to crochet one for her for Christmas! I will post photos of both when they are completed.
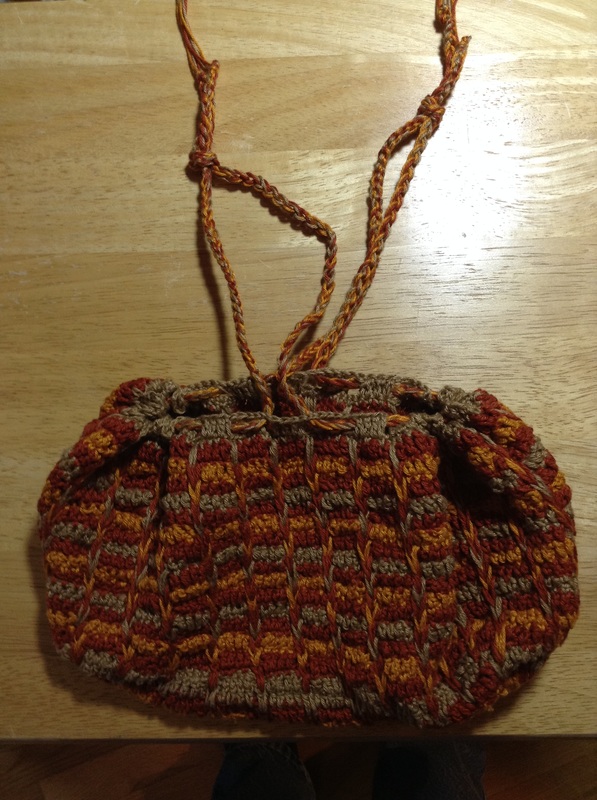
Carol Ann finally completed this cute little handbag! Love the colors!
For Stitching in Miniature.....
For Stitching in Miniature.....
- Miniature needlepoint is generally worked on anything from 18-count fabric and smaller -- try 28-count evenweave to start with.
- Always read the chart to make sure you use the correct size needle, threaded with the right number of strands.
- Make sure you have good light, plus a magnifier, and take regular breaks to help you avoid straining your eyes.
- Miniatures make ideal gifts as they're quick to stitch. Try making jewellery, scissor fobs and even doll's furniture.
- Make sure you have a larger border than normal around the edge of your stitching area so that you can use a frame or hoop.
- If you've cut your fabric too small to fit in a hoop, tack strips of fabric around the edge to make it larger, then unpick it once you've finished stitching.
- If you're having trouble seeing the holes, put a piece of paper or fabric in a contrasting colour behind.
May 20, 2015
With my birthday in 10 days, my husband and I took a one-day trip to Canada (border is less than 2 hours north of us, so easy trip). Bummer that it was only one day, but it was still enjoyable and relaxing. Now back to work....
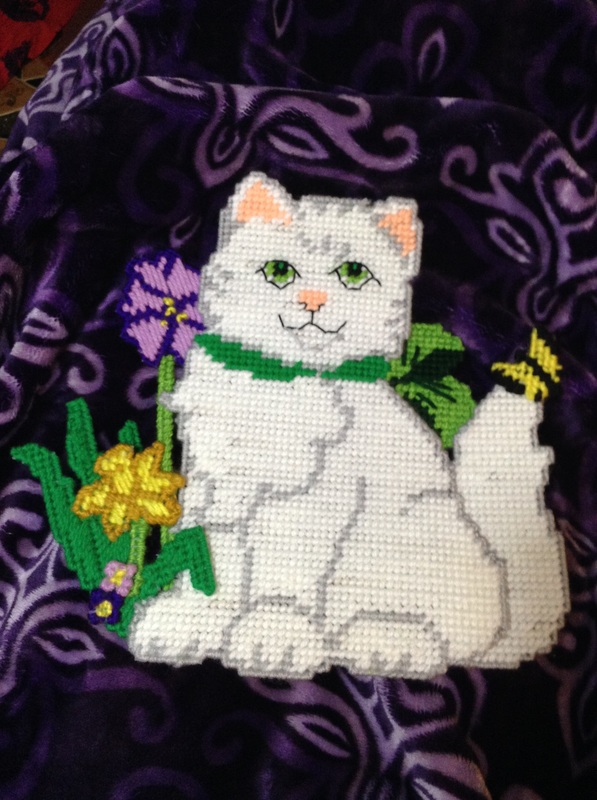
My husband stitched this pretty little kitty. This is a plastic canvas project. Just adorable!
Kimberly just completed this project for her mother's birthday. Excellent job!
With spring gardening in full swing, it has not interfered with my stitching as I garden in the early mornings and stitch in the evenings. Right now, I am working on a project that I started in 2007. Yes, it is almost done!
What have you stitched this spring?
With spring gardening in full swing, it has not interfered with my stitching as I garden in the early mornings and stitch in the evenings. Right now, I am working on a project that I started in 2007. Yes, it is almost done!
What have you stitched this spring?
May 4, 2015
Time to get caught up on photos on my iPod and camera....
Here are a couple of photos of a Hardanger project that member Wendy picked up at a second-hand store. She will complete the project. So pretty!
Here are a couple of photos of a Hardanger project that member Wendy picked up at a second-hand store. She will complete the project. So pretty!
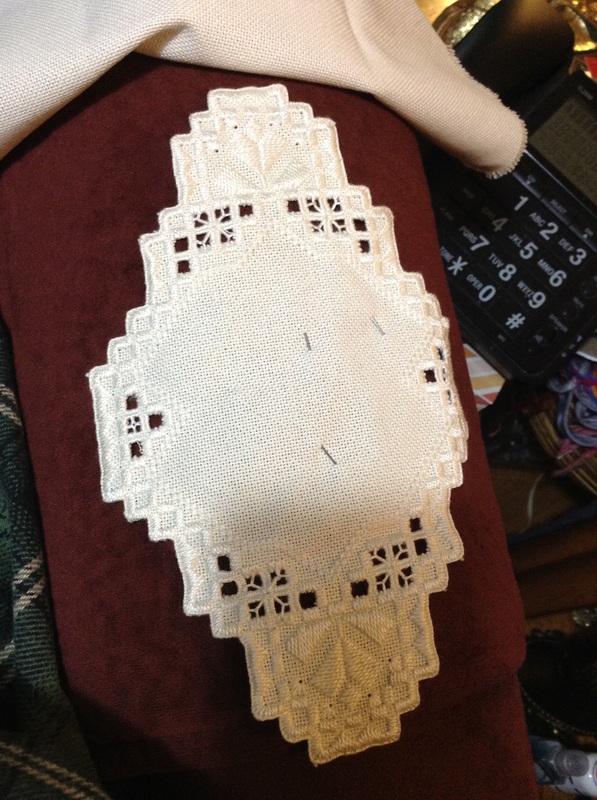
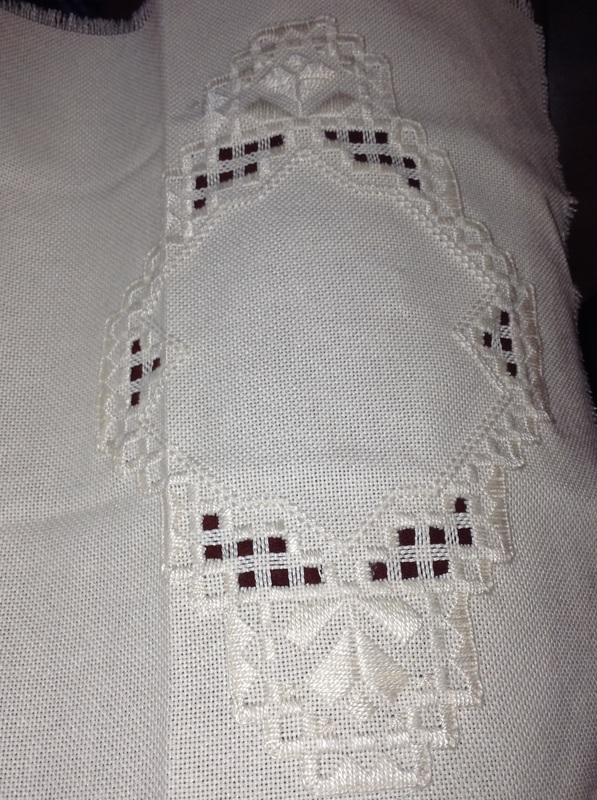
Detail of the incompleted Hardanger project.
On March 23, I completed a stamped cross stitch project for good friends of ours. I did not put it up on the website as I have not been able to give it to them until yesterday. It is a Piano Keyboard Dresser Scarf.
On March 23, I completed a stamped cross stitch project for good friends of ours. I did not put it up on the website as I have not been able to give it to them until yesterday. It is a Piano Keyboard Dresser Scarf.

The family is very musical. I bought this a year or so ago specifically for them. It took me a month to stitch.
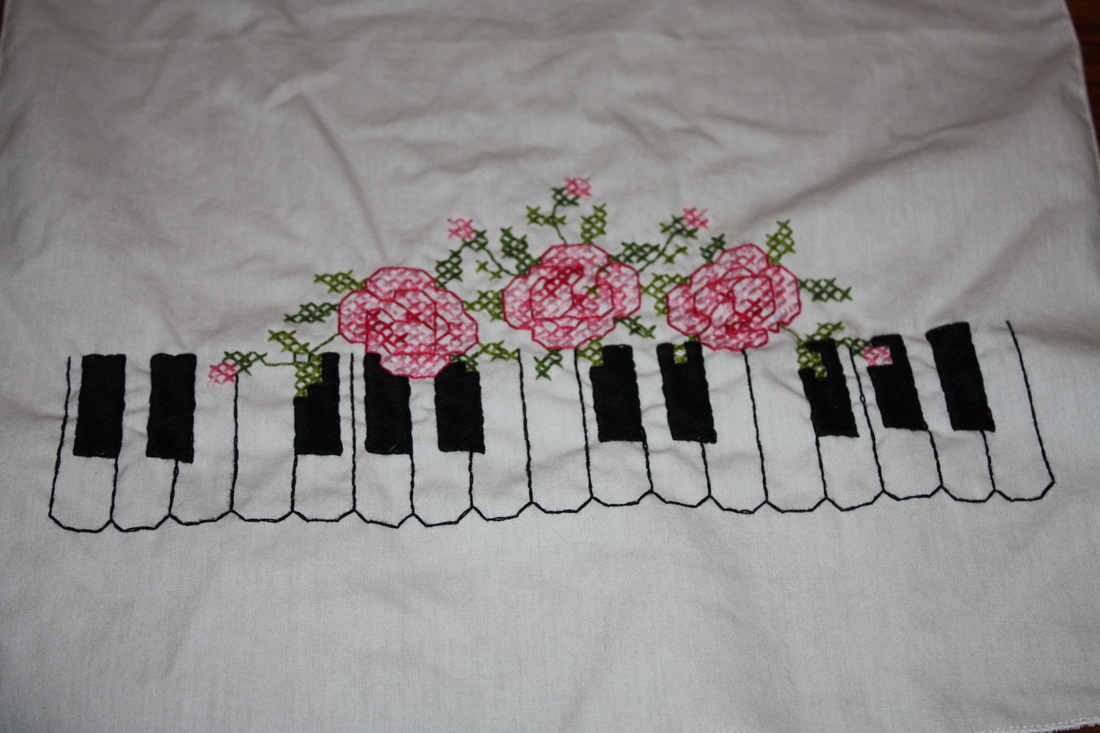
Close-up of one end of the Dresser Scarf.

Close-up of stitching.
While I was waiting to give the Dresser Scarf to our friends, I stitched a couple of smaller projects....
While I was waiting to give the Dresser Scarf to our friends, I stitched a couple of smaller projects....
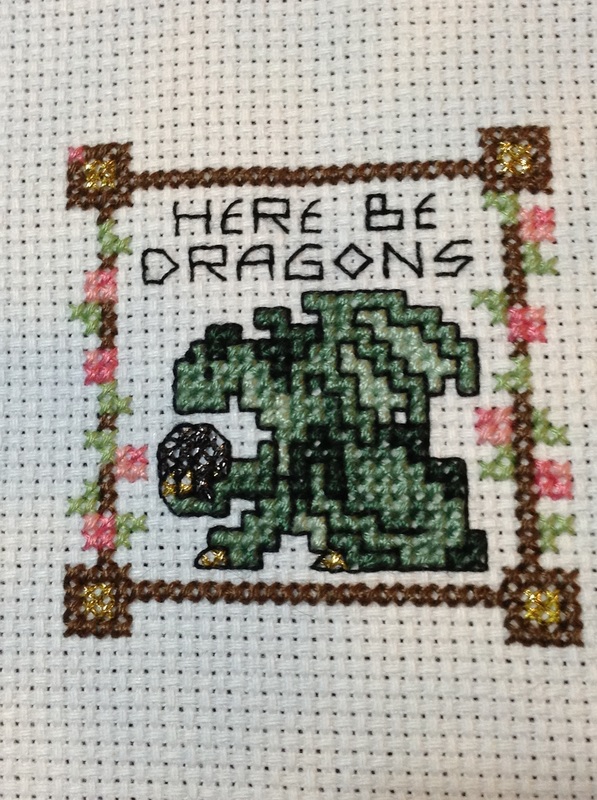
This 3 X 3 inch Dragon will be turned into a greeting card. Yes, that is metallic Gold (four corners) and metallic Dark Grey (ball).
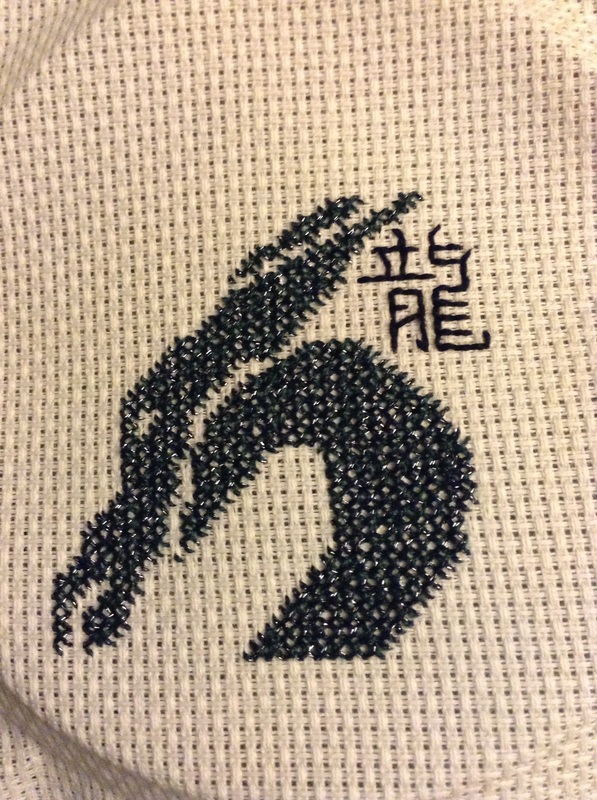
Another 3 X 3 inch Dragon greeting card. The shiny in the stitching is dark grey metallic thread with the cotton thread. The Chinese sentiment translates "Small but Mighty."
I did two other 5 X 5 designs, but I cannot put them on the site until late August as they are for family members' birthdays (who are also on Facebook).
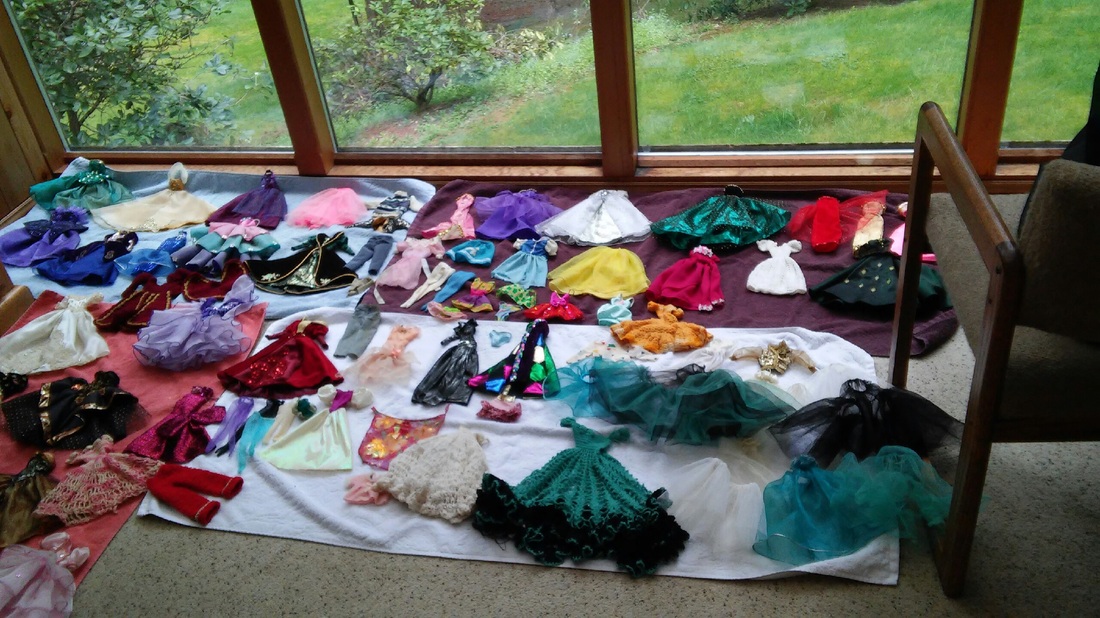
And now for a final Barbies update....
I did two other 5 X 5 designs, but I cannot put them on the site until late August as they are for family members' birthdays (who are also on Facebook).
And now for a final Barbies update....
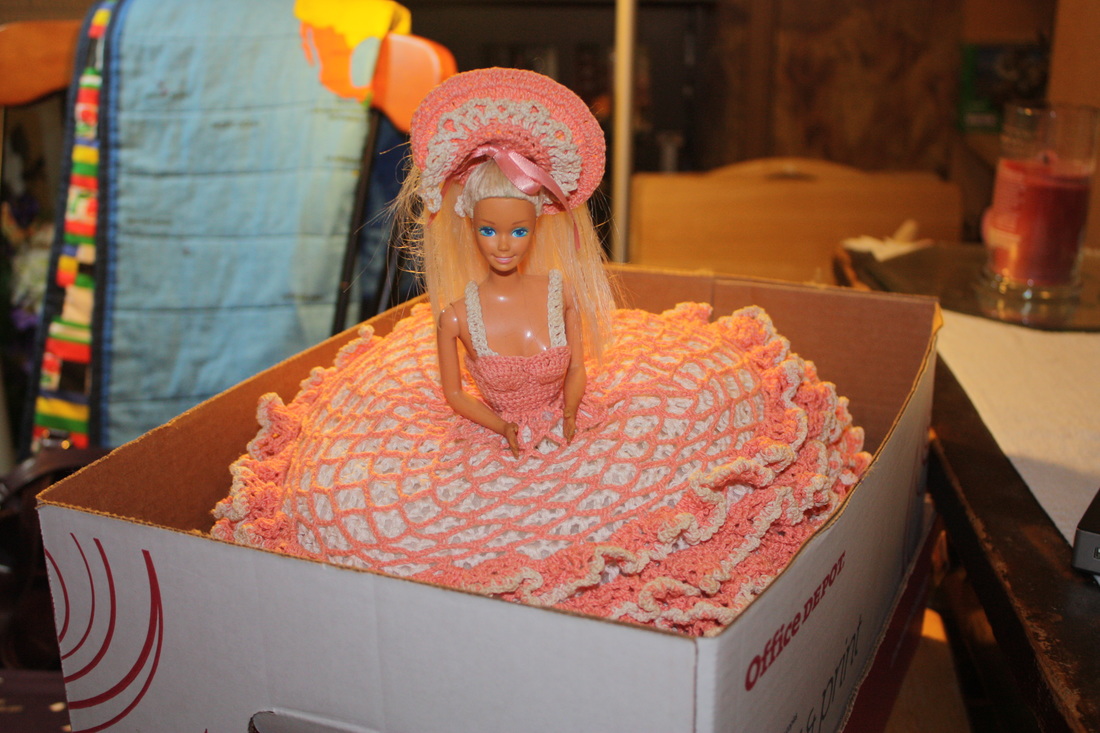
The "bed" Barbie cleaned up so well!
Kimberly and I were looking at all the Barbies she had cleaned up to that point. The dresses are gorgeous! The Barbies' hair are all soft and styled. (My husband's cat Raven was helping us.) You did a great job, Kimberly!
Thank you Vickie for the wonderful donation! Enjoy your retirement!
A couple days later, member Carole M picked these Barbies up to take back to Spokane with her. She has additional Barbie clothes, will add a set or two with each Barbie, do any necessary mending, and then provide them to her local area Children's Hospital and Women's Shelter. Kimberly still has more to clean, and then she will distribute them to local charities. What a neat gift these girls will receive!
April 14, 2015
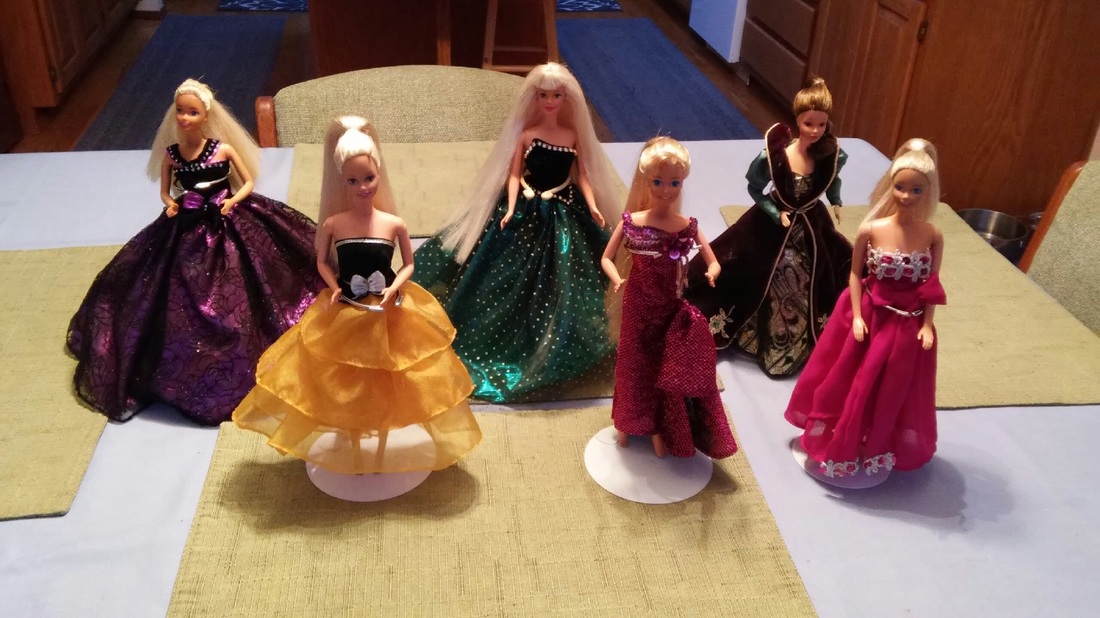
Another look at the Barbies that Kimberly has been working on since I uploaded the last batch of photos.....
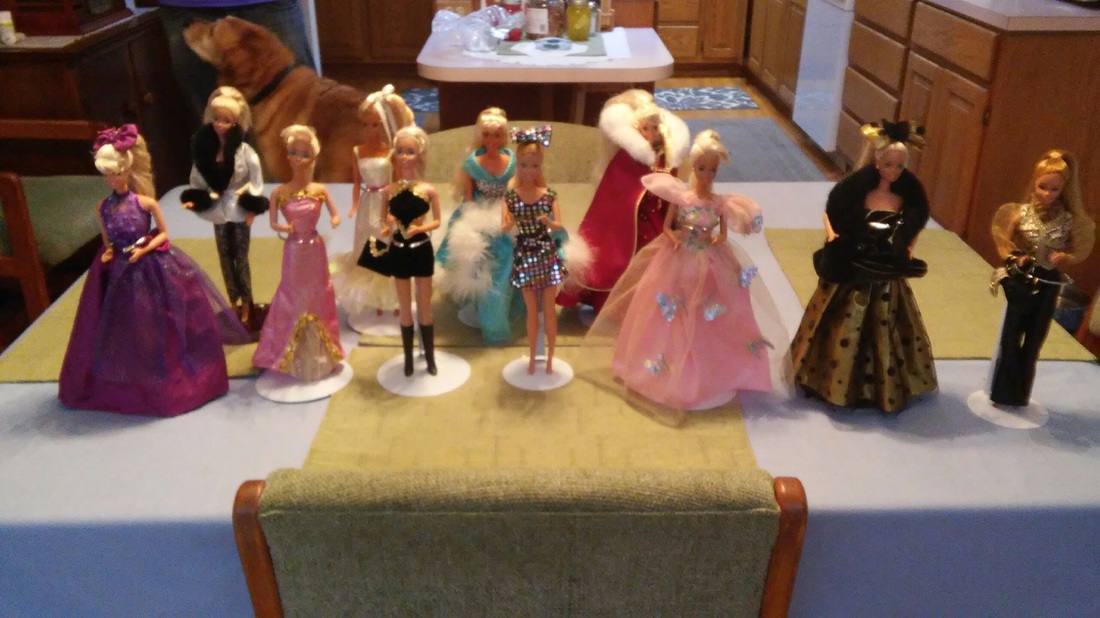
Wow! Look at those outfits!
Remember, Stitchery Club meets tonight. See you there!
Remember, Stitchery Club meets tonight. See you there!
April 8, 2015
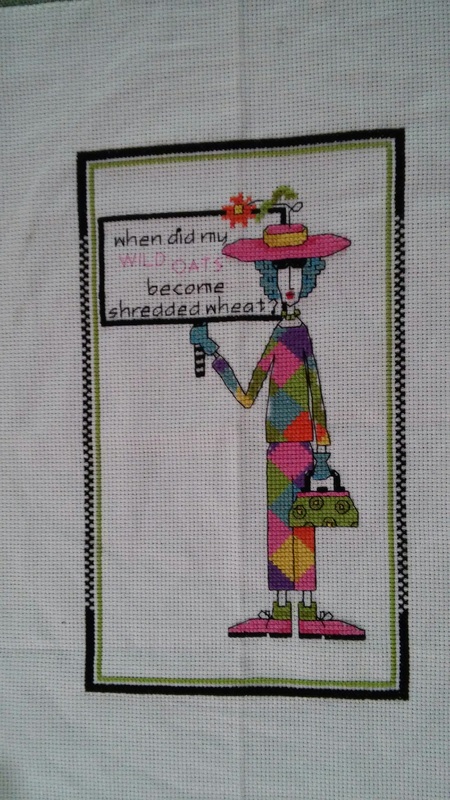
Have you ever had a project that just didn't turn out? After a life-time of stitching, I had my first "what the heck is that?! That's not a kitty. I don't know WHAT it looks like." I was trying to do a little kitten for a birthday card for a friend. The body looked great, but the face is....well, I'm not sure what it is. So I set it aside (so hard to just toss it), and I started on a new greeting card design:
SO much better! The design is not a kitty, but my friend will love it nonetheless. Now, on to making it into a greeting card.
April 6, 2015
Kimberly is doing a GREAT job in cleaning up the Barbie Dolls and their clothes! Here are a couple more photos of cleaned dolls:
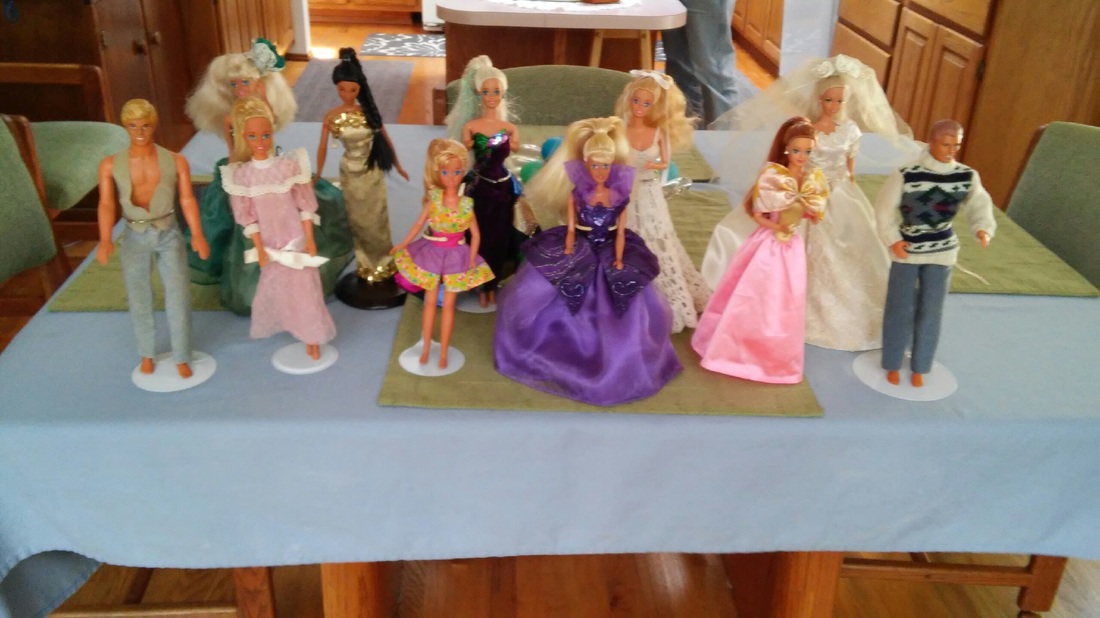
Hey, the Ken dolls are clean, too!
Once all the clothes and dolls are clean, then Kimberly will add cleaned accessories to the outfits that have some. Some clothes do need mending, which she is quite adept at doing.
A bunch of little girls are going to love these dolls!
Once all the clothes and dolls are clean, then Kimberly will add cleaned accessories to the outfits that have some. Some clothes do need mending, which she is quite adept at doing.
A bunch of little girls are going to love these dolls!
April 2, 2015
Remember those Barbies that were donated to us to clean up and donate to children?
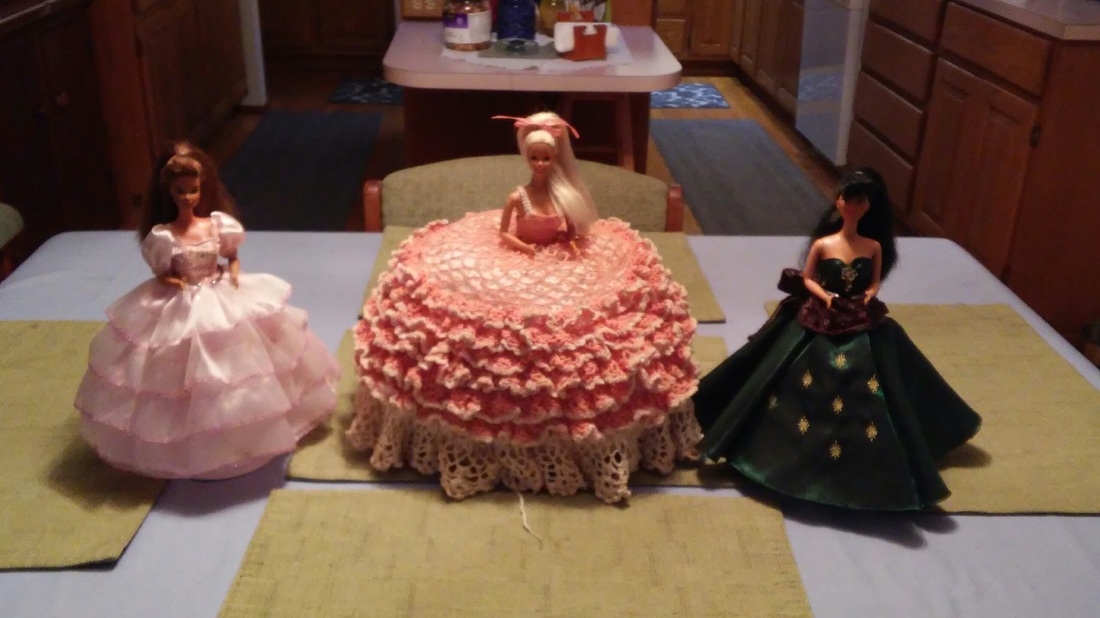
The first 3 Barbies, bathed, hair brushed, clothes cleaned, and put back together. Oh, so pretty!
Kimberly is having WAY too much fun! And she's doing a great job of cleaning up the Barbies and their clothes! I think she deserves some of my husband's homemade chocolates, a fresh loaf of banana bread or homemade cookies or something. I'll post more photos as Kimberly sends them to me.
Thank you so much Kimberly for a great job with these Barbies!
Thank you so much Kimberly for a great job with these Barbies!
March 30, 2015

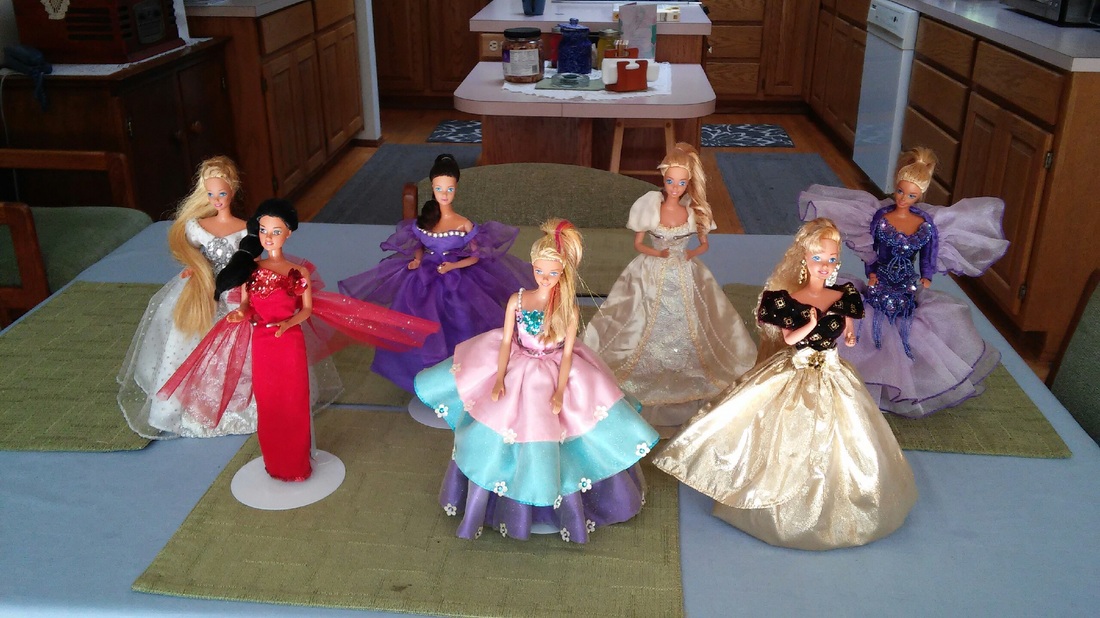
Wow! Kimberly is doing a great job cleaning the Barbie doll clothes! This is not all of them, but look at the varieties and colors -- store bought and handmade! These are now drying and airing out. Still more clothes to clean and then she will get started on the dolls.
I believe Kimberly counted 67 Barbies. That's going to make a lot of little girls happy!
Did I forget to mention there were 2 Ken dolls included in the stash?
I believe Kimberly counted 67 Barbies. That's going to make a lot of little girls happy!
Did I forget to mention there were 2 Ken dolls included in the stash?
March 25, 2015
Stitchery Club met last night and it was a full house. Wendy brought her detailed Wolf counted cross stitch project that she has been working on since late last year. It is coming along very nicely. Kimberly is working on a counted cross stitch gift for a family member. Carol Ann worked on this hand sewing project:
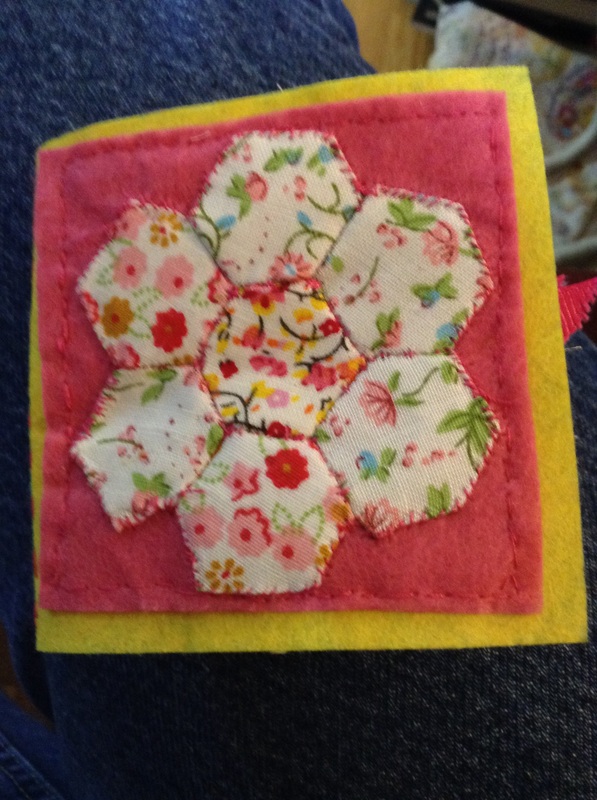
This is a Needle Case she was completing. She is a member of other Needlearts clubs, including the Guild of Washington State. They teach all kinds of needlearts techniques, you buy the kit and complete the project. She was completing this last night at our club meeting. She was also working on a crochet turtle she's been working on for awhile. It is very cute.
Keith was finally able to get back to his White Kitty plastic canvas project he started back in January before he caught the flu and resulting pneumonia. It is coming along quite nicely.
I completed my stamped cross stitch project on Sunday, but I will not show a photo until the recipient has received it. Now what to start? I think two greeting card designs as there are birthdays for special people coming up.
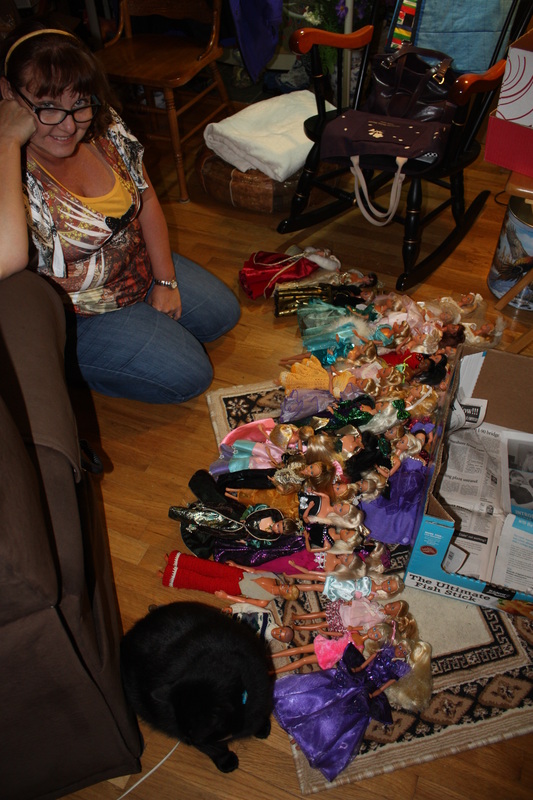
Our society is a mobile one -- meaning many people move their households several times throughout their life. Carole M moved to Eastern Washington last fall (warmer weather for her). Now Victoria is moving to Nevada. After she sold her house, she contacted me and asked if we'd be interested in her Barbie Doll collection. Carole M has been making Barbie doll clothes, boxing them up and donating them to Children's Hospital, Women's Shelter's, etc., for quite a while now. Victoria did not want to donate the dolls to Goodwill or other such charity -- she wanted them to be cleaned up and donated to underprivileged children. My husband and I picked up the Barbies yesterday afternoon:
Keith was finally able to get back to his White Kitty plastic canvas project he started back in January before he caught the flu and resulting pneumonia. It is coming along quite nicely.
I completed my stamped cross stitch project on Sunday, but I will not show a photo until the recipient has received it. Now what to start? I think two greeting card designs as there are birthdays for special people coming up.
Our society is a mobile one -- meaning many people move their households several times throughout their life. Carole M moved to Eastern Washington last fall (warmer weather for her). Now Victoria is moving to Nevada. After she sold her house, she contacted me and asked if we'd be interested in her Barbie Doll collection. Carole M has been making Barbie doll clothes, boxing them up and donating them to Children's Hospital, Women's Shelter's, etc., for quite a while now. Victoria did not want to donate the dolls to Goodwill or other such charity -- she wanted them to be cleaned up and donated to underprivileged children. My husband and I picked up the Barbies yesterday afternoon:
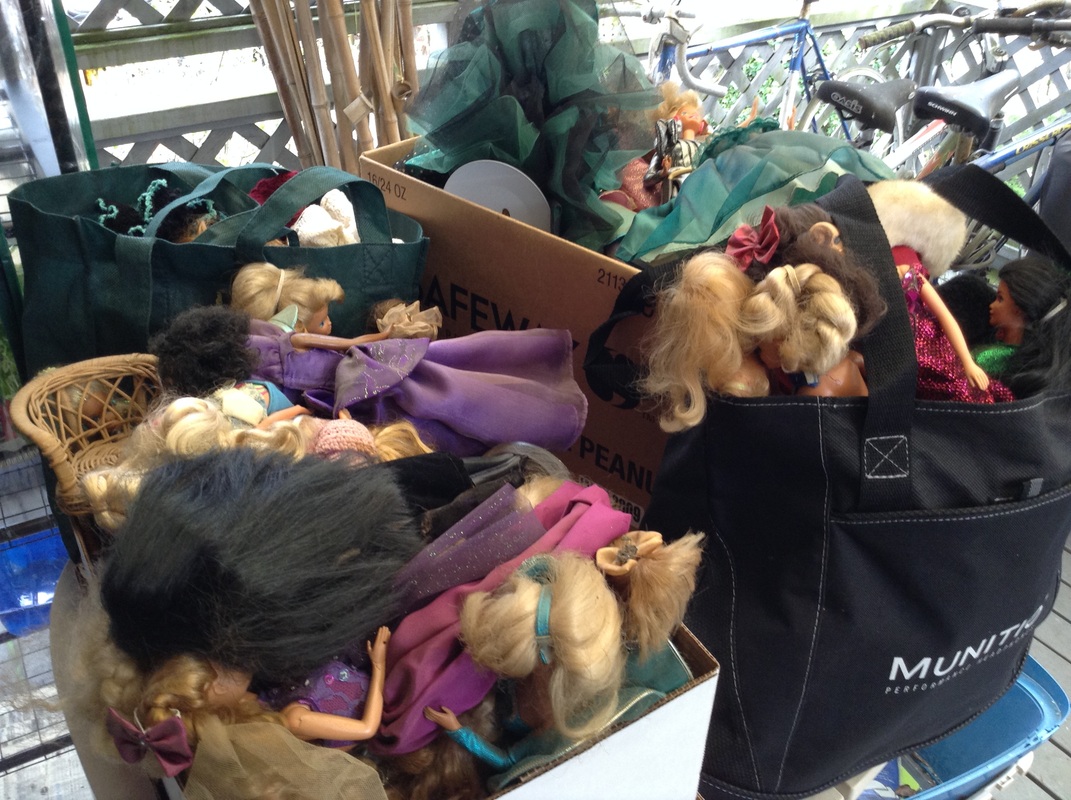
The boxes are larger in size, normal size reusable totes, so there are a LOT of Barbie dolls here! Kimberly volunteered to take all the dolls home to clean them and attempt to clean the clothes (she was the only one who knew how to do this). Once cleaned, she will divide the dolls up evenly. She will donate half to underprivileged children programs here in Western Washington. The other half I will take to Carole M when I see her in April and she will donate them (with a new set or two of clothes) to Eastern Washington's underprivileged children programs. Such wonderful efforts by these two! Thank you to all involved! A lot of little girls are going to enjoy these Barbies!
March 17, 2015
Happy St. Patrick's Day!
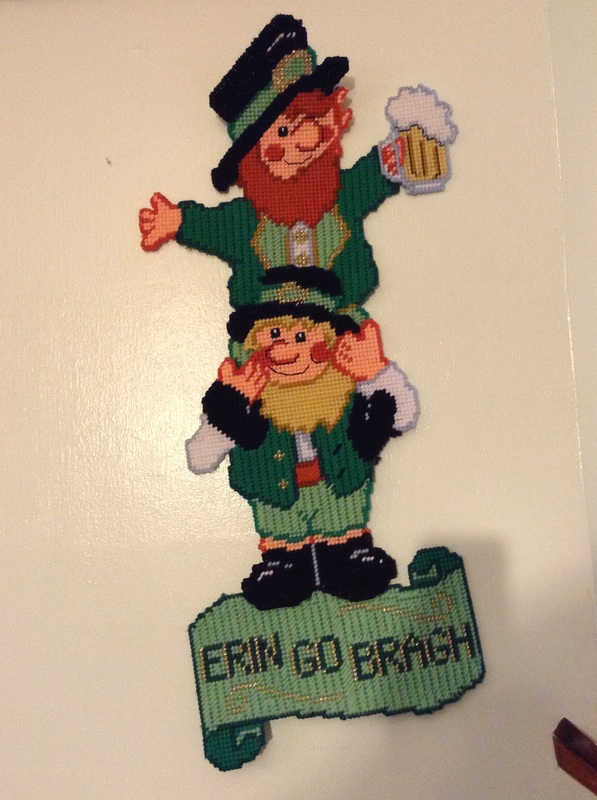
My husband did these two plastic canvas stitchery projects over the past couple of years. They are just adorable!
Be sure to Like us on our Facebook page! Enjoy your day!
Be sure to Like us on our Facebook page! Enjoy your day!
January 29
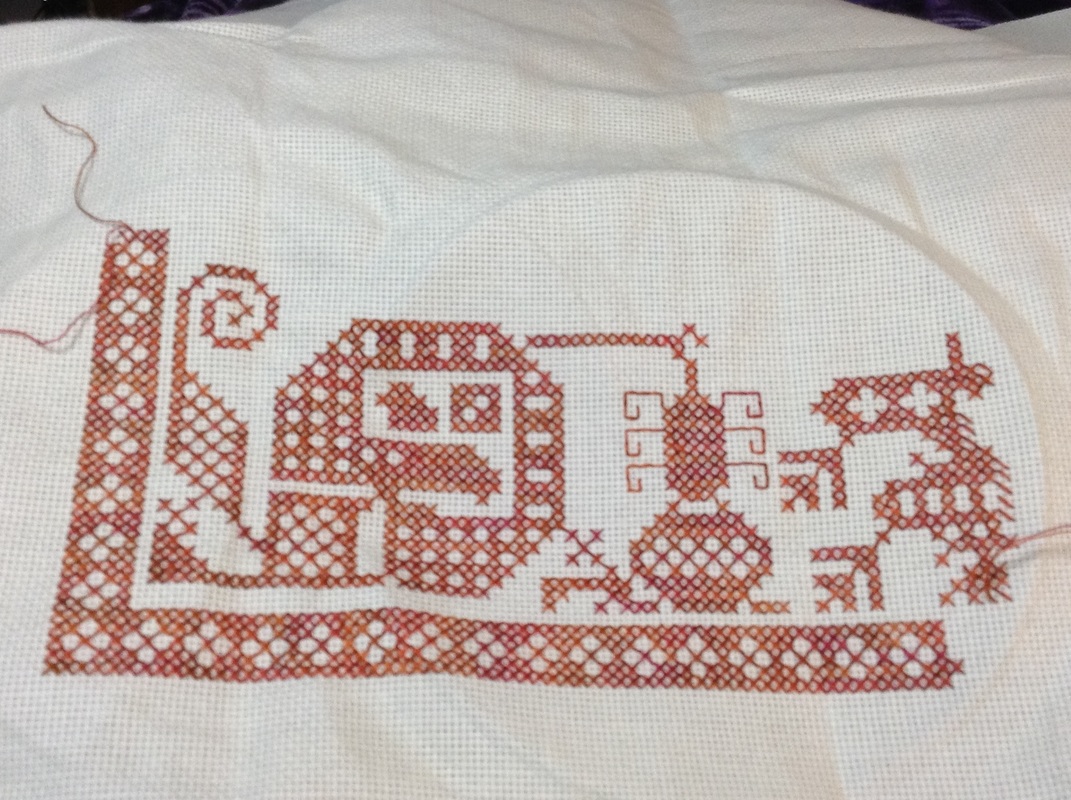
Have you done a project, or perhaps still have a project, that you started YEARS ago? Yep, thought so. We all do. And for a variety of reasons. Here is a project I started on December 30, 2004. Yes, that is correct - 10 years ago!
I first worked on this project for 5 days, a total of 8½ hours, before I set it aside. I just couldn't "get into it", if you know what I mean. I tried again on April 24, 2005; only worked on it for an hour. On August 23, 2011, I picked up the project again and succeeded working on it for 3 days and finally put it away again on August 31.
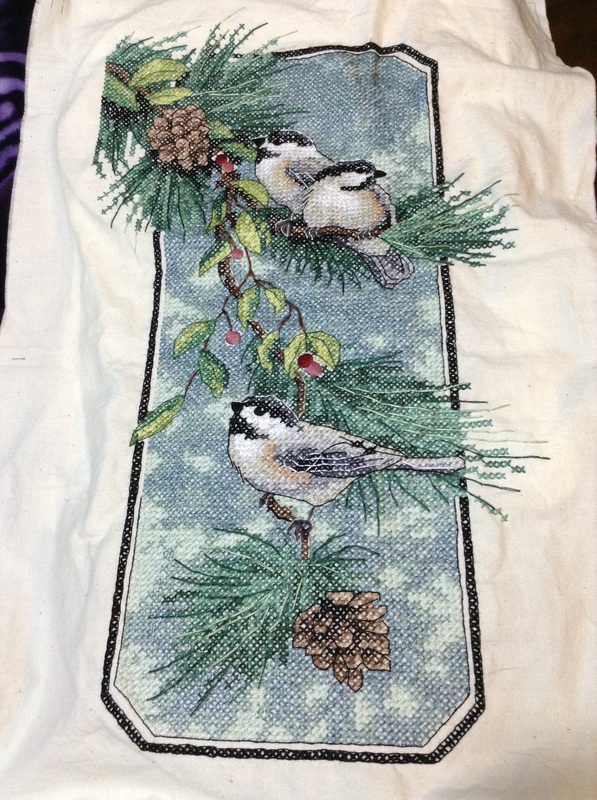
When I completed my last quilt and two red-checkered hand towels in December 2014, I found this project in one of my project bins. On December 21, 2014, I took it out determined to try once again. I only had the lower left one-eighth section previously completed. Lo' and behold -- I actually got into the project! I was starting to LOVE it! Now, a month later, it is done!! Total time it took to stitch was @ 77 hours, 35 minutes. Now, I will put it away until I complete the matching Chickadees design. I will then wash, iron and have them both framed. If I frame this one now, I may not be able to get a matching frame whenever I do the other.
I think the reason it took me so long to get into this project is the stitches are SO small. What's your excuse?
Now, what's my next project to stitch?
January 13, 2015
Northwest Stitchery Club 2015 Schedule
Since October 2006
January 13 and 27
February 10 and 24
Valentine's Day, Saturday 14th
February 26 - March 1 Sewing & Stitchery Expo; Puyallup, WA
https://www.sewexpo.com/
Advanced tickets $12; at the door $14
I’ll be going with my sister-in-law on Thursday, February 26. Hope to see you there!
March 10 and 24
April 14 and 28
Easter, Sunday 5th
May 12 and 26
Mother's Day, Sunday 10th
June 9 and 23
Father's Day, Sunday 21st
July 14 and 28
Independence Day, Saturday 4th
August 11 and 25
September 8 and 22
October 13 and 27
Halloween, Saturday 31st
November 10 and 24
Veteran's Day, Wednesday 11th
Thanksgiving, Thursday 26th
December 8 and 22
Christmas, Friday 25th
January 5, 2015
Happy New Year, everyone! Hope your year is off to a good start.
Here is a photo of my last holiday project -- a Teapot Table Topper for my college buddy (that's over 30 years of friendship!). She is a classy lady, so the teapots are a perfect fit for her. The table topper has a teapot in each corner, and then a center one:
Here is a photo of my last holiday project -- a Teapot Table Topper for my college buddy (that's over 30 years of friendship!). She is a classy lady, so the teapots are a perfect fit for her. The table topper has a teapot in each corner, and then a center one:
In order to keep my husband busy over the next 1 - 2 years, I just ordered a couple hundred dollars worth of projects for him (at least I hope this will be enough projects to keep him busy that long!). Remember, he does plastic canvas needlepoint in honor of his mother -- and now, for his medical health.
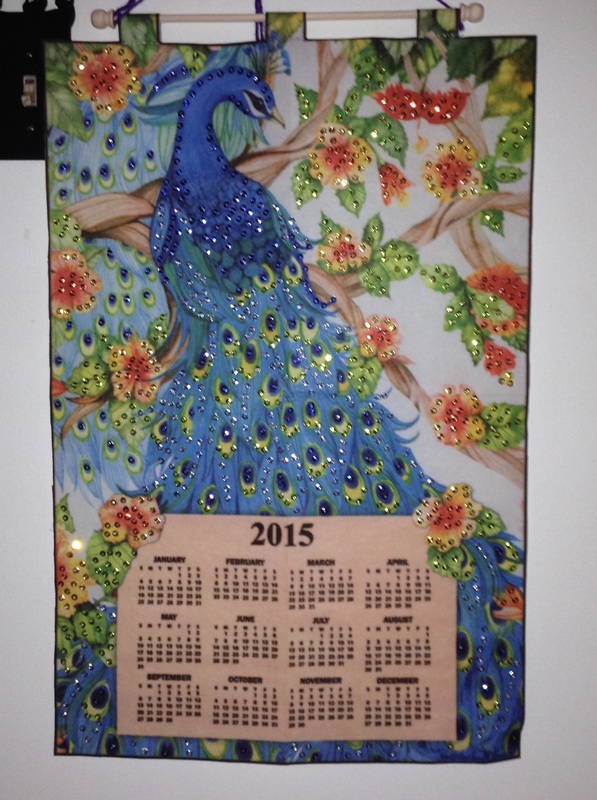
This is a Peacock 2015 calendar my husband did and gave me for Christmas. The design is printed on the felt, and he did all the bead and sequin work on it. I hear there's another Peacock calendar for 2016....Right now, he is working on a Clock. I'll post photos when it is completed.
I am working on a project I started a number of years ago and just could not get into it. You know what I mean. If you don't, it'll happen. Well, I picked up the project, and I'm really into it this time 'round -- it is currently about halfway done. Can't wait to see it completed and then framed. Hint: Do you love Chickadees?
What are you working on this year?
The Sewing & Stitchery Expo is coming to Puyallup, Washington, February 26 - March 1. This is the 7th (or 8th) year of my sister-in-law and I attending together. Such fun! So many things to look at! Hope you get to go, and see you there!
December 17
Everyone is stitching like crazy to get items done for Christmas. Here is Wendy's project, an afghan for her daughter.
It is coming along beautifully.
I am embroidering a table topper for a close friend; it should only take me three more days to complete it. I will post photos later.
I wish you all a Happy Hanukkah, Very Merry Christmas, and a Safe New Year! See you next year!
I am embroidering a table topper for a close friend; it should only take me three more days to complete it. I will post photos later.
I wish you all a Happy Hanukkah, Very Merry Christmas, and a Safe New Year! See you next year!
December 9
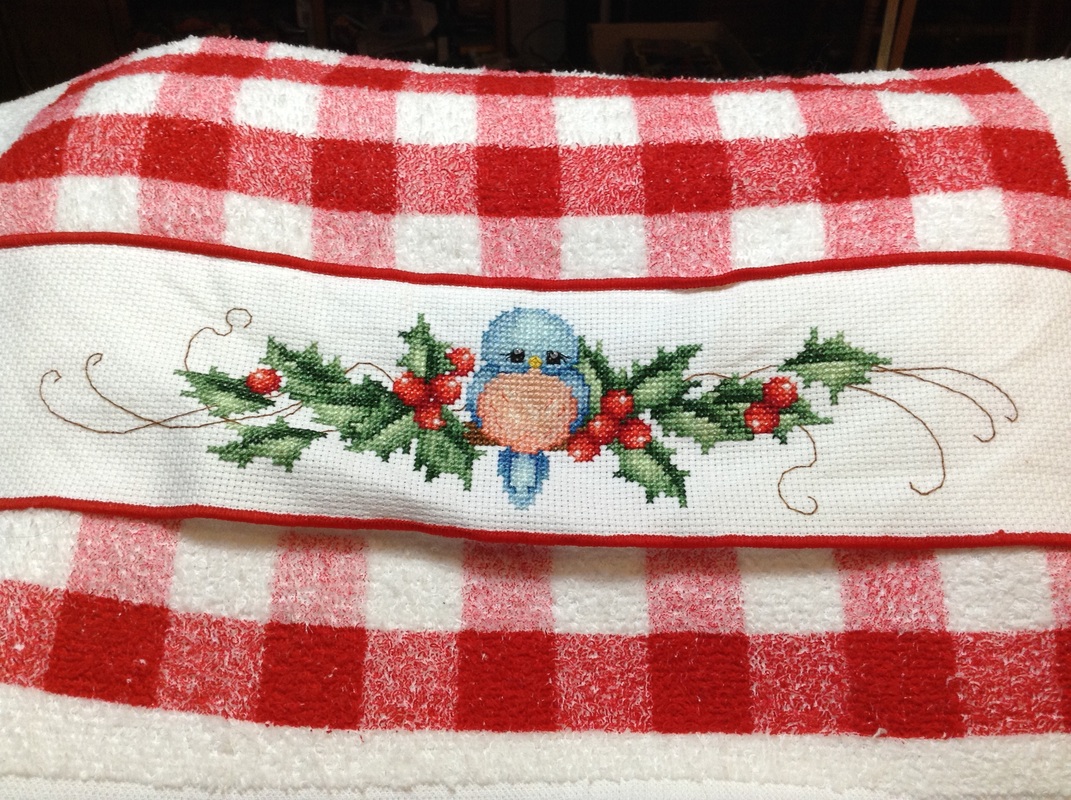
Here is the hand towel that goes with the Bird & Holly towel I showed a month ago. The towels are now packaged up and ready to ship to my Best Bud from high school.
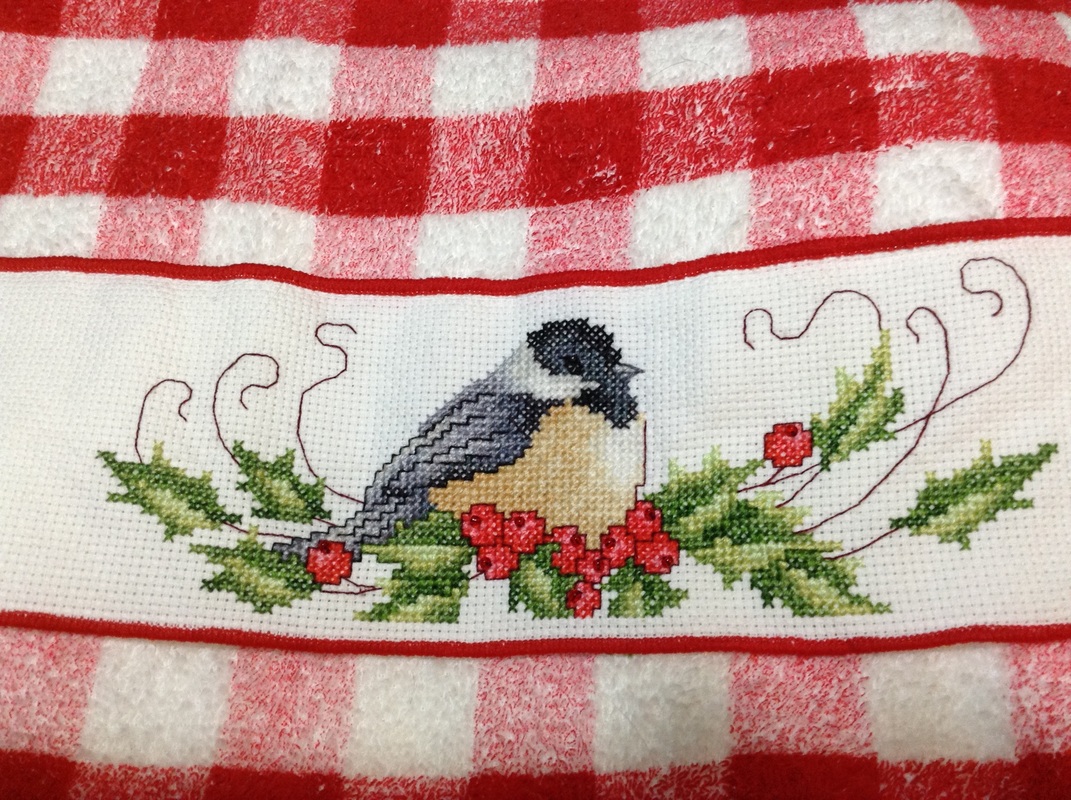
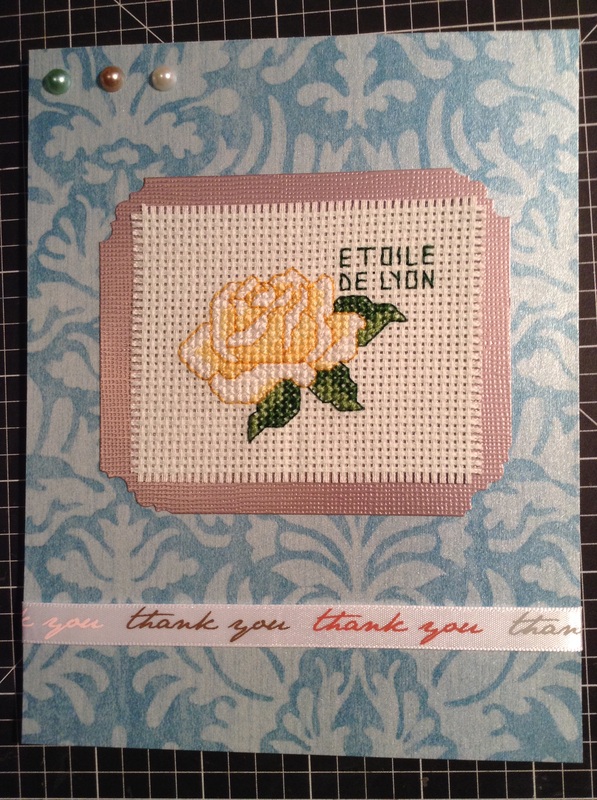
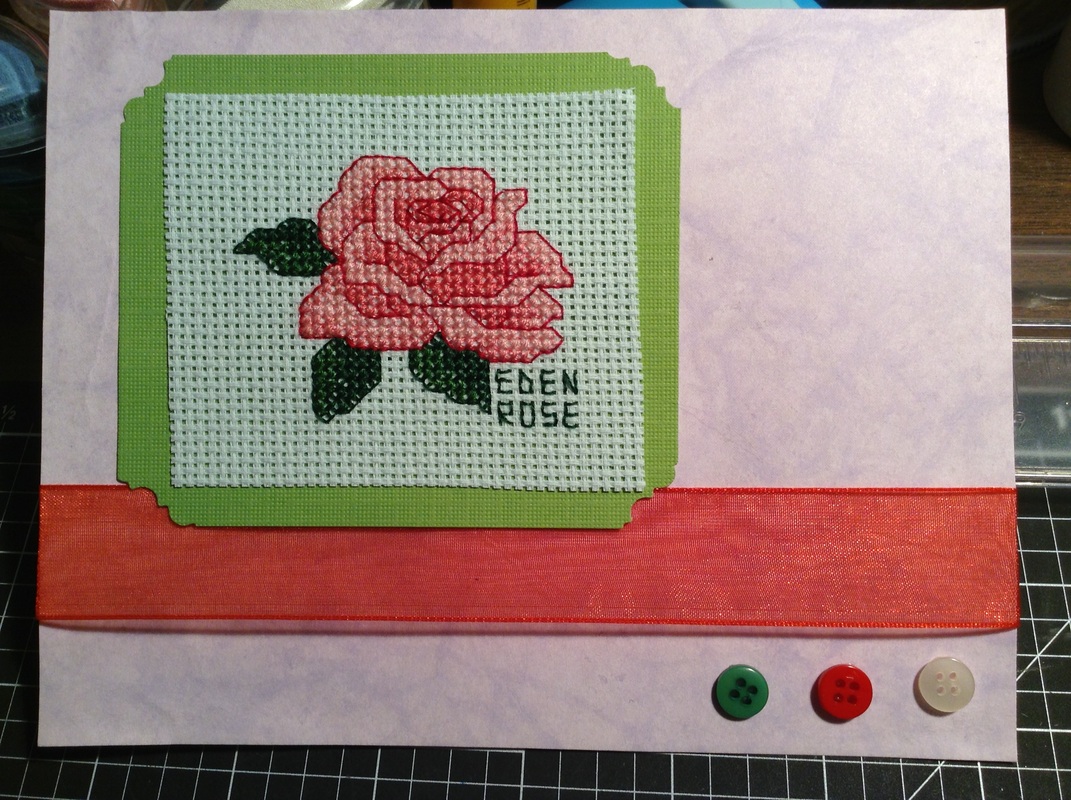
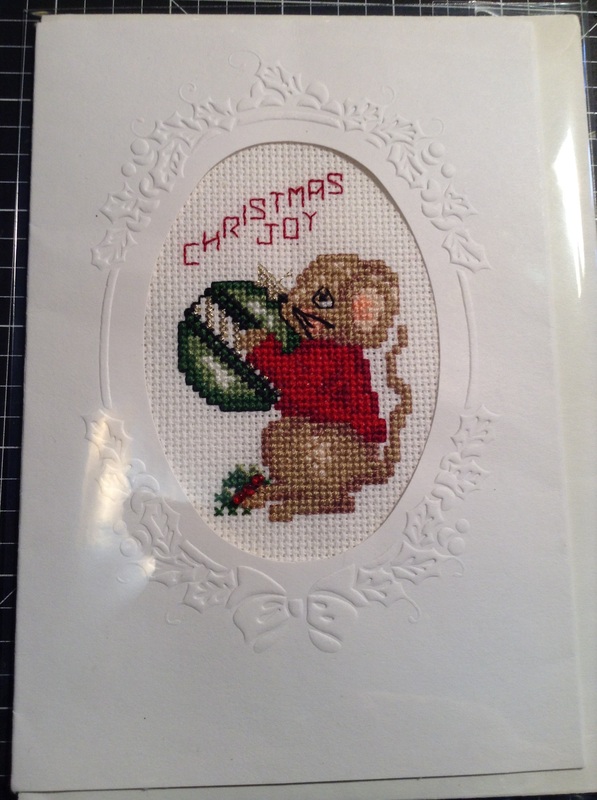
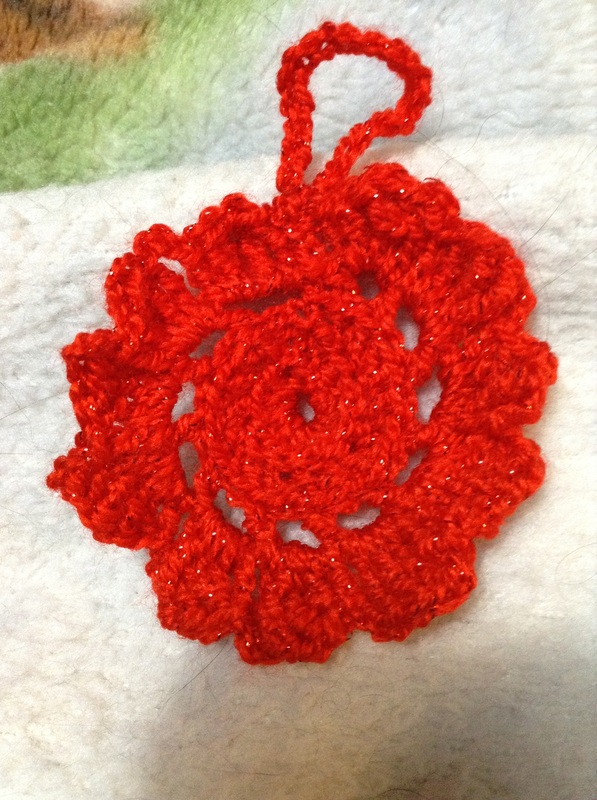
I've been doing other stitching, including a Yellow Rose for a greeting card for close friends of ours, a Red Rose to sell, and a cute Mouse Christmas Card:
I also have 2 Angels completed, but need to mount them -- one will be mounted in a frame, the other made into a card. Photos will come.
Stitchery Club meets tonight. If anyone has any completed projects, I will take photos and post them.
Have a good week!
Stitchery Club meets tonight. If anyone has any completed projects, I will take photos and post them.
Have a good week!
December 2
I received an email from a stitching company in England, Willow Fabrics. Feel free to check them out. They have just about anything for all Needle Artists. Sale going on right now, so if you need anything, give them a look.
http://www.willowfabrics.co.uk/
Our Stitchery Club members have been busy. Some things are finally coming to completion. Carol Anne crocheted two quick Christmas balls that she stitched for charity.
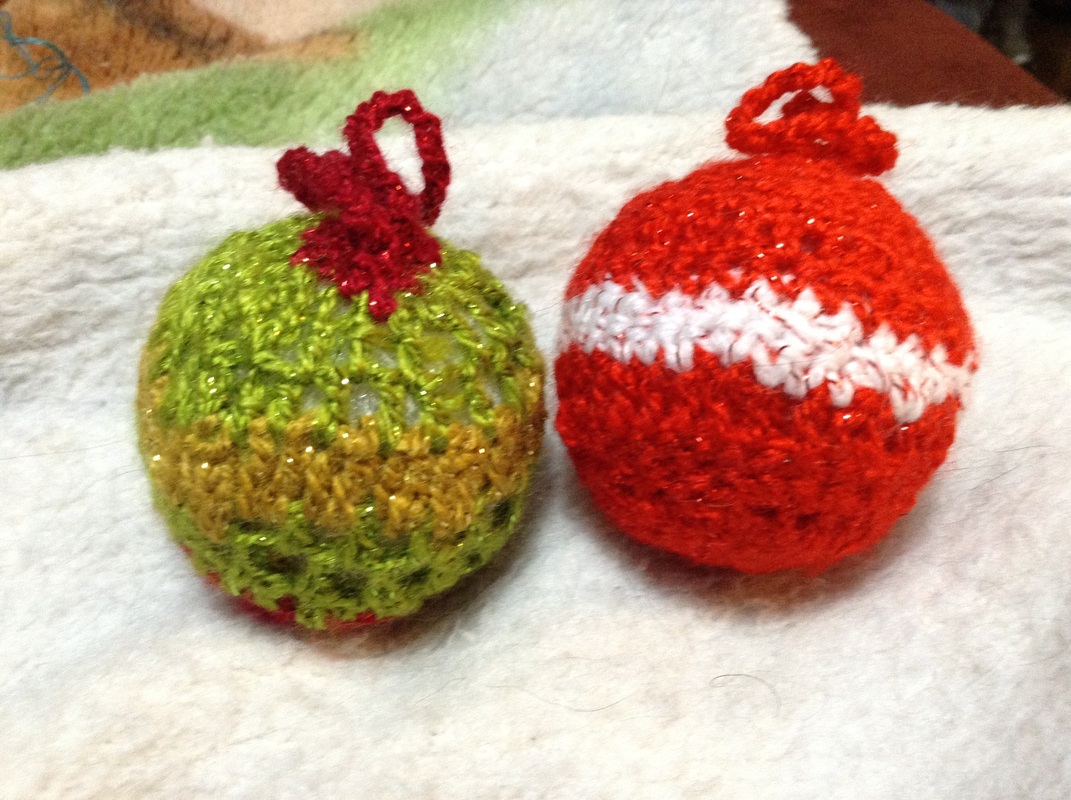
Notice the metallic gold in the yarn? So cute.
Christmas Rose with metallic thread in the yarn.
I have completed a couple of quick cross stitch pieces that I will turn into greeting cards. I will take photos and post those in a few days.
My husband Keith also completed a project and that photo will be forthcoming as well.
Stay safe as you participate in holiday shopping and get-togethers.
I have completed a couple of quick cross stitch pieces that I will turn into greeting cards. I will take photos and post those in a few days.
My husband Keith also completed a project and that photo will be forthcoming as well.
Stay safe as you participate in holiday shopping and get-togethers.
November 27
Happy Thanksgiving!
Happy Thanksgiving!
November 6
Finished my first Holiday Gift -- a red and white checked hand towel. A high school friend of mine had bought a bunch of hand towels at a garage sale years ago. She came across them earlier this year and asked if I wanted them. She wanted to keep a set of the red towels for herself. Yeah, right. Since when do you stitch, Sue? So, I told her since she was giving me all the towels, give me the red ones, too, and I'll stitch something on them for her. She told me what designs she was interested in and I took several patterns down in May when we went for a visit. This is the first hand towel:
Finished my first Holiday Gift -- a red and white checked hand towel. A high school friend of mine had bought a bunch of hand towels at a garage sale years ago. She came across them earlier this year and asked if I wanted them. She wanted to keep a set of the red towels for herself. Yeah, right. Since when do you stitch, Sue? So, I told her since she was giving me all the towels, give me the red ones, too, and I'll stitch something on them for her. She told me what designs she was interested in and I took several patterns down in May when we went for a visit. This is the first hand towel:
Of course, there were french knots for the eye highlights -- I used beads.
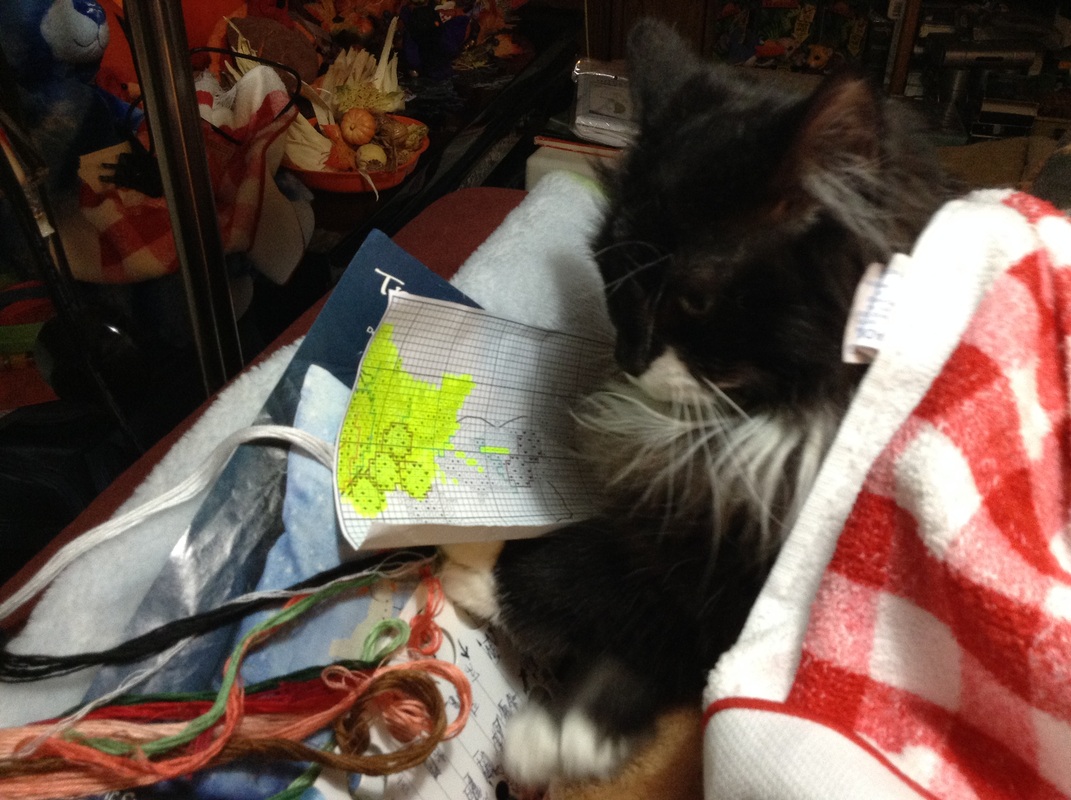
I always have assistance with my stitching. This is Hermione, our Maine Coon.
Now, off to the second hand towel....Have you started your Holiday stitching yet?
Now, off to the second hand towel....Have you started your Holiday stitching yet?
October 30
It is done!!! My Garden Sampler Quilt (Dimensions stamped cross stitch) is finally completed (as of Sunday evening). The Forget-Me-Nots was the final section to stitch.
It is done!!! My Garden Sampler Quilt (Dimensions stamped cross stitch) is finally completed (as of Sunday evening). The Forget-Me-Nots was the final section to stitch.
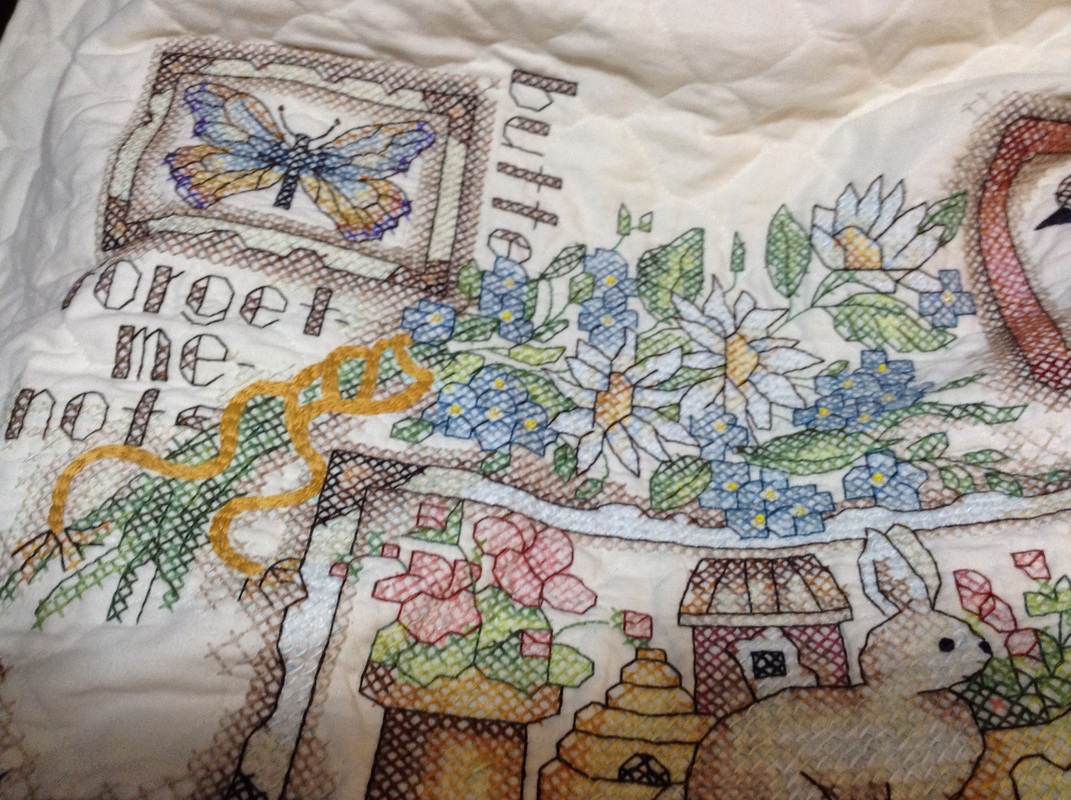
Surprisingly, it took me less than 200 hours to do the quilt -- an estimated 189 hours and 5 minutes. This last section did take some time to do as there are several shades of blue in it.
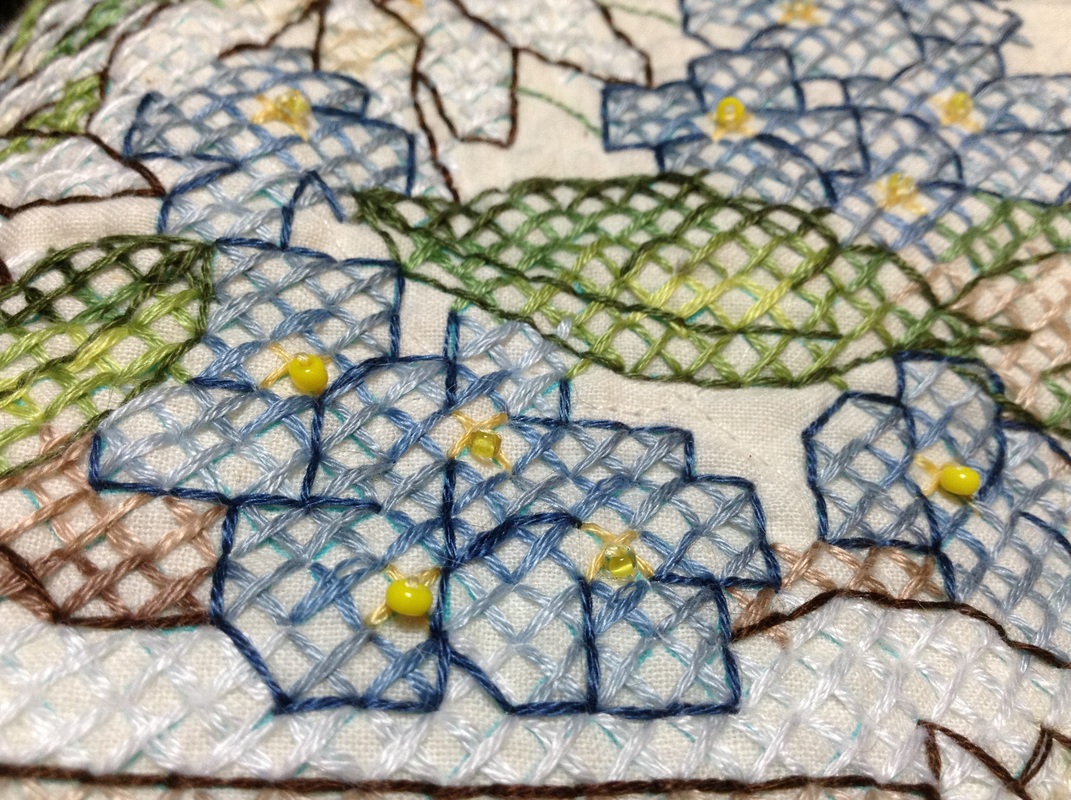
The middle of each Forget-Me-Not was a single yellow cross-stitch; I didn't think this was enough so I added in yellow beads. Some of the beads are a solid yellow, others are a clear yellow. Makes a nice difference.
Photos of the completed quilt:
Photos of the completed quilt:
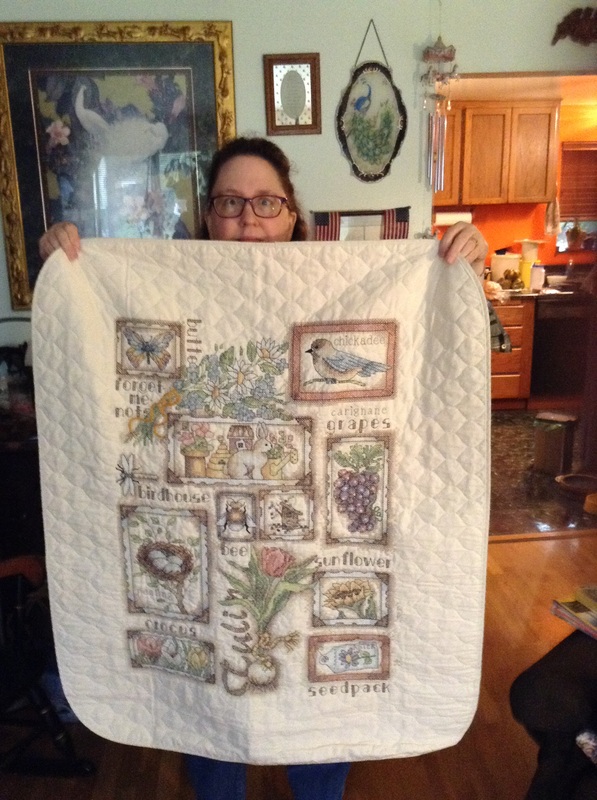

Now, I just need to pop up to JoAnne's or Hobby Lobby and find a fabric to finish the back off. The quilt came pre-quilted so that saves some work.
I've already started a project for a Christmas gift.
I've already started a project for a Christmas gift.
October 17
Finished another section on my nature lap quilt last night. I'm really loving this quilt! Outside of a couple of difficult sections, the quilt is easy and relaxing to work on.
Finished another section on my nature lap quilt last night. I'm really loving this quilt! Outside of a couple of difficult sections, the quilt is easy and relaxing to work on.

About 8 colors in this chickadee, but he wasn't difficult at all to stitch. One more section to go before the quilt is finished! Can't wait! Then I can work on a Christmas gift -- hope I can finish it in time!
What is the most difficult project you've worked on?
Happy stitching!
What is the most difficult project you've worked on?
Happy stitching!
October 14
10 signs You're Addicted to Cross Stitch
- While other tourists on the beach are sunbathing or reading a novel, you see this as the perfect time to start your brand new Joan Elliott project. Well, you didn't fight to get your embroidery scissors through airport security for no reason!
- When Christmas Day comes around, instead of admiring all your festive makes, you're already planning what decorations you can stitch for next year.
- The bookmarks in your internet browser include the Cross-stitching.com forum, a multitude of online craft shops and all the Crazy designers' blogs. Oh, and your internet banking.
- Your idea of the perfect day off from work is reading your new copy of Crazy, followed by uninterrupted stitching -- absolutely no distractions from family, friends, kids or the dog!
- You think it's perfectly normal that you reference colours according to the DMC shade chart. "Ooh, I love your new jumper -- is that 335?"
- You spend hours stitching every single birthday, thank you and wedding card you need to send, and all your presents are accompanied by stitched gift tags.
- Your loved ones know that the only way to get your attention is to confiscate your WIP. Although it might not be positive attention they get...
- Instead of name tapes, your kids' clothes and school items are marked with stitched letters from Crazy's One Nighters charts.
- There's not a square inch of wall in your house that isn't full of your framed projects, your sofa and chairs are stuffed with cross stitched cushions, and your mantelpiece is groaning under the weight of biscomus and other stitched ornaments.
- Although you've got a cupboard so full of unopened kits its doors no longer shut properly, you can't resist buying "just one more" to add to your extensive stash!
Reprinted from Cross Stitch Crazy, Issue April 2014, p 90
October 1
Wow! Has it been a busy summer! Lots of gardening, good produce from the vegetable garden, and love my Irises and Roses! My husband has been home for the past year, so we get out in the flower beds and gardens each morning for about an hour; after a while, you can see the progress. Then we stitch in the evenings.
I see I haven't shown you progress on my quilt lately. Here are the last 3 sections:
I see I haven't shown you progress on my quilt lately. Here are the last 3 sections:
During this time, my husband finally finished a project he has been working on:

Whenever we go through the latest Herrschner's or Mary Maxim catalogues, we always see things that his mom would have loved to do. She's been gone now for 17 years. In her honor, my husband decided to start plastic canvas needlepoint. He has done a variety over the past two years; this Easter bunny is his latest. So cute!
Now that he is home permanently (on disability), I will need to keep him in projects.
I completed another section of my quilt last night, the Butterfly. It turned out so pretty! Yes, those are beads at the end of his antennae.
Now that he is home permanently (on disability), I will need to keep him in projects.
I completed another section of my quilt last night, the Butterfly. It turned out so pretty! Yes, those are beads at the end of his antennae.
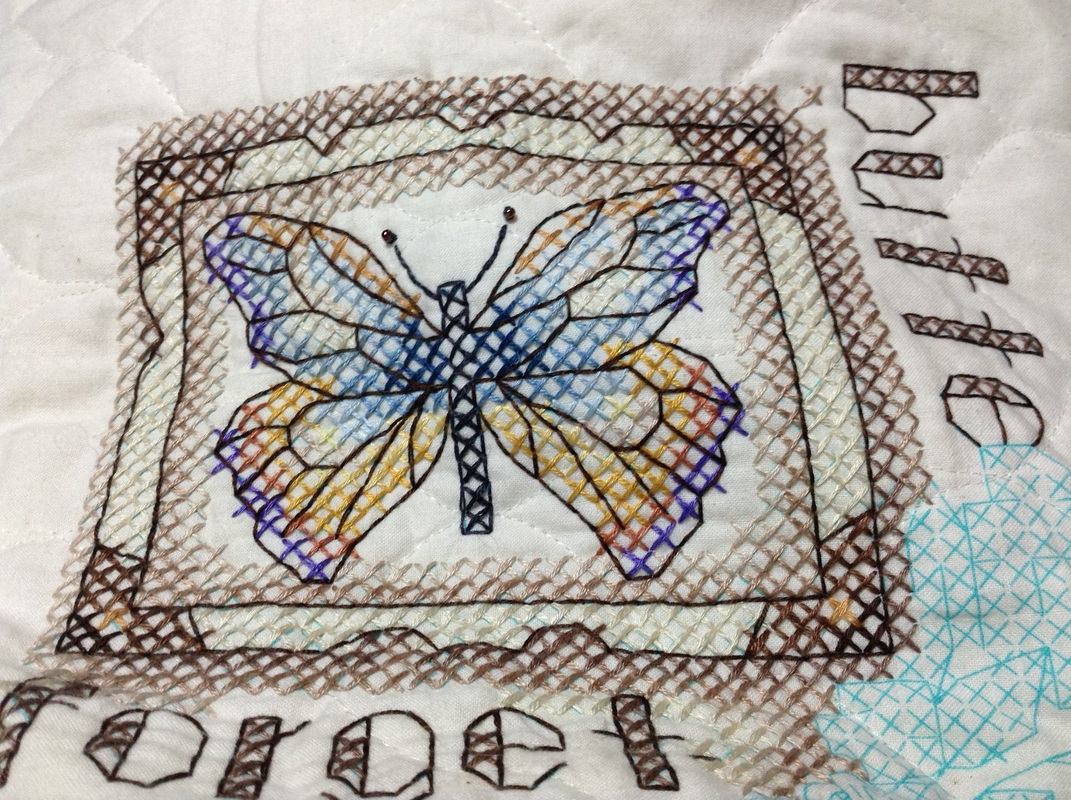
I have two more sections left on my quilt and then it is done. The last section is a big one (like the Tulip section), so it will take a bit of time to complete. I am expecting 25 to 30 hours on that section.
Then I need to work on a couple of Christmas projects! What are you working on?
Then I need to work on a couple of Christmas projects! What are you working on?
August 22
What do you do with that left-over ball of yarn? Make a newborn/infant hat, of course.
What do you do with that left-over ball of yarn? Make a newborn/infant hat, of course.
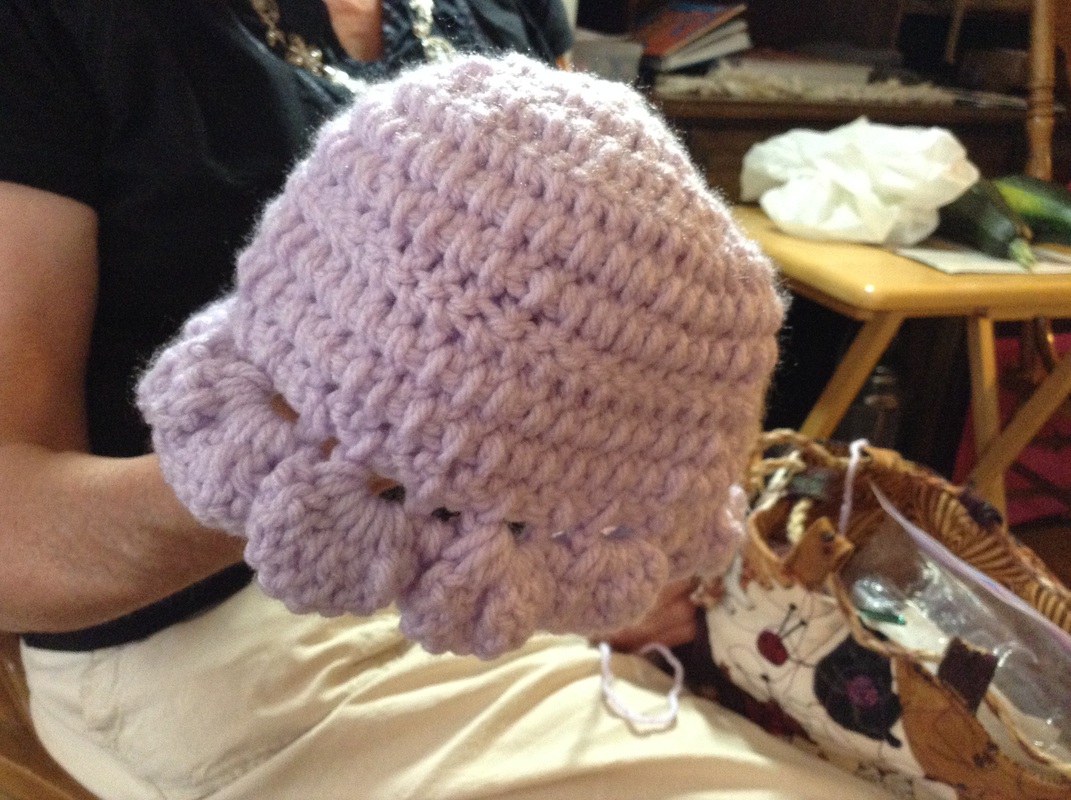
Here is Carol Ann's almost completed infant hat that she will be donating.
The latest on my lap quilt:
The latest on my lap quilt:
For those of you unfamiliar with Stamped Cross Stitch, the blue pattern markings on the fabric will wash away the first time the quilt is washed. I usually wash these items on permanent press cycle.
Next Northwest Stitchery Club meeting is Tuesday, August 26. See you there!
Next Northwest Stitchery Club meeting is Tuesday, August 26. See you there!
August 12
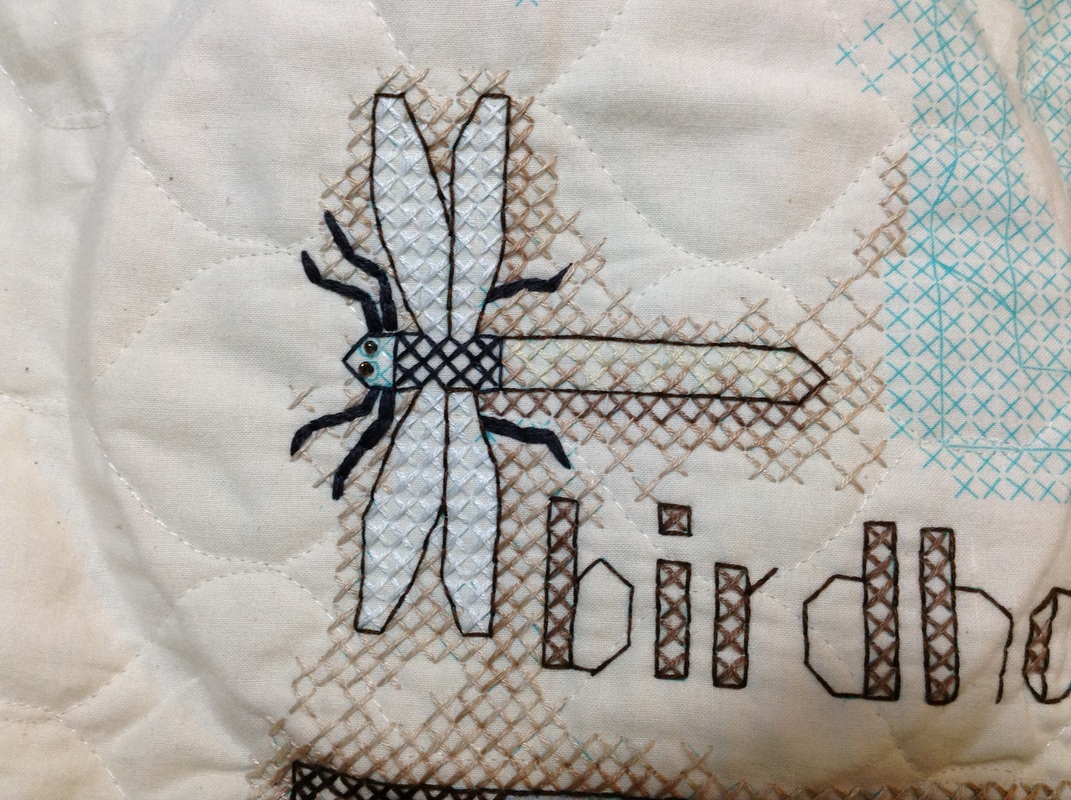
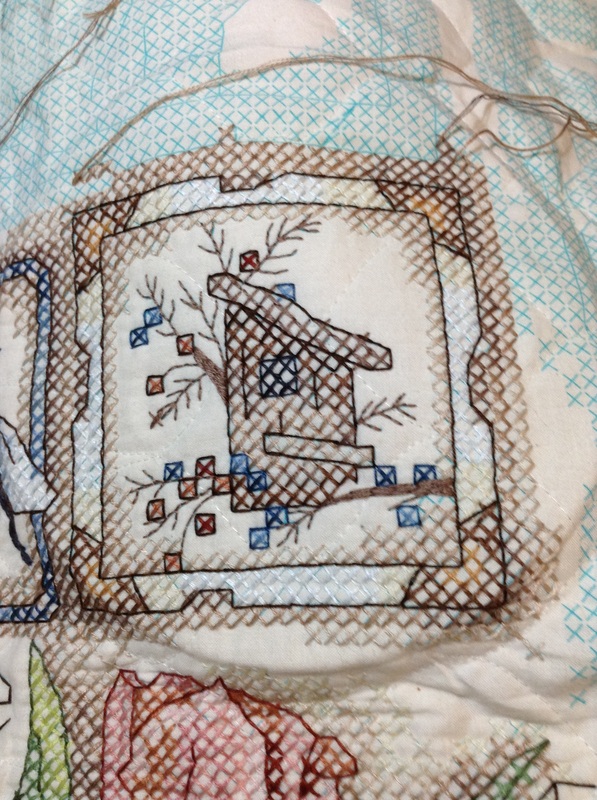
Next section of my Garden quilt:
Next section of my Garden quilt:
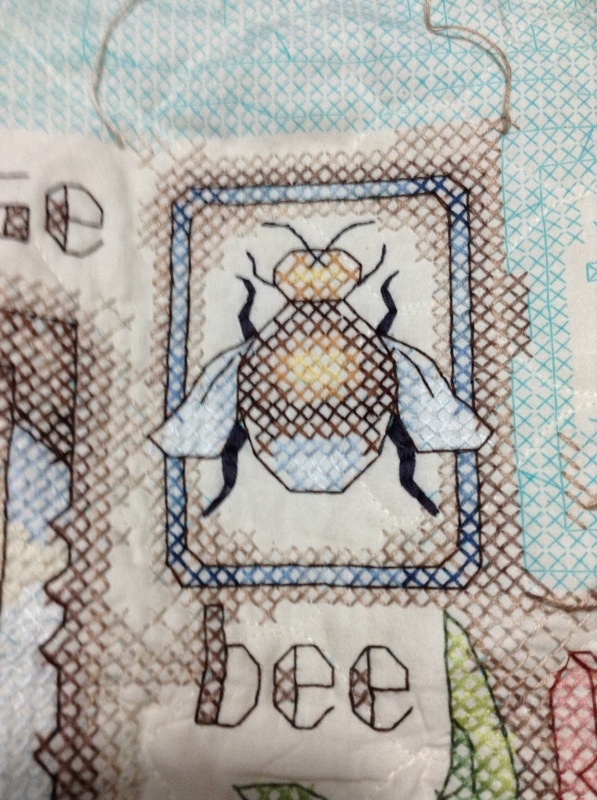
This Bee was quick and easy to do. Finished him last week and well into more than half of the next section, a Birdhouse. I am really trying to finish my quilt so I can get started on Christmas projects.
Stitchery Club meets tonight. Hope to see you here -- despite our thunder and lightning with a bit of rain here and there.
Stitchery Club meets tonight. Hope to see you here -- despite our thunder and lightning with a bit of rain here and there.
August 4
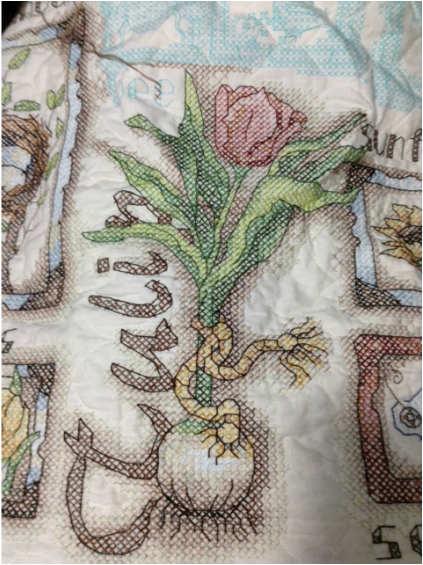
The Tulip is finally finished. Now, it really looks like a Tulip instead of a clove of garlic! Now I am working on the Bee above the Tulip.
The Tulip is finally finished. Now, it really looks like a Tulip instead of a clove of garlic! Now I am working on the Bee above the Tulip.
Have you received your new Mary Maxim and Herrschners catalogues yet? If you have, then you are probably drooling like I am over the new designs for the Christmas sale! So need to put in an order! If you do not receive either of these catalogues, go to their websites and sign up to receive them. They are simply delicious just to drool over without ordering.
Hope you are all having a great summer!
Hope you are all having a great summer!
July 28
It is time to get you caught up on progress of my quilt. I am just loving it! It appears to be going much quicker than some of my other larger projects. In fact, I cannot seem to put it down to take a break and work on smaller projects. What's wrong with that?!
It is time to get you caught up on progress of my quilt. I am just loving it! It appears to be going much quicker than some of my other larger projects. In fact, I cannot seem to put it down to take a break and work on smaller projects. What's wrong with that?!

When I start this section, I thought it was Garlic, but the words wouldn't come out that way. Duh -- It's Tulip! Well, the bulb section of it anyway. On quilts, I tend to work in sections from left to right.
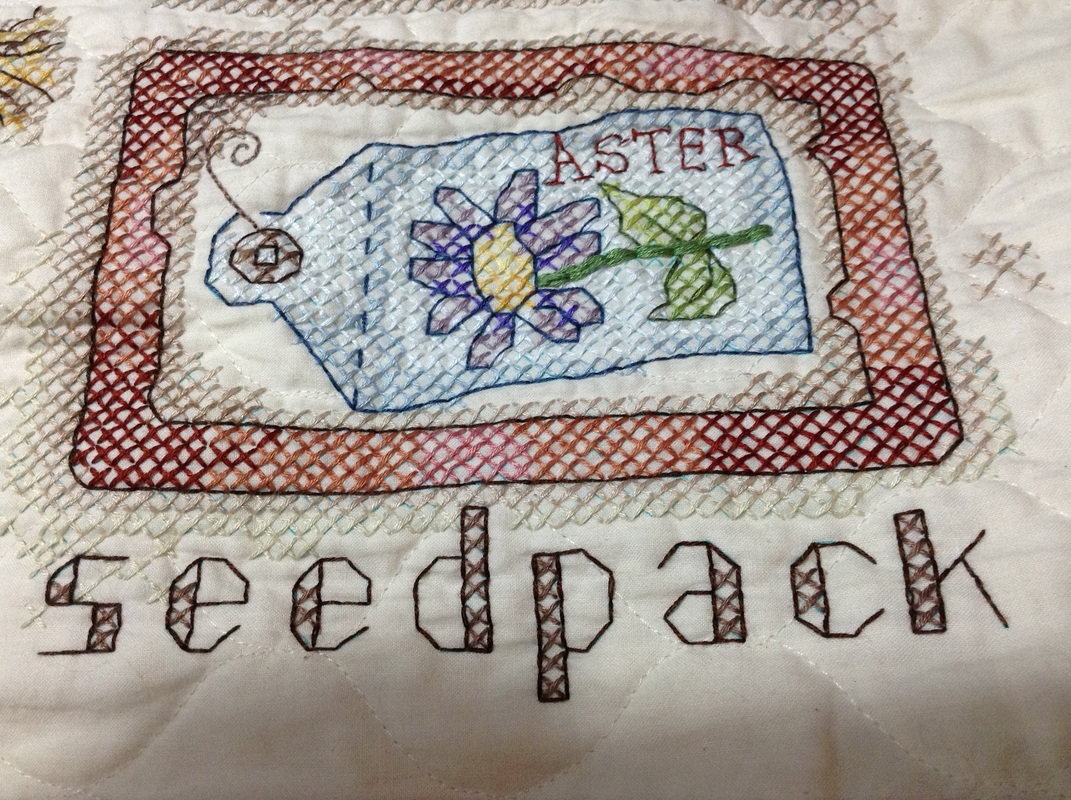
Worked only half-way on the Tulip, then moved over to work on the Seedpack.
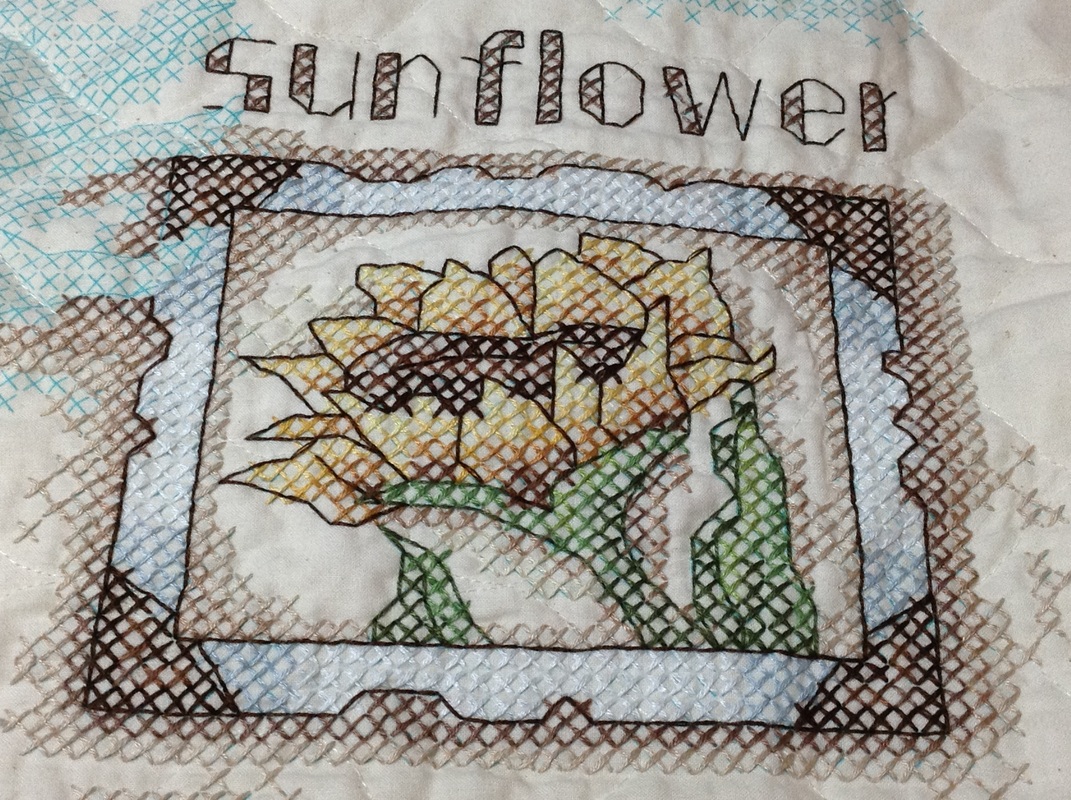
This Sunflower was above the Seedpack as that was a smaller design.
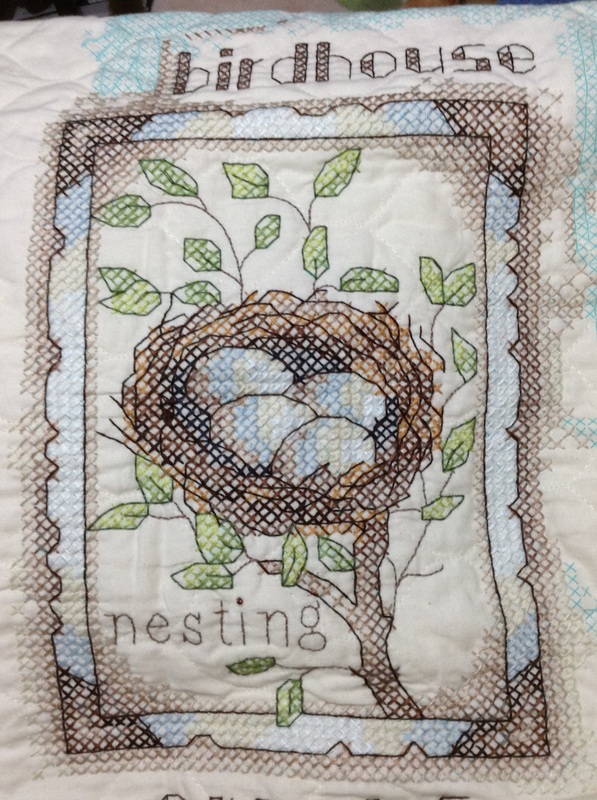
...Back over to the left side of the quilt to do the Bird Nest.
Now that this section is done, I will work on the second half of the Tulip, which is to the right of the Bird Nest and in the lower middle of the quilt.
Now that this section is done, I will work on the second half of the Tulip, which is to the right of the Bird Nest and in the lower middle of the quilt.
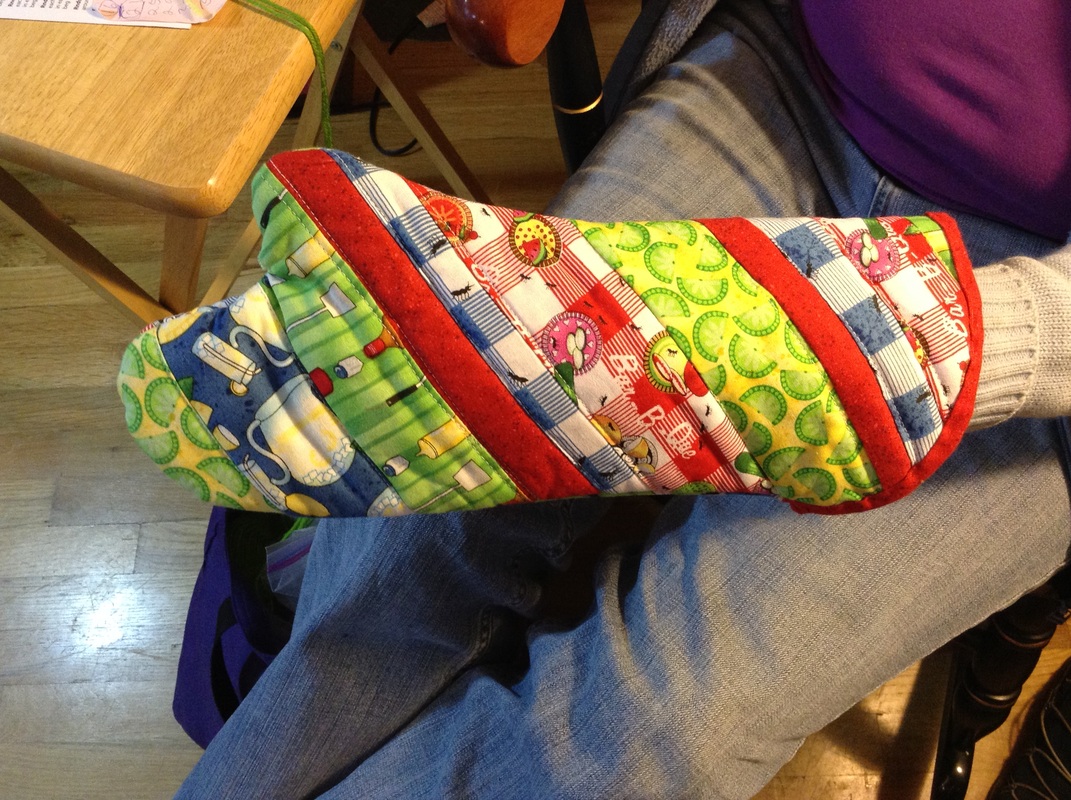
At Stitchery Club meeting, Carol Anne showed off a BBQ mitt she made out of quilting scraps. It is just adorable! She is make a larger one for her husband.
June 25
Today, we have 10 Tips for Beading, courtesy of Cross Stitch Crazy, August 2008, Issue 114 (yep, still sorting through the "library"):
1. Be sure to use a needle threader when beading because the eye of a beading needle will be smaller than your normal cross stitching needle.
2. A special bead nabber helps to pick the beads up.
3. Separate your beads into colours before starting.
4. Match your thread colour to the colour of your bead.
5. Use a half stitch to add the bead to your work.
6. You may need a second half stitch (in the opposite direction) to secure the bead.
7. If using two strands of thread, let one strand rest on either side of the bead.
8. Be careful not to stitch over other threads when finishing off -- it will make it more difficult to undo your work if you need to later on.
9. Before washing your work, make sure the beads you've used are colourfast -- surprisingly, some aren't!
10. If you iron your finished work, lay the work face-down on a towel and use a cool iron -- the beads should be protected by the towel.
What these tips do not advise is the size of beads. If you are a beginner, this can be quite confusing. Here's a hint:
If you are replacing a French knot with a bead (like I do), then use a Seed Bead.
There are a wide variety of beads available to enhance your stitching. Depending on how you use the bead(s), what effect you want or to just add to a completed project, you can use Seed Beads, larger beads or Shaped Beads (Owl, Peacock, Flower, Butterfly, etc.). Get creative -- beads literally ADD to and ENHANCE your stitching!
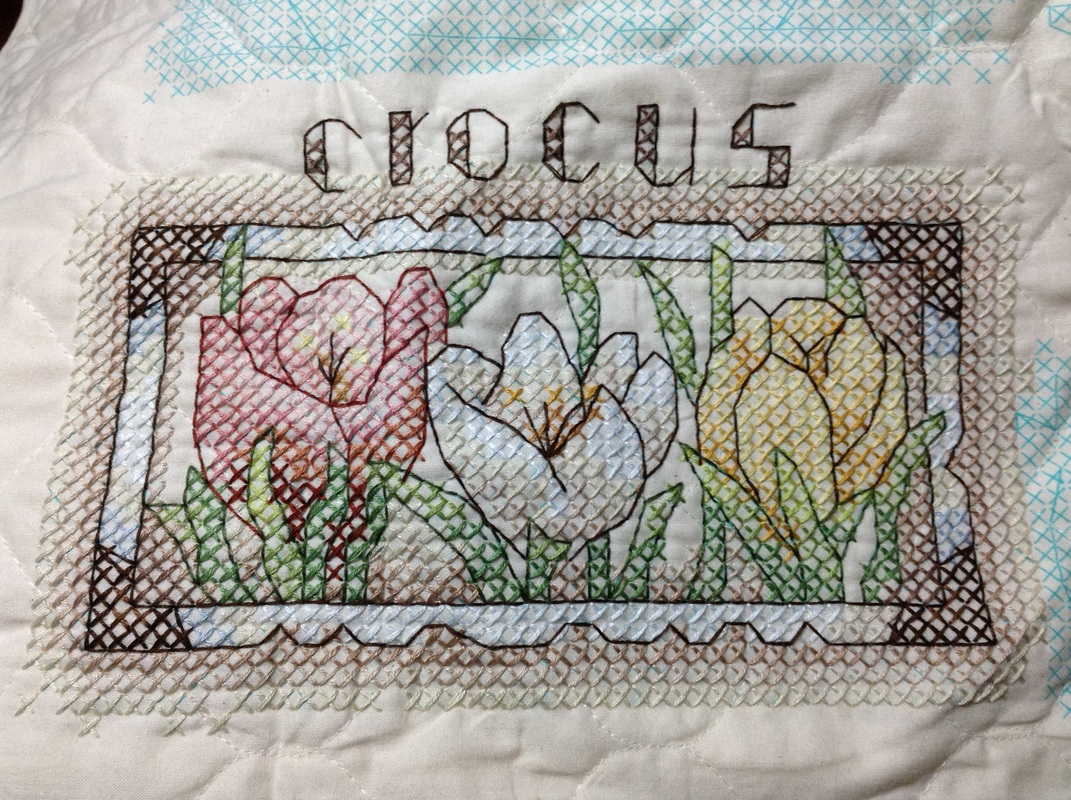
My quilt is coming along quite nicely. This one is fun to stitch, I am really enjoying it and it is helping me to relax in the evening (so I can have a halfway decent sleep at night). I will post photos next time of the section I have completed so you can get a more complete picture to do with the Crocus section I posted earlier.
Our vegetable garden is starting to produce and our Strawberries, Raspberries and Blueberries are producing, so our mornings are spent picking (what the birds left for us!).
Til next time!
Today, we have 10 Tips for Beading, courtesy of Cross Stitch Crazy, August 2008, Issue 114 (yep, still sorting through the "library"):
1. Be sure to use a needle threader when beading because the eye of a beading needle will be smaller than your normal cross stitching needle.
2. A special bead nabber helps to pick the beads up.
3. Separate your beads into colours before starting.
4. Match your thread colour to the colour of your bead.
5. Use a half stitch to add the bead to your work.
6. You may need a second half stitch (in the opposite direction) to secure the bead.
7. If using two strands of thread, let one strand rest on either side of the bead.
8. Be careful not to stitch over other threads when finishing off -- it will make it more difficult to undo your work if you need to later on.
9. Before washing your work, make sure the beads you've used are colourfast -- surprisingly, some aren't!
10. If you iron your finished work, lay the work face-down on a towel and use a cool iron -- the beads should be protected by the towel.
What these tips do not advise is the size of beads. If you are a beginner, this can be quite confusing. Here's a hint:
If you are replacing a French knot with a bead (like I do), then use a Seed Bead.
There are a wide variety of beads available to enhance your stitching. Depending on how you use the bead(s), what effect you want or to just add to a completed project, you can use Seed Beads, larger beads or Shaped Beads (Owl, Peacock, Flower, Butterfly, etc.). Get creative -- beads literally ADD to and ENHANCE your stitching!
My quilt is coming along quite nicely. This one is fun to stitch, I am really enjoying it and it is helping me to relax in the evening (so I can have a halfway decent sleep at night). I will post photos next time of the section I have completed so you can get a more complete picture to do with the Crocus section I posted earlier.
Our vegetable garden is starting to produce and our Strawberries, Raspberries and Blueberries are producing, so our mornings are spent picking (what the birds left for us!).
Til next time!
May 24
Happy Memorial Day! Remember those who made the ultimate sacrifice, and those who were able to make it home, so that we may live with freedom and choice.
When you complete a project, how do you decide what to work on next? After I completed the Christmas Holiday Bells tablecloth collection, I had no clue what to work on next. I dug my two project tubs out of the closet and emptied them out onto the front room floor. I handled every project, organized them by topic and put them all back neatly in the bins. When they were all back in, I still did not have a single project set out to work on. Oh dear.....I fingered through the tubs again -- and kept coming back to two projects -- both stamped cross stitch lap quilts.
As you know, it takes an evening to sort out all the floss for a project. A week later, here is the first section of the quilt....
I am thoroughly enjoying working on this quilt. Yes, Crystal is always on my lap and it doesn't bother her when the quilt, charts and floss are draped over her. If she changes position, she makes sure she gets under my project.
Time for another Top Tips from Cross Stitch Crazy, Christmas 2008, Issue 118: Designing on Graph Paper
1. A small motif or a bookmark would be good to try for a first project.
2. Look in magazines, on the internet and in catalogues for design inspiration, or draw your own picture to trace.
3. To start, you will need pencils, coloured pencils and a good eraser!
4. Print free graph paper in the count you require from www.needlepointers.com (I didn't find the graph paper, but I found a lot of other cool stuff!)
5. Keep your colour choices to a minimum to achieve a more simple design.
6. Buy a shade card that matches your coloured pencils for easy reference.
7. Start your design by using just whole cross stitches to mark out a basic shape.
8. Go along the curved areas of your design and add three-quarter and quarter stitches to complete definition.
9. Use your coloured pencils to shade your design, adding symbols to differentiate between similar colours.
Remember, Cross Stitch Crazy can be found in larger bookstores like Barnes & Nobles. The magazine is out of Great Britain.
Have a great weekend, everyone!
May 11
Happy Mother's Day!
I was downloading photos from my digital camera this morning, and realized I had not posted these photos:
Happy Mother's Day!
I was downloading photos from my digital camera this morning, and realized I had not posted these photos:
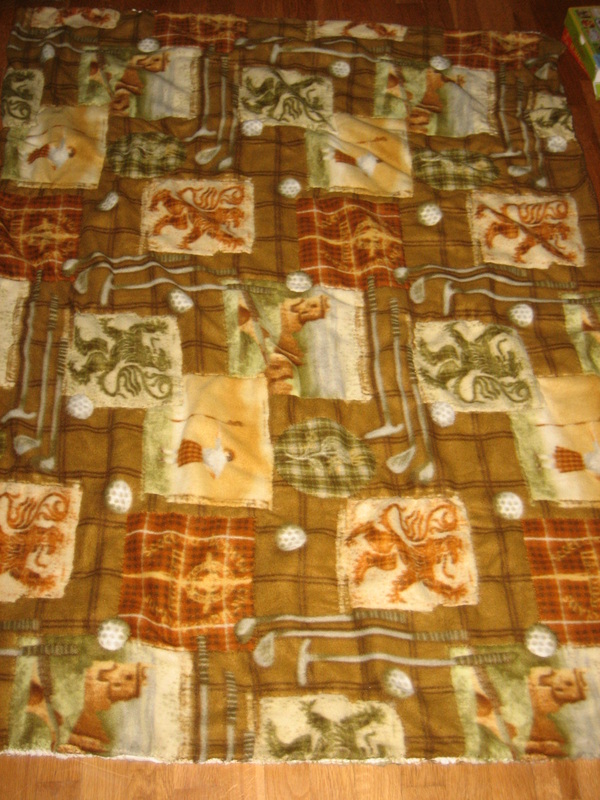
This is a blanket my husband did. This is one of those fleece blankets you buy from craft stores, cut the edges and tie into knots. Neither of us like that style, so he decided to back stitch around each Lion, Castle and Golf Balls. Then he hand-stitched the edges.
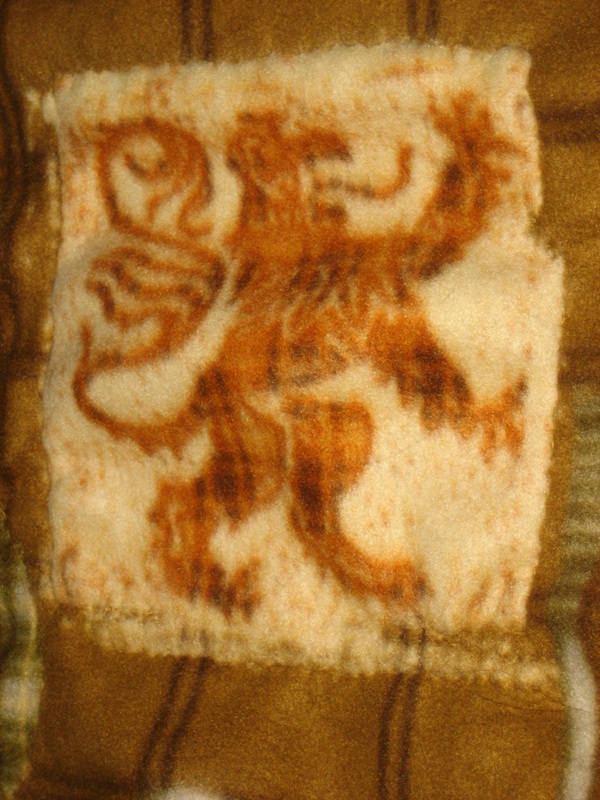
Close-up of stitching around Lion square. My husband has strong Scottish blood, which is why this fabric appealed to him.
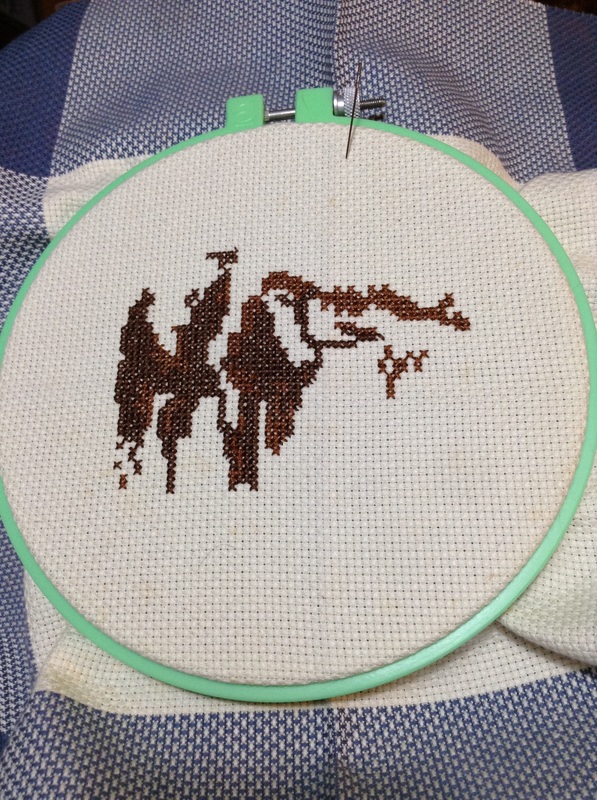
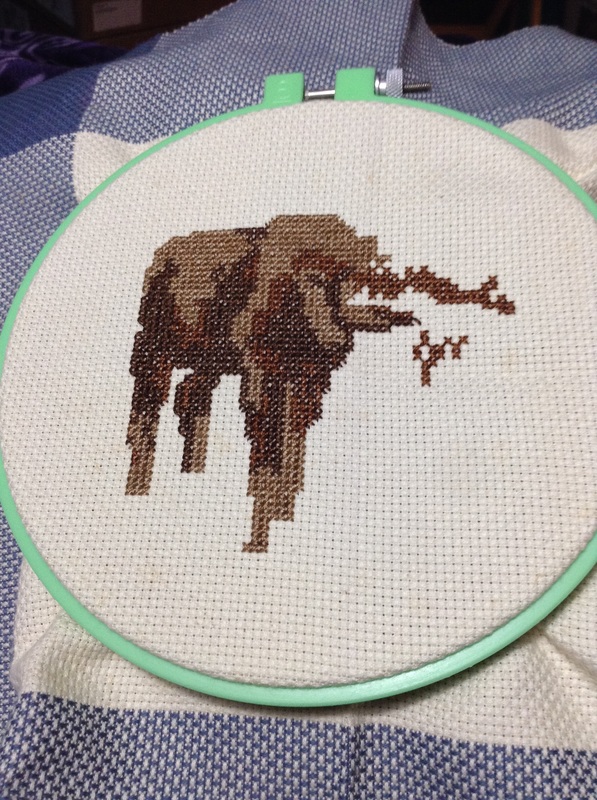
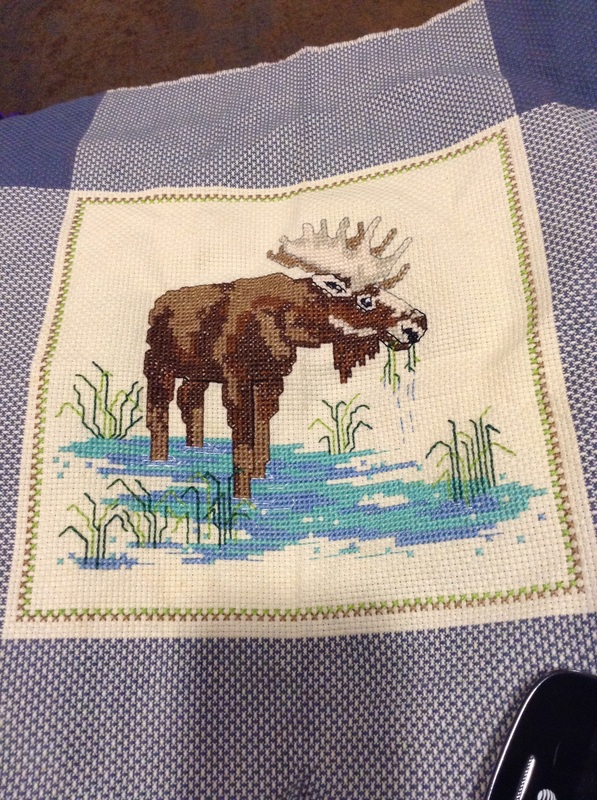
Last year, one of my high-school friends' daughter got married. After a lengthy conversation about what her daughter and new husband would like, we settled on Wolves. I found a great Wolf Totem pattern from Fantasy Cross Stitch by Lesley Teare (page 35).
Last year, one of my high-school friends' daughter got married. After a lengthy conversation about what her daughter and new husband would like, we settled on Wolves. I found a great Wolf Totem pattern from Fantasy Cross Stitch by Lesley Teare (page 35).
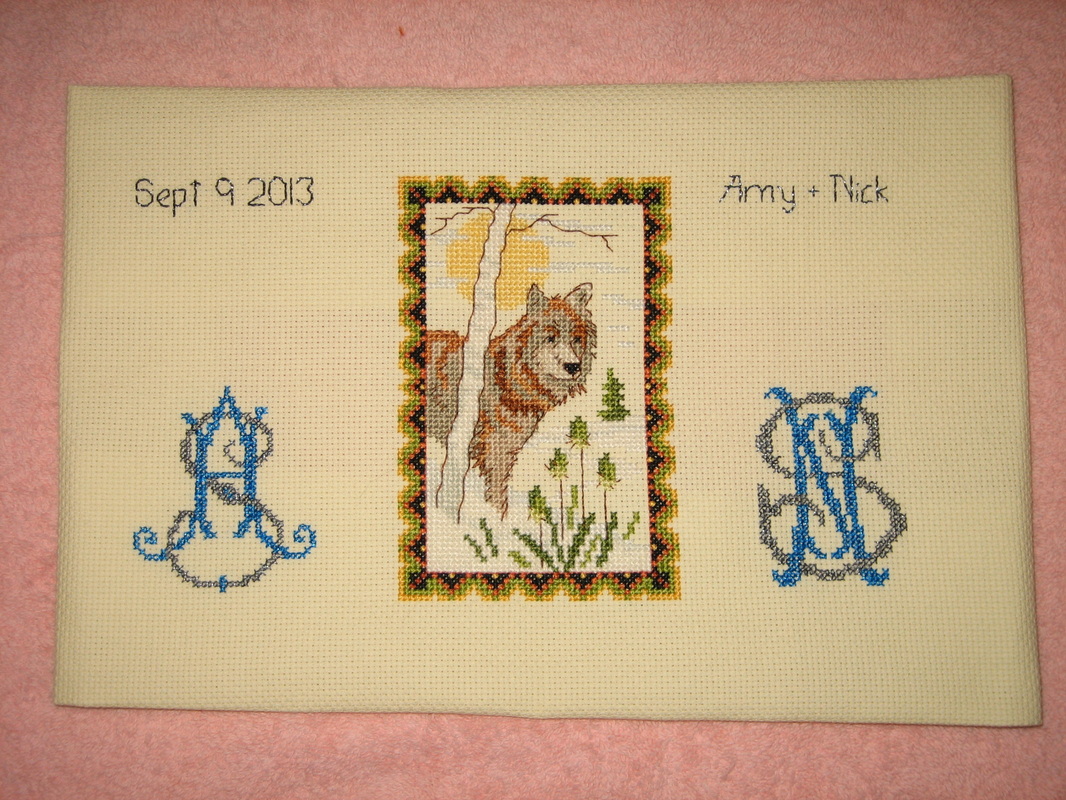
Completed Wedding Sampler

Close-up of Wolf area
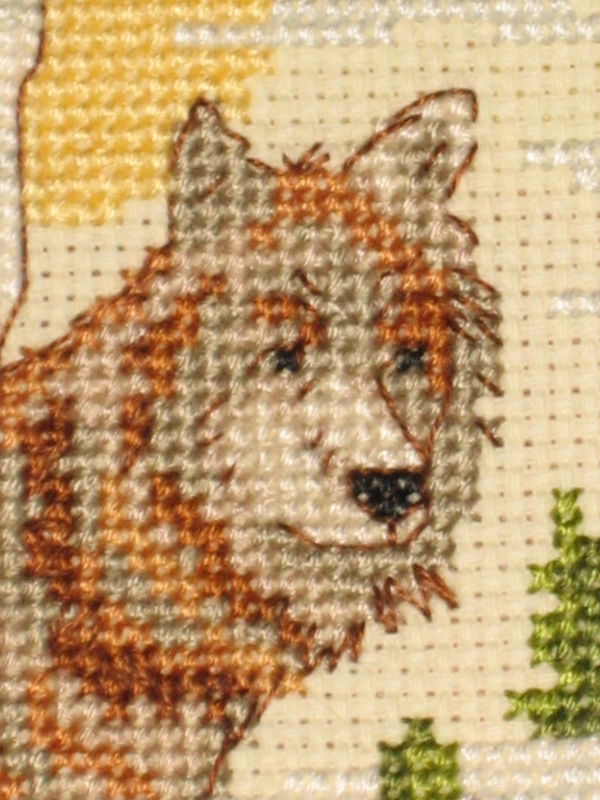
Close-up of Wolf
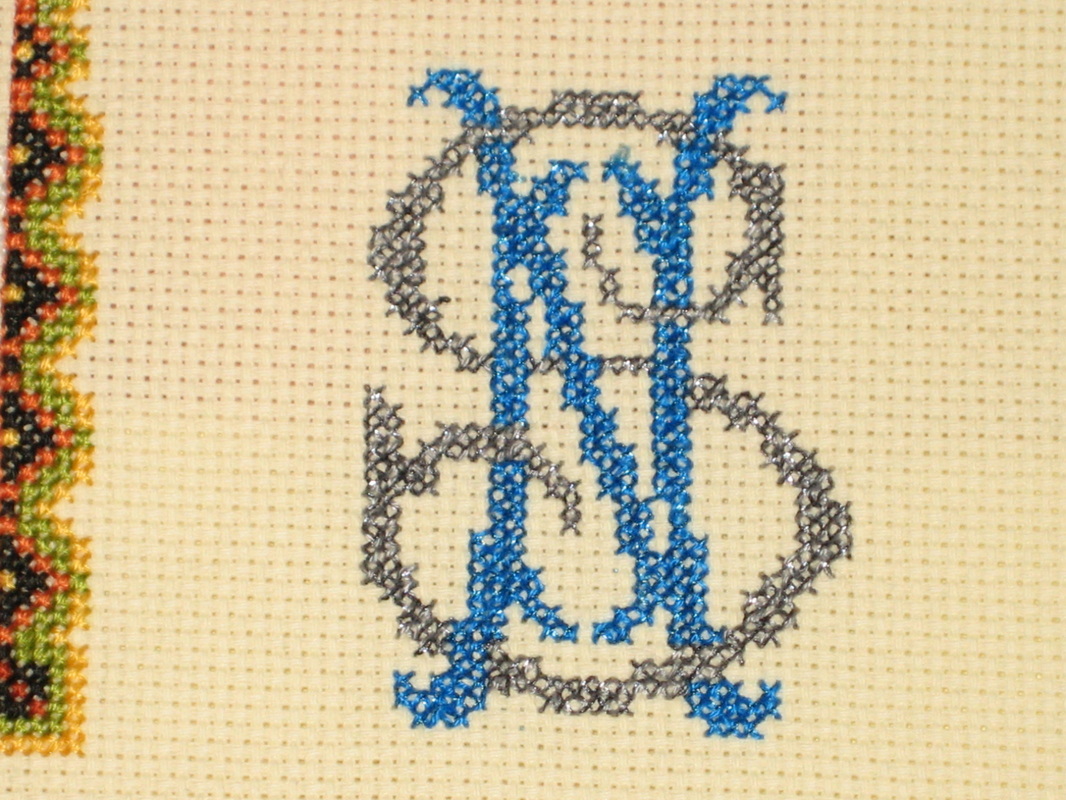
Close up of groom's initials (cotton and metallic threads). Bride's initials were stitched in same. The pattern for the initials came from Charted Monograms for Needlepoint and Cross-Stitch by Rita Weiss; Dover Needlework Series, Dover Publications, NY; 1977. I found the chart book at an estate sale last summer. Looks like I will be using these charts more often.
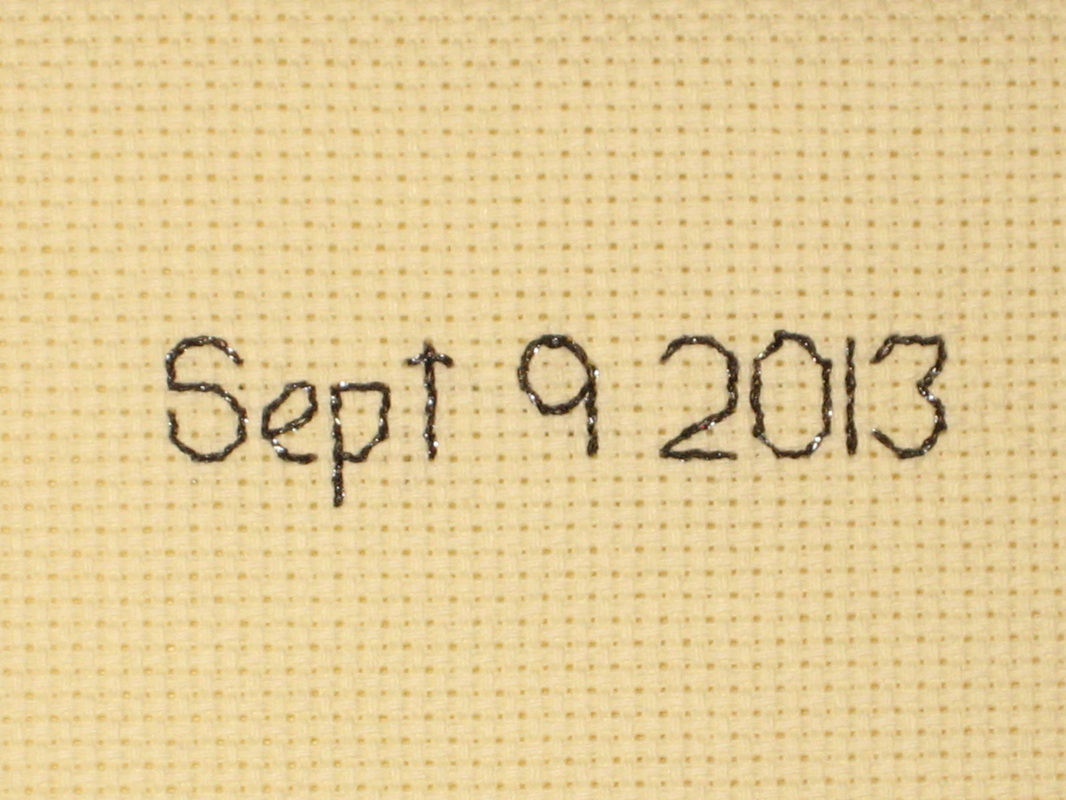
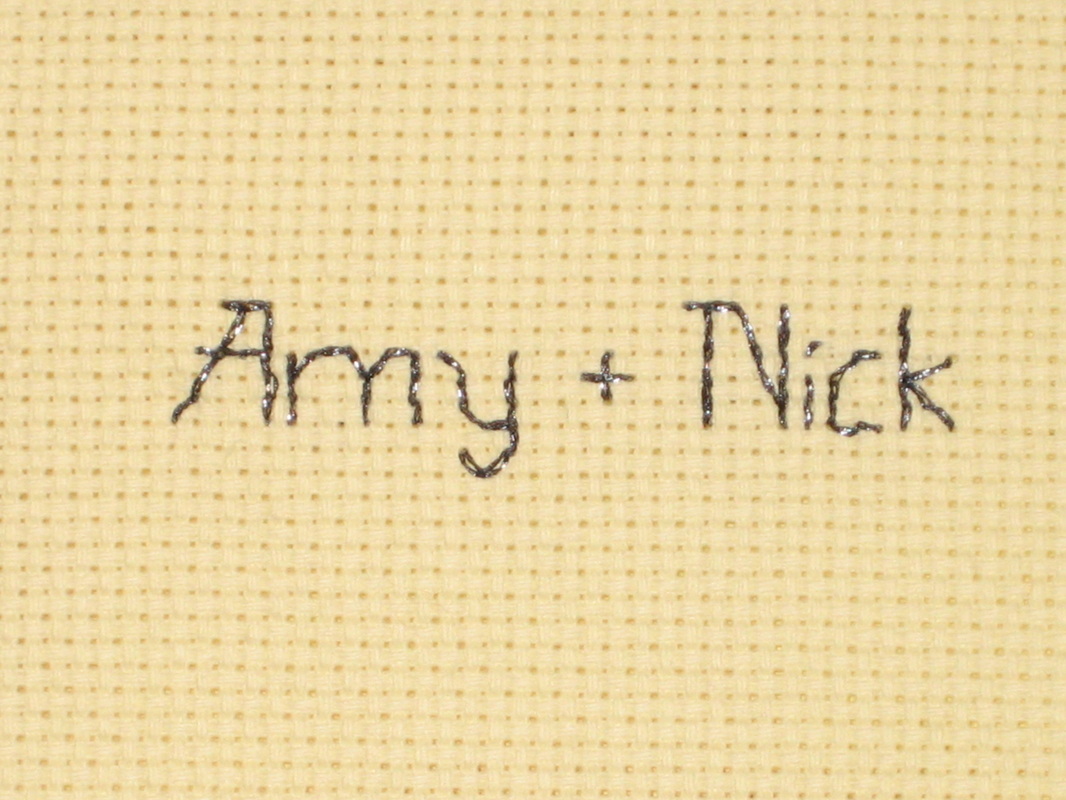
Date of wedding and names in metallic dark grey
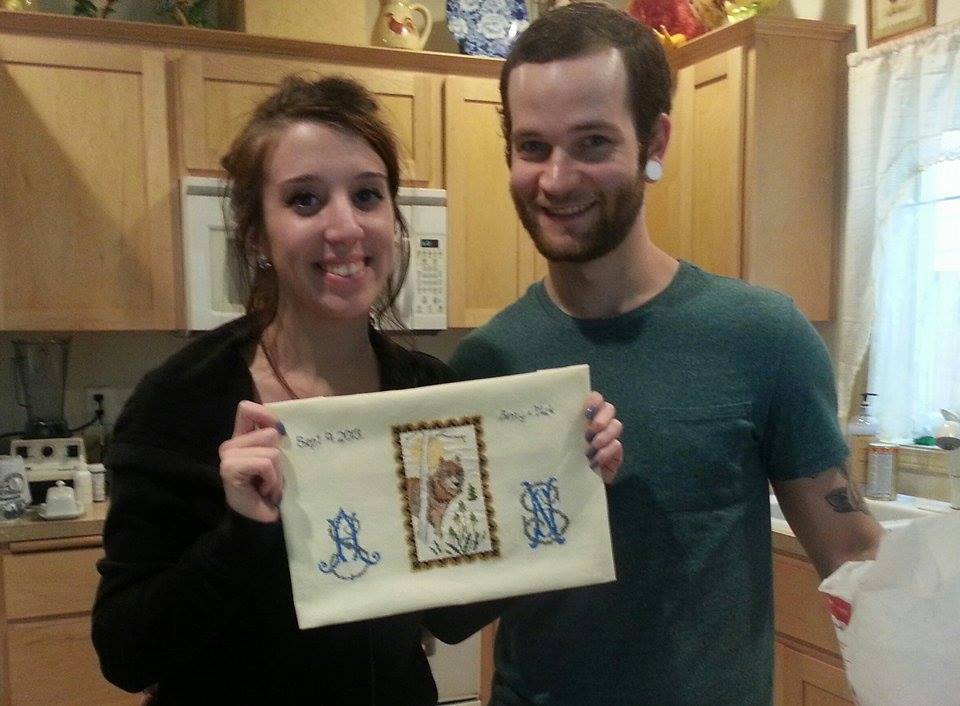
The happy couple with their Wolf wedding sampler. I did not frame it, but did enclose funds so they could buy a frame to match the sampler and their home decor. I enclosed a slip of paper stating how many hours it took to stitch, signed with my name (yes, people often ask how long a project takes = 26 hours for this one). They will attach this paper to the back of the frame so years down the road they can remember who stitched it. I also typed up the history of the Wolf Totem as explained in the pattern book, and they will attach that to the back of the frame.
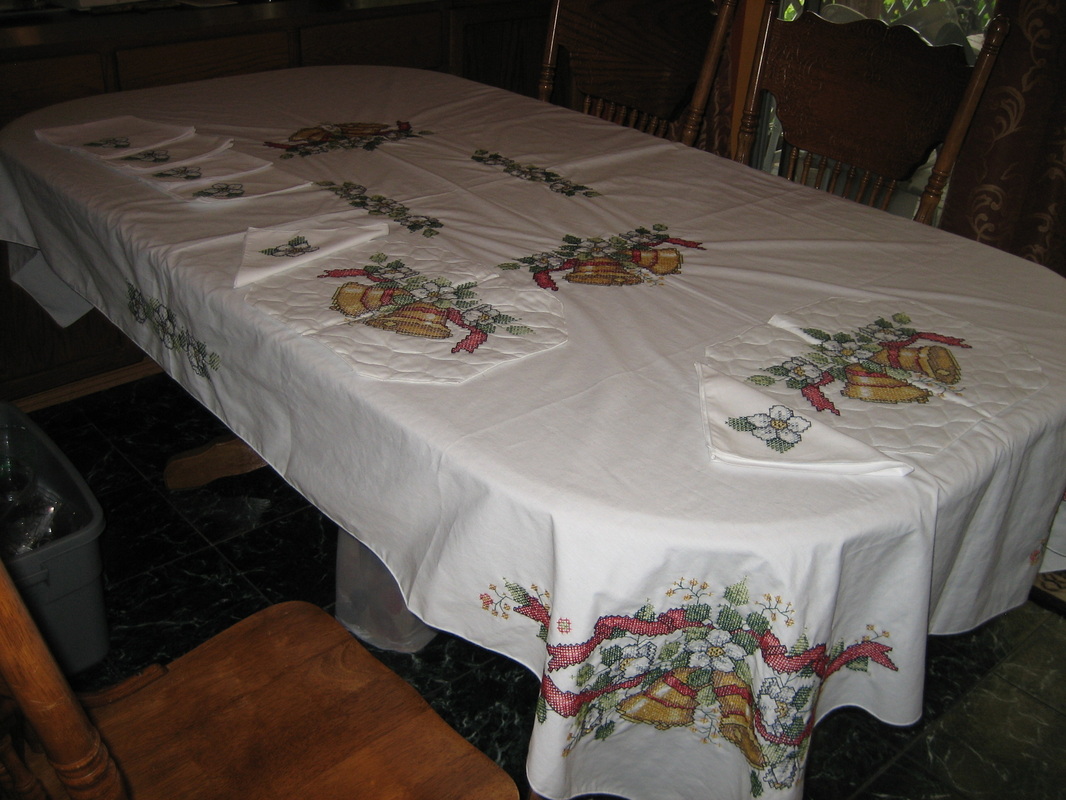
....And it is DONE! After approximately 280 hours, 35 minutes, The Christmas Holiday Bells 58" X 104" oblong table cloth, 2 placemats and 6 napkins are finally completed! Ensemble is worked in Stamped Cross Stitch. Here is the setup on my dining room table (with one leaf insert).
....And it is DONE! After approximately 280 hours, 35 minutes, The Christmas Holiday Bells 58" X 104" oblong table cloth, 2 placemats and 6 napkins are finally completed! Ensemble is worked in Stamped Cross Stitch. Here is the setup on my dining room table (with one leaf insert).
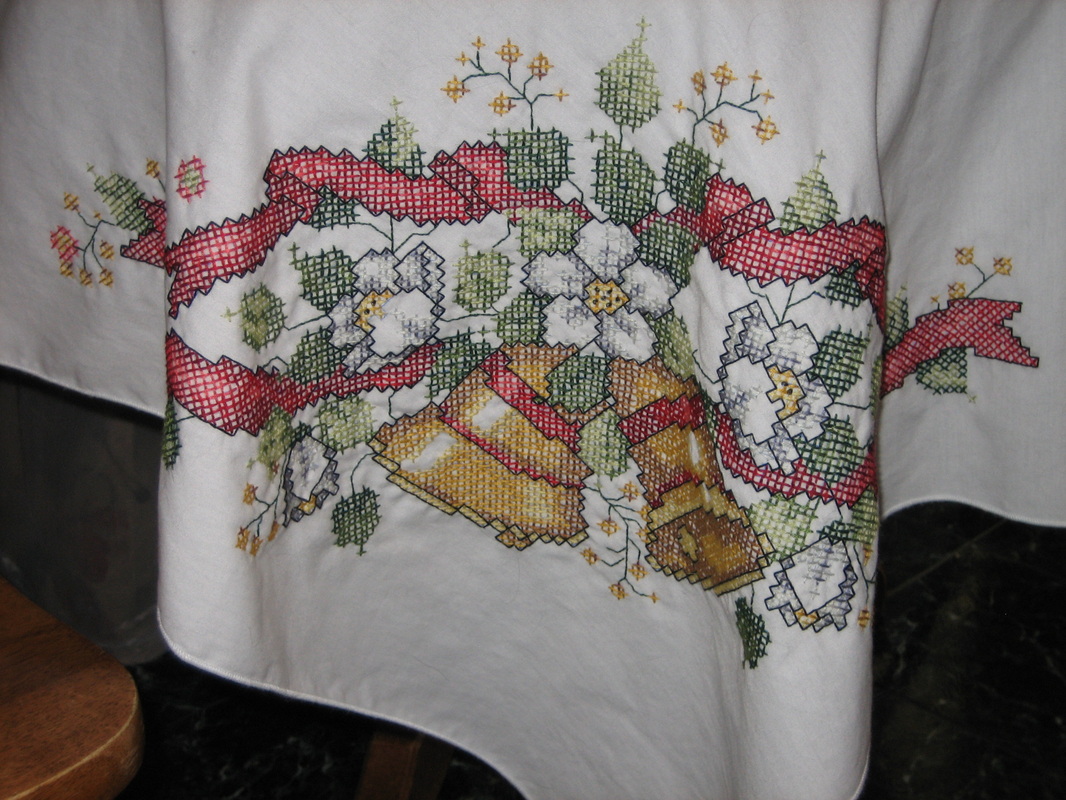
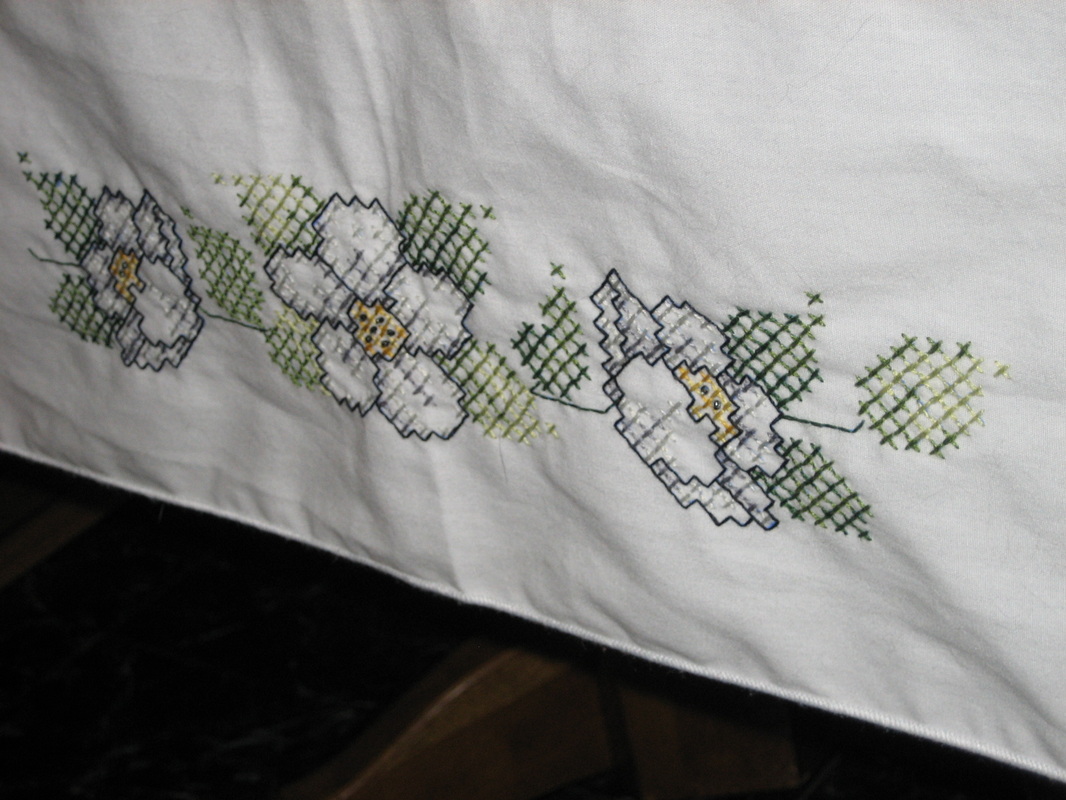
Close-up of the tablecloth....
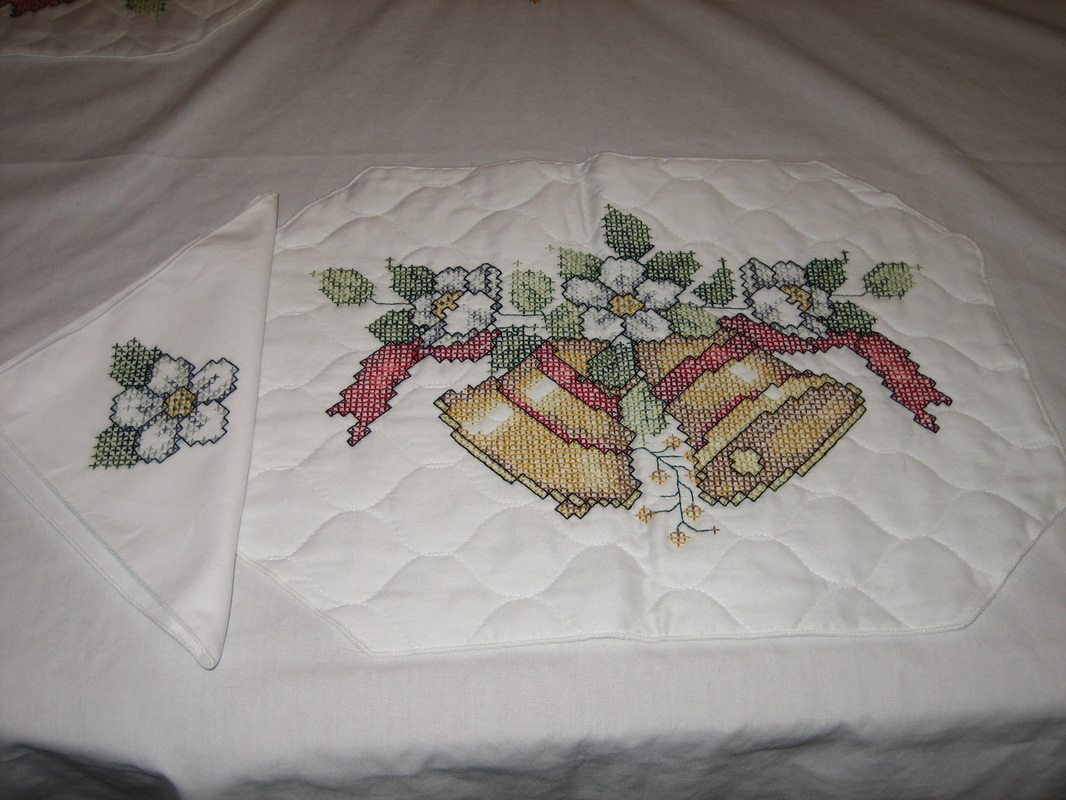
Placemat and napkin
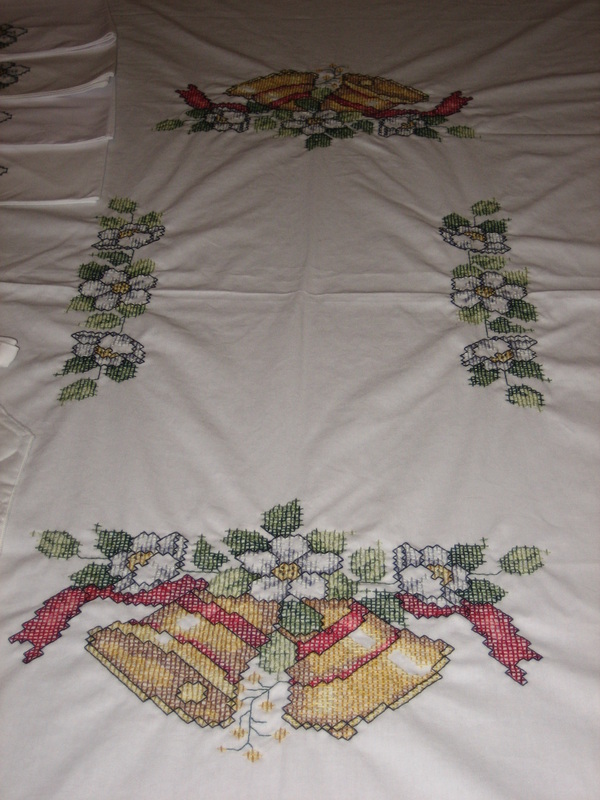
Center of the tablecloth
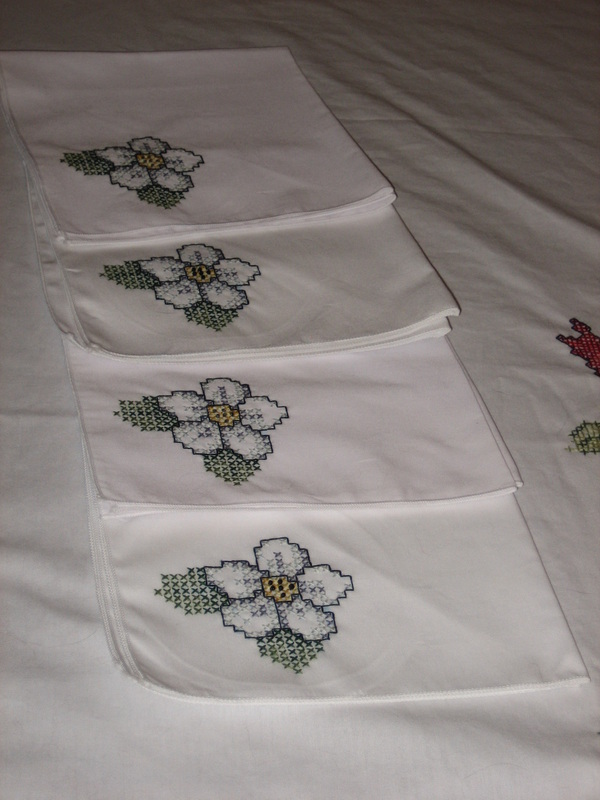
Napkins -- Notice the beads in the center of each flower. Beads were also used in the center of flowers on the placemats and tablecloth (you know how much I loathe French knots). A total of 156 dark grey beads were used on this entire project.
Side of tablecloth -- with beads
I started this project September 14, 2011. Between each section, I worked on smaller projects -- a project this large, one does need a break....The project was completed May 3, 2014. It looks great on my dining room table!
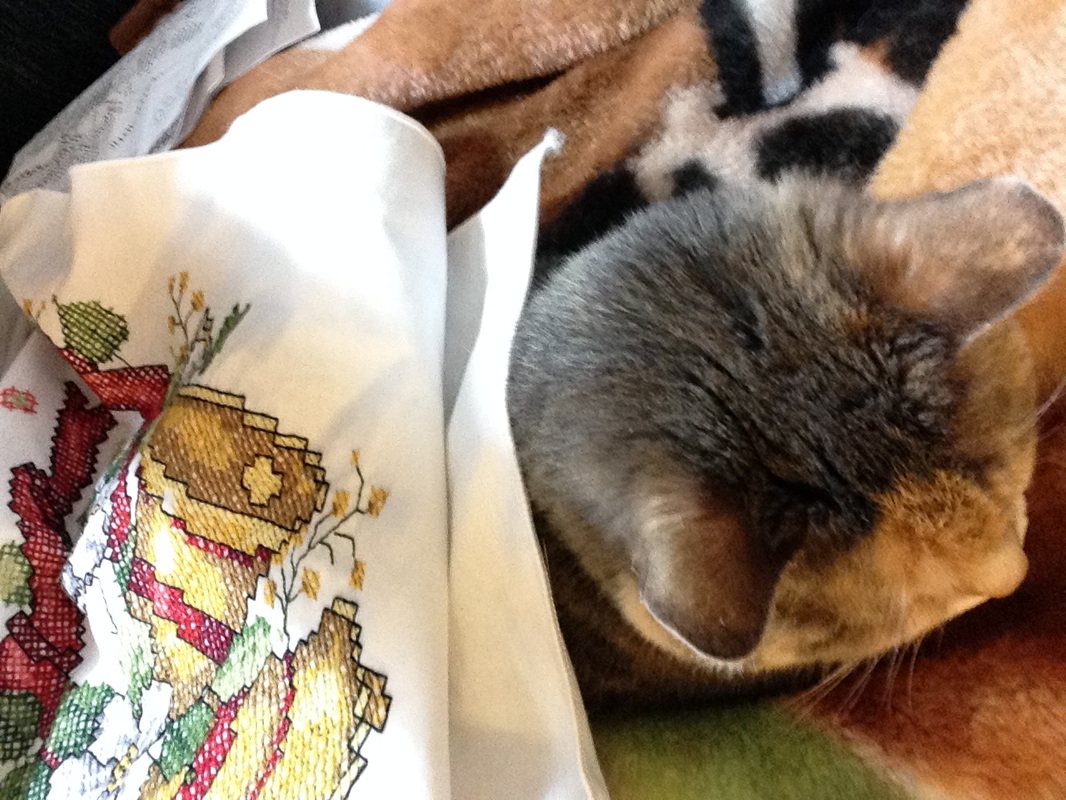
Of course, I always have plenty of assistance with my projects.
After completing the tablecloth, I took a couple days off from stitching as I had to re-organize my floss from this and another previous project before I started a new project. I also reorganized my stitching tubs, and just couldn't decide what to start next. I need to work on one of my Peafowl projects, but my head kept going to one of two lap quilts. Finally pulled out a lap quilt. Took one evening to sort the floss. Got a good start on the quilt last night, and I'm completely within my element!
What have you been stitching lately?
April 16
Wow! Has it been that long since I last posted?! Whoops!
But I haven't been bumming around. I'm almost done with that Christmas Bells tablecloth set I started two years ago. I have done a couple of small projects in between as well. My latest small project is in the wash, and I will photograph and post as soon as it is dry.
Hopefully, today's post will make up somewhat for lack of posts lately....
Last month, I won an advanced copy of Debbie Macomber's latest Blossom Street book, Blossom Street Brides. I love this series, and it was difficult waiting for the book. If you are unfamiliar with Blossom Street, the series centers around a knitting shop, the owner and friends (new and old). Each book also contains the knitting pattern of whatever class the shop does in the book. Sometimes recipes and quotations are included. There is a quote in Blossom Street Brides that I think you will all enjoy; it is perfect for anyone who uses beads in their needlearts. At a recent stitchery club meeting, I read it aloud to everyone -- it just fit! Here is the quote:
When you put beads in your knitting, you are really putting bits of light in your knitting. The gleam and color-play of beads adds a whole other dimension that could be demure or outrageous, as you please. Your choice of beads and yarn uniquely expresses your personality.
~Sivia Harding
designer and teacher
~Sivia Harding
designer and teacher
Blossom Street Brides by Debbie Macomber, Chapter Seven, Page 56. http://www.debbiemacomber.com/ Printed with permission by author and Ms. Harding.
I may not knit, but I have used beads in my cross stitching for many years. Beads really do add something extra to your projects!
I may not knit, but I have used beads in my cross stitching for many years. Beads really do add something extra to your projects!
February 26
Since our Stitchery Club meeting was cancelled last night due to me fighting a cold, we will meet on March 4, 11 and 25. I have been working on cleaning out my stash of cross stitching magazines (just do not have the room anymore!). You can relate to that, right? Come a little early to the March 4 meeting and be the first to go through the magazines to select what you want to take home to add to your library. I have three big stacks on the floor just waiting for new homes. Two members took home two stacks that were here at the last meeting (February 11), and they will bring back the unwanted issues in March. The current three stacks have not been gone through by other members (only me), so be sure to come a little early to get first pick! Some of the magazines still have their free small kits that originally came with them.
In going through the magazines, I found a few items to post on our website. I have already posted some, so here is another for today:
The A - Z of Stitching
A is for Aida Band. With a role of aida band, you can create everything from bookmarks, curtain ties, bands for cakes and candles; to bracelets, strips to sew onto guest towels or placemats, and more. It's worth keeping some in your stitching stash, and Sweigart sells a good variety of colours. Visit www.willowfabrics.com to find out more.
B is for Backstitch. This is a sore point with many stitchers who don't like spending hours outlining their design when it's so close to being finished. Unless the chart says otherwise, try to keep your patience in check and backstitch over one square at a time. Using longer stitches will make your project look untidy, and won't make the most of your hard work. (Personally, I love backstitch as it tells me I am finally at the end of a lengthy project!)
C is for Cards. We're sure you know you can cross stitch your own cards, but did you know you don't always need to put it inside a specially-designed mount? Simply fold a standard piece of card in half and stick your finished stitched piece to the front using double-sided tape. Dress it up a bit by fraying the ends of the fabric beforehand, or gluing ribbon around the edge to make a "frame". (You all know I do cross-stitch greeting cards and have seen a variety on this website.)
D is for Determining fabric count. If you often switch between fabric counts, chances are your stitching stash my also be full of different counts of fabric. You can count how many holes there are per inch to find out what the size is, or you can hold a handy fabric gauge up to it and let it do the counting for you. Pick up yours at Sew and So (UK). (1-2-3 Stitch in the US, and Amazon.com also have it. I really need to get one of these!)
E is for Evenweave fabric. Don't let the high stitch count stop you from trying to stitch on evenweave! It has a more open weave than Aida, meaning it's more flexible and perfect for stitching bags, table linen and cushions.
F is for Framing. Save the money you spend on taking your stitched pieces to the framers and sign up for a course from Diyframing (UK). In just a day, you'll learn the basics of planning, designing and making a frame from scratch and can start finishing off your own pieces all by yourself.
G is for Greener stitching. Photocopying charts is a great way to keep the originals in pristine condition so you don't have to mark them up. However, a greener way to go would be to have the originals laminated at your local printers. You can mark your finished stitches as you work through the chart, and wipe it all off when you've finished. (I always enlarge and copy my charts as the originals are too small to see comfortably!)
H is for Hoops. Super grip, spring tension and flexi! Don't be afraid of trying a new style of hoop if the one you're using isn't working well for you. Siesta frames has a good range of hoops and frames to choose from.
I is for Initials. Personalize cards, towels, bags, handkerchiefs and more by stitching your own or a friend's initials using decorative ABC charts. We publish them in Crazy, or check out the chart shop to find some more.
J is for Joining a club (like Northwest Stitchery Club here on the Pacific West Coast of the USA!). Find stitching friends to chat to and learn from by joining a local stitching group. Or, if you can't find one, then why not start your own up?
K is for Kids can stitch too! Teaching your kids how to take part in the craft you love will not only encourage them to be creative in a different way, but will also give you something to enjoy together -- particularly on a rainy day home from school! Most companies have a range of easier kits for kids to start stitching with, or, if you've got some spare fabric and thread, go to our Crazy kids pages in each issue to find a simple stitch for them.
L is for the Loop method. Starting off with a knot is a big stitching faux pas! Either secure your thread underneath the first few stitches, or use the loop method. Separate one strand and double it over. Pass both ends through the needle, forming a loop on the other side. Bring the needle up through the fabric, leaving a bit of the loop underneath. Pass the needle back down through the fabric, going through the loop. Pull the thread taught (taut) and continue stitching normally.
M is for Making time. Carry your project around with you during the day, and sneak in a few stitches during your lunch hour, on the bus or while in a waiting room. Stitching is also your time to relax, so make sure you keep some time free each evening to let yourself -- and your thread -- unwind.
N is for New babies. Special occasions give stitchers a chance to shine, and the arrival of a new baby is no exception. Have your gifts stand out at showers this year with a personalized item for the new little one. DMC has a wide range of ready-to-stitch items including bibs, bags, booties and bunnies. (Visit DMC USA for US customers).
O is for Organization. Having an untidy stash of threads, fabric and charts means we're more likely to just go out and purchase new items rather than laboriously digging through the piles and find what we need. Save yourself time and money by investing in a few well-chosen storage solutions.
P is for Preventing frayed fabric. Hem the edges of your fabric before you start stitching, especially if you're working with evenweave. Just run some stitches either over or around the edges or, if you're not keen on sewing, bind them with masking tape.
Q is for Quick gifts. When you're in need of a quick gift, never underestimate the versatility of a stitched keyring, coaster or set of napkin rings! We've got lots of small designs in Crazy that can fit these, but you can also stitch your favourite motif on smaller-count fabric to squeeze it into the small plastic frames. Framecraft has a great selection of these. (Oh wow! Where has this website been hiding?!)
R is for Reviewing kits. It can be very disappointing to find out that a kit isn't what you thought it would be, but you can avoid this if you know what sorts of things to look for before you buy. Look carefully at the picture on the front to determine the difficulty -- the more colour changes and stitch types there are, the harder it will be. Before purchasing, also ask how the chart and instructions are presented -- is it in colour, large print, or clearly laid out? Decide what style you find easiest to work from and choose kits that are the right fit for you.
S is for Stopping fluff. Friction from thread being passed continually through your fabric. Often this results in loose piles of fluff building up around your stitches, which may make your design look untidy in spite of your very neat stitches. Not to worry, however -- simply wrap a piece of masking tape around your forefinger and middle finger with the sticky side out, and press gently over your finished stitches to pick up those loose bits.
T is for Triptychs. For a stylish way to dress up a room, stitch a triptych by choosing three complementary designs and mounting them in a 3-aperture frame. Or, splash out on a lovely Lanarte flower kit from Sew and So.
U is for Unique stitching. Make a point to add your own touch to your stitching by using a different colour thread, adding beads and charms or stitching a saying with the design. Not only will your work stand out more, but you'll wake up your creative side and start thinking of lots of different touches to add to your future projects.
V is for Variegated thread. Effortlessly create subtle or defined colour distinctions in your stitching by using variegated thread. Threads that contain varying tones of a single colour can create lovely effects on things such as water, giving it a depth that can't always be achieved by switching thread colours. Or, stitch single colour items in multi-colour threads to give a unique touch to the design. Next time you're in your local craft shop, check out the Anchor (or your choice of floss brand) thread display to see their range of variegated threads and get some inspiration for your next project.
W is for Waste canvas. Don't waste your waste canvas! Before you throw that scrap of old aida away, consider what you can do with it. Embellish the edges of sheets and pillowcases, dress up a plain t-shirt, turn your apron and oven gloves into styled accessories, or transform a set of plain cloth napkins into a set of elegant table linen.
X is for X-Stitch Birds. There's not too much longer to go until the first day of spring! Start thinking of the budding days ahead by stitching a design of your favourite bird. Based in Dorset, England, they sell affordable charts and kits of birds native to both Europe and North America. You'll get a choice of stitch count as well as a wide selection of beautiful birds. (Oooh, another wonderful website that's been hiding on me!)
Y is for Your stitching thoughts. This year, keep track of the projects you stitch and how you found them in A Stitcher's Journal. That way, the next time someone asks you about one of your finished pieces, you can pull your journal out and tell them exactly what you thought! Buy one for yourself or a friend in blue or copper at Wimblebees (or Yarn Tree if you live in the US.
Z is for Zebras. Find some in Jayne Netley Mayhew's books, Cross Stitch Safari and Cross Stitch Jungle. (I have Safari, but Jungle is still on my want-list!)
~~ Cross Stitch Crazy, January 2009, Issue 120
February 25
Sick again, so no Stitchery Club meeting tonight. We will meet on March 4 (to make up for tonight), 11 and 25.
Sick again, so no Stitchery Club meeting tonight. We will meet on March 4 (to make up for tonight), 11 and 25.
February 14
For those of you who are dealing with feet of snow, hopefully, you are warm and cozy, and able to stitch. We received a total of 2 inches with our single snow storm last weekend.
Here is my latest project:
For those of you who are dealing with feet of snow, hopefully, you are warm and cozy, and able to stitch. We received a total of 2 inches with our single snow storm last weekend.
Here is my latest project:
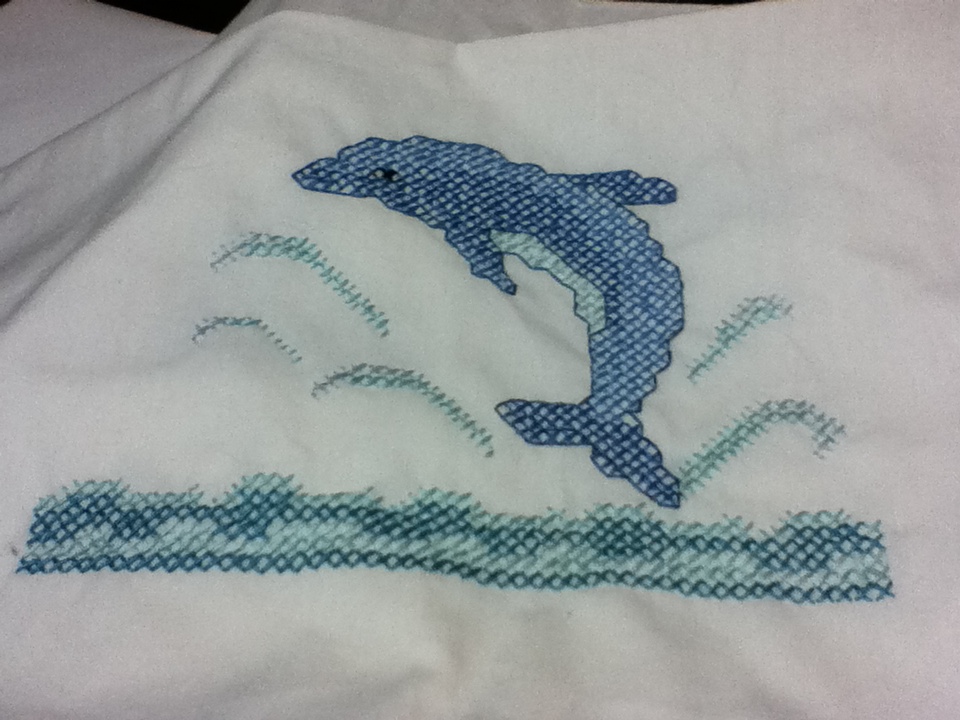
This is a Dolphin Dresser Scarf with this design at both ends. My husband enjoys Dolphins, so it is for him. This was a quick and easy stamped cross stitch project from Herrschners.com, a great company to get your next project from. If you have plenty of projects at the moment, then feel free to contact them for their latest catalogue, perfect for drooling!
Stay warm, safe and enjoy the peace that snow brings. Happy Valentine's Day everyone!
Stay warm, safe and enjoy the peace that snow brings. Happy Valentine's Day everyone!
February 11
I am in the process of cleaning out my stitchery magazines. I am taking charts out that I strongly thing I will eventually do in the future, but there are tons of charts still in the magazines for others to enjoy.
In January 2010, Issue 133, of Cross Stitch Crazy, I found an article that would benefit members:
Top Tips: Where to find free charts (click on the name to go to the website)
1. For designs by Connie G Barwick
2. Take your pick from Stitch the Night Away
3. Use the Celtic Alphabet Generator to chart your own name -- Looks like this is no longer available. If anyone knows of a similar program, please let us know.
4. For a stars and stripes chart search the free patterns at Caron. Actually, just click on Free Patterns and explore. The site is interesting enough to Bookmark and come back periodically to check out what is new.
5. Don't forget that you can find friends and free charts at Craft Bubble. Yes, you will find yourself at Cross Stitching.com, but that is okay as there is plenty to see and do.
6. If you like blackwork. Ooooh, I see some nice Blackwork patterns I would love to try! Worth a look!
7. You can find a Dragon chart
8. Download a chart by Happy Threads Pty. Ltd. Well, that link didn't work, so if anyone know if this company is still around, please let me know. (Remember, this information is 4 years old.)
9. You'll see lots of free charts at DMC. This is one of my favorite sites.
10. Join the Club
If you know of other sites where we can acquire free cross stitch patterns, please let us know so I can post them here.
Happy Stitchin'!
January 29, 2014 -- Update
Ooops, one of my members reminded me I didn't put up this year's Stitchery Club schedule. Here it is:
February 11 and 28
Valentine's Day, Friday 14th
March 11 and 25
April 8 and 22
Easter, Sunday 20th
May 13 and 27
Mother's Day, Sunday 11th
MAY HAVE TO CHANGE APRIL OR MAY DATES DUE TO FRIENDS COMING IN FROM BELGIUM. I'LL LET YOU KNOW....
June 10 and 24
Father's Day, Sunday 15th
July 8 and 22
Independence Day, Friday 4th
August 12 and 26
September 9 and 23
October 14 and 28
Halloween, Friday 31st
November 11 and 25
Veteran's Day, Tuesday 11th
Thanksgiving, Thursday 27th
December 9 and 23
Christmas, Thursday 25th
Local members -- If you want to hold a stitchery club meeting at your home, let me know and we will pick a date(s).
January 29, 2014
Happy New Year! Hope you all had a safe celebration!
Here are on the west coast is Super Bowl mania as our local team, Seahawks, made it to the super bowl this year, against the Broncos. My husband and I are not football fans, but congratulations to both teams who made it to the Bowl!
I got the nasty bug right after I posted the last blog last month, so now I am trying to get caught up.
Here is what some of our members have been up the past couple of months:
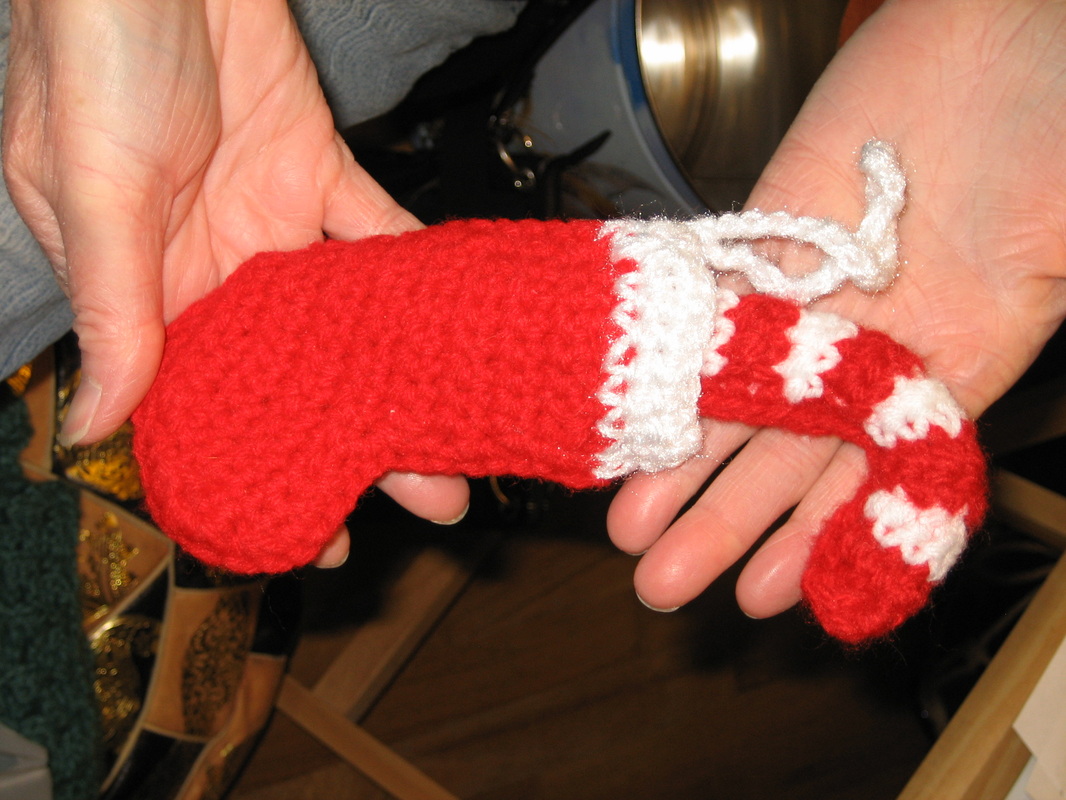
Carol Ann crocheted this adorable stocking with candy cane for me a couple of years ago. It hangs on my stitching lamp.
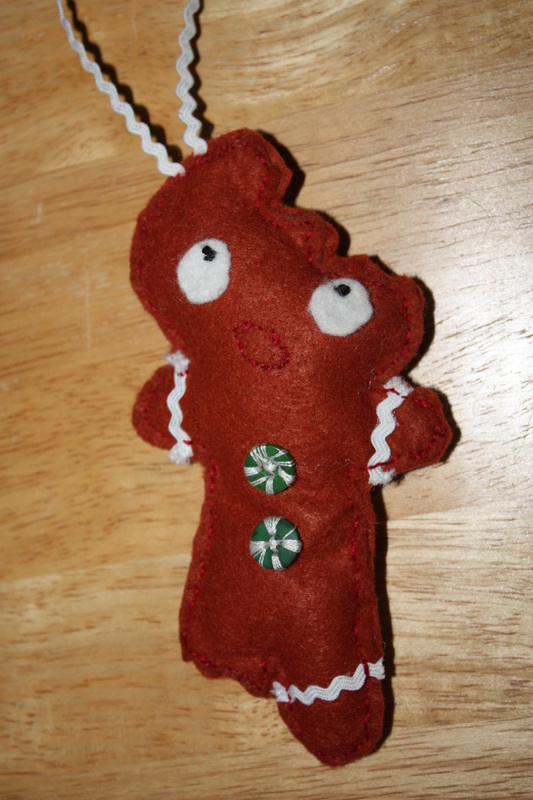
Carol Ann hand sewed this cute little Gingerbread Man for me this Christmas. So adoreable!
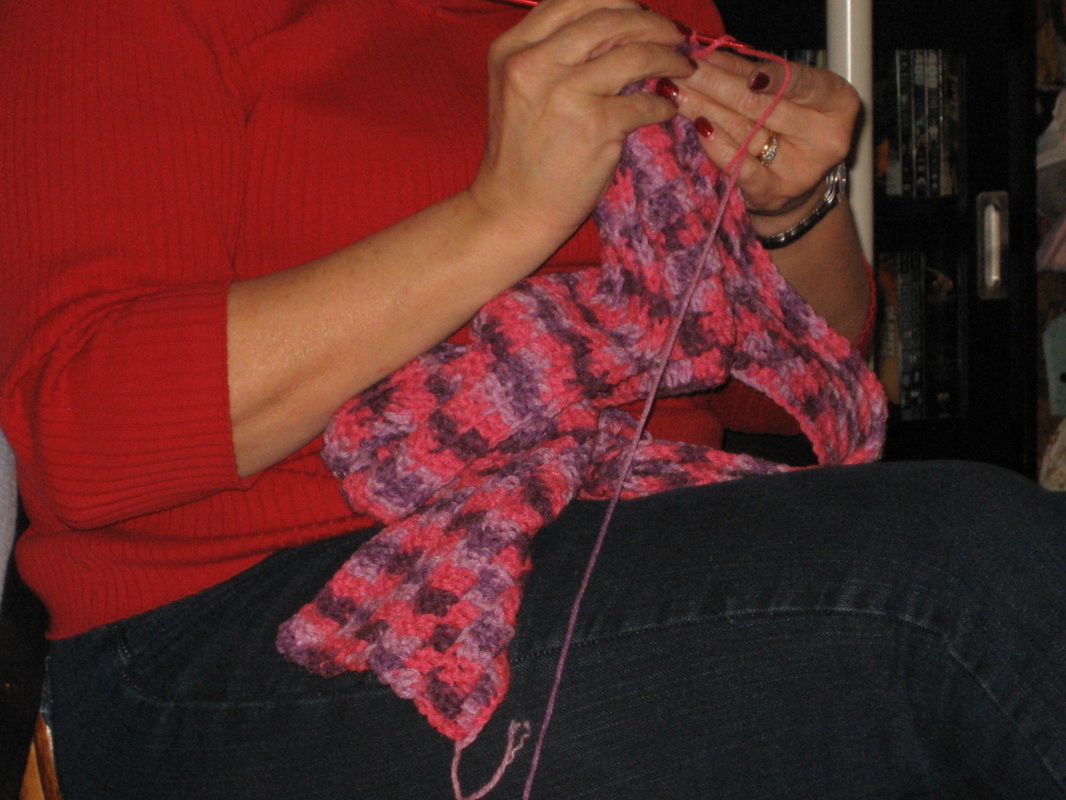
Kimberly furiously crocheting a project in time for the holidays!

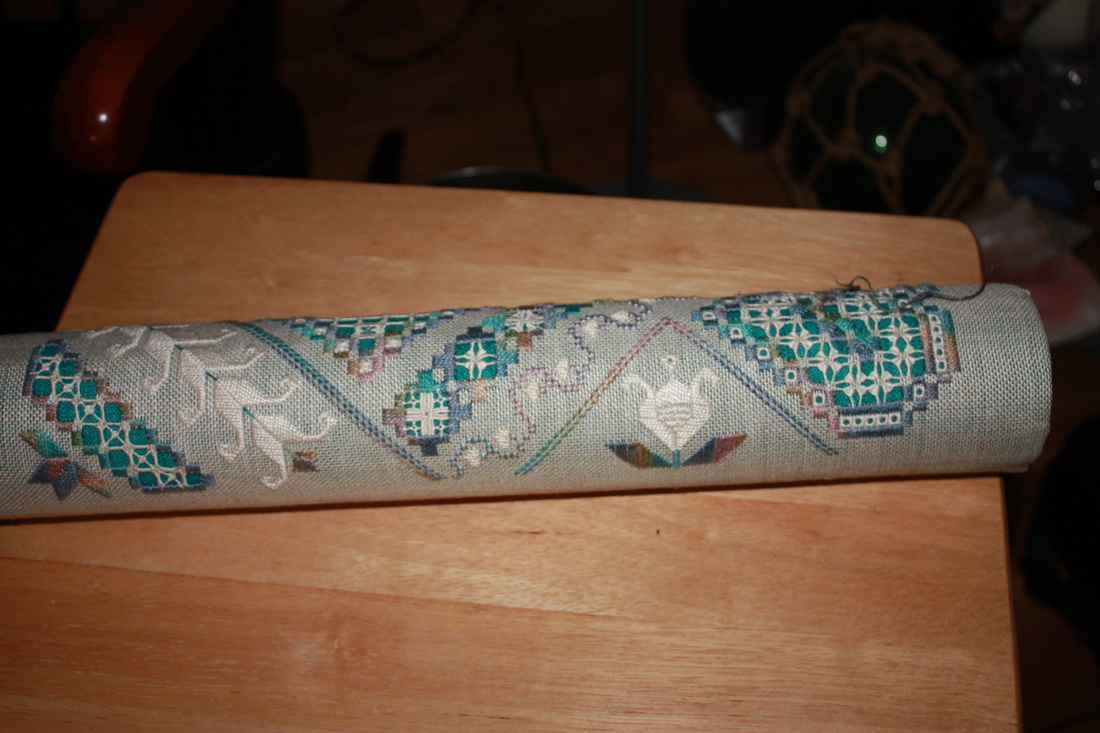

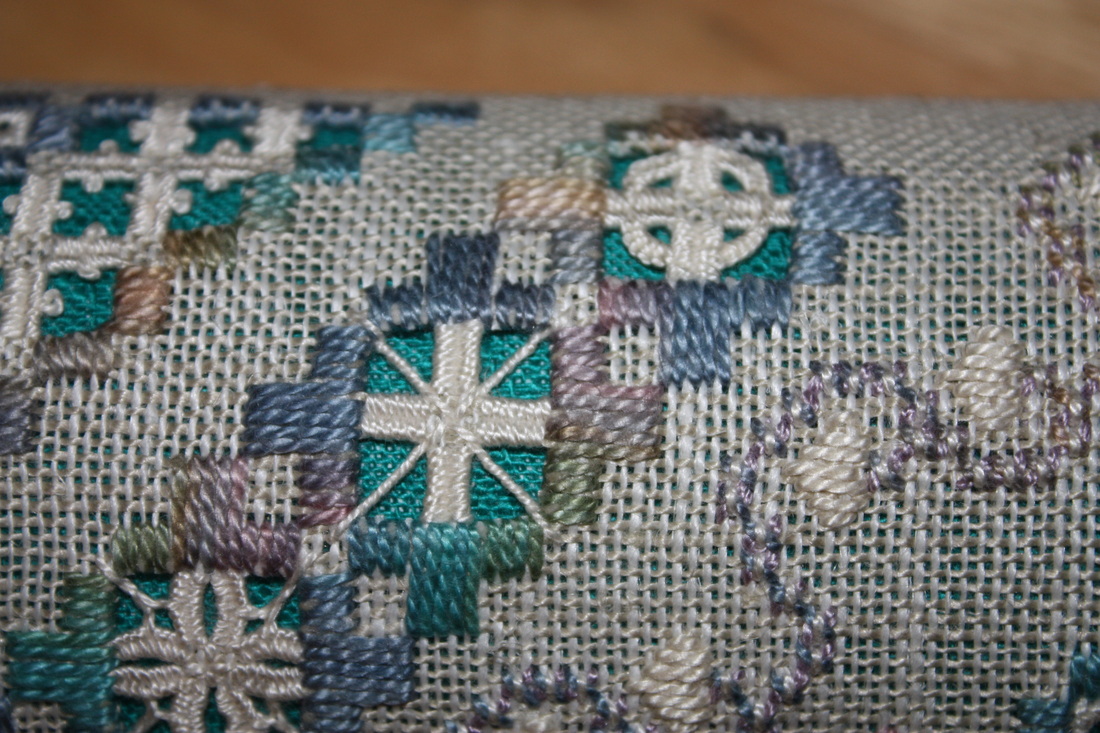
A Hardanger roll that was a gift to Wendy. These were used back in the olden days as a way to roll linens so they didn't wrinkle. Look at the details of this treasure!
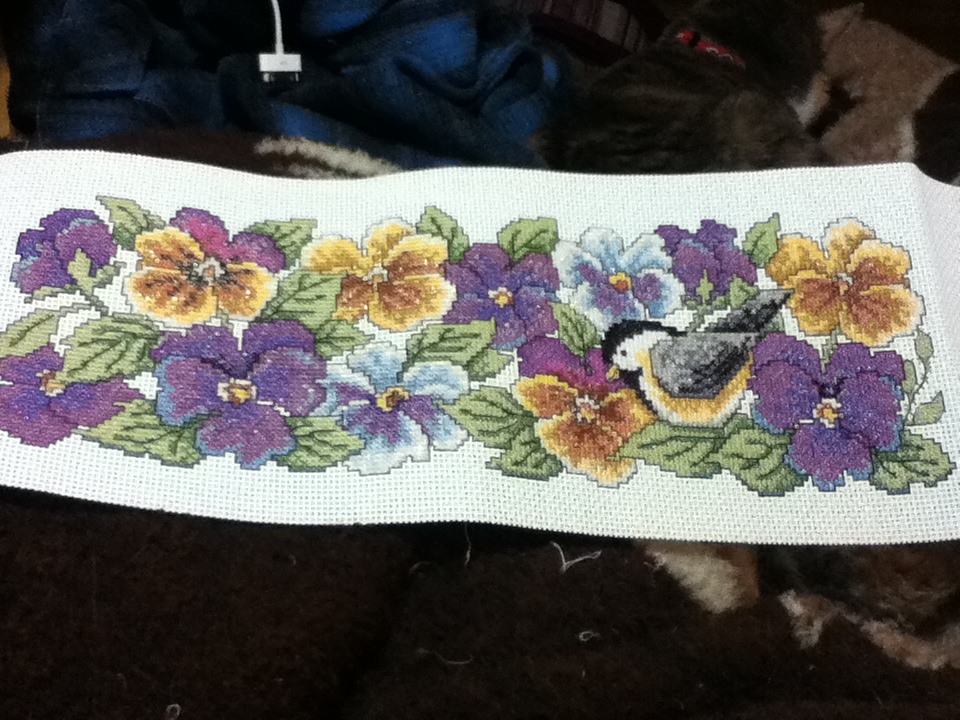
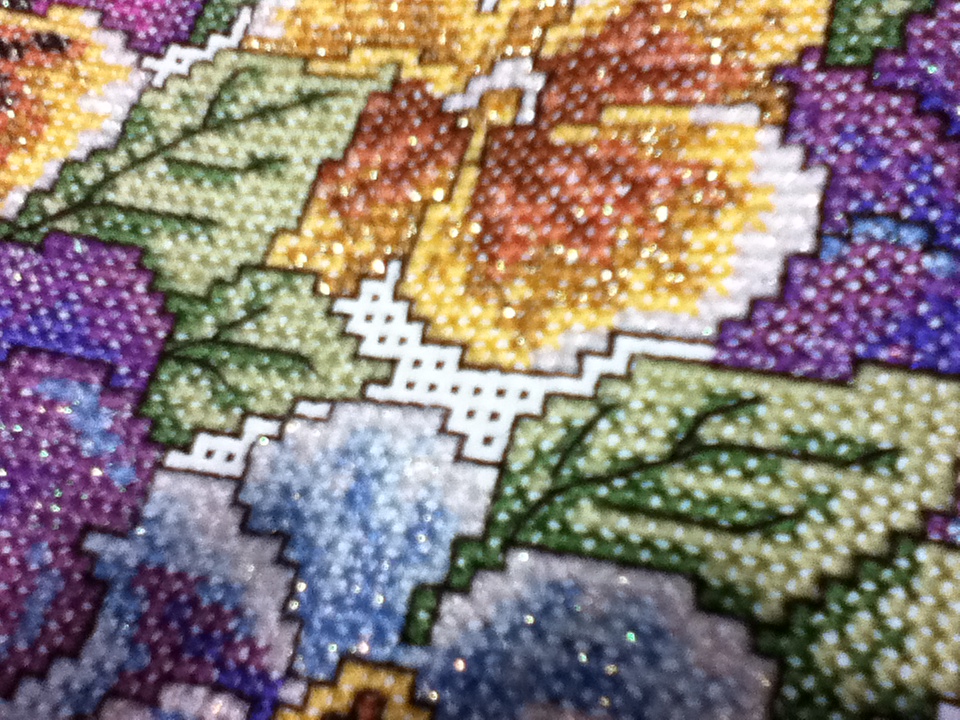
It is finally finished! Wendy has been working on this gorgeous Candle Wrap for months! She has done this candle wrap before, and gave it away as a gift. This time, she did it for herself. It is difficult to see, but she used metallic threads in the design. It is simply breathtaking in person. Great job, Wendy!
The knitted afghan she did for her granddaughter turned out very well and her granddaughter simply loves it. We are still waiting for a photo to post.
I have more projects to post, so stay tuned!....
The knitted afghan she did for her granddaughter turned out very well and her granddaughter simply loves it. We are still waiting for a photo to post.
I have more projects to post, so stay tuned!....
December 27, 2013
Hope you all had a wonderful and relaxing Christmas! My husband and I spent the day with friends/roommates from our college days and their families.
One of our Stitchers who is not able to attend the meetings, stopped in last night for a visit and to show off some quilts and doll clothes she recently completed.
Below are doll clothes she crocheted; the last item (light green dress) she knitted.
And now for her quilts....
Knitting Lamb quilt -- this is so cute! See close-ups.
Twizzle quilt -- cut fabric in squares and turn them to make the interesting designs. Last two photos show close-up portions of quilt.
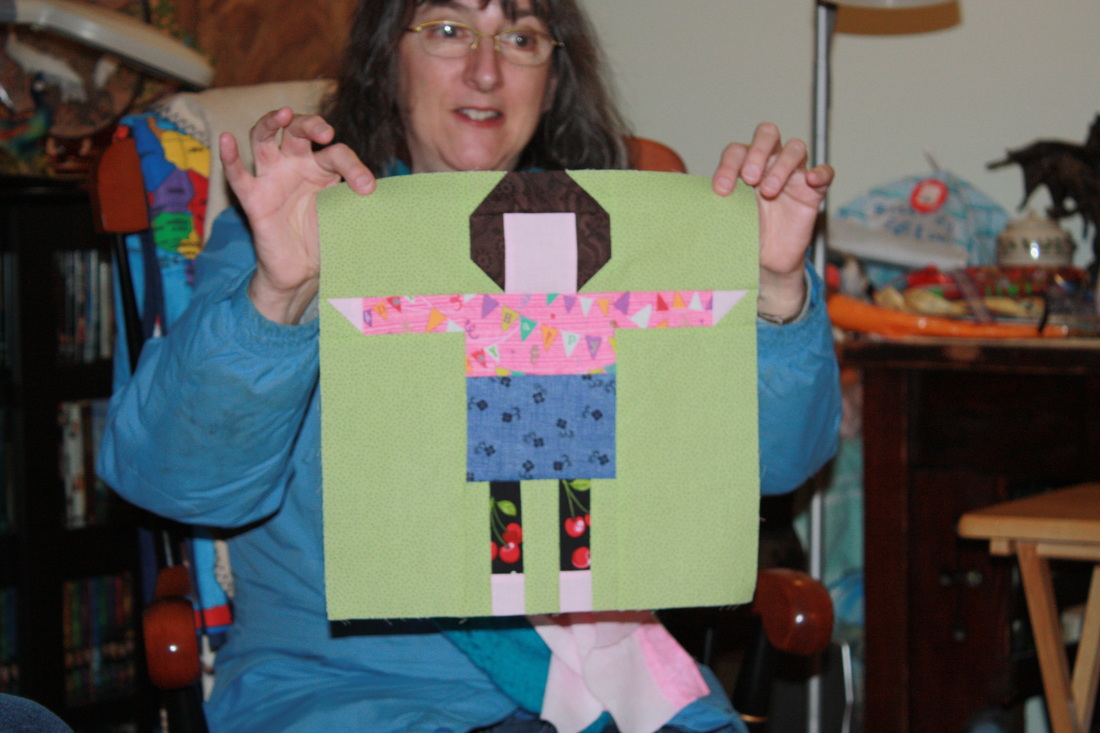
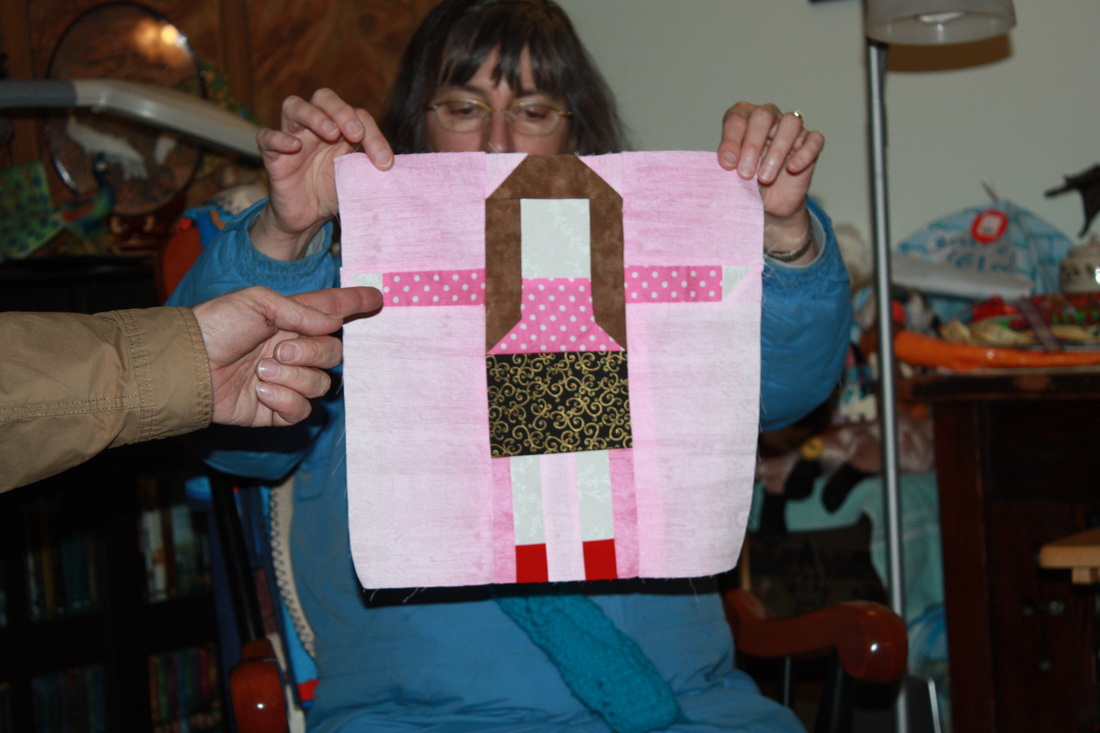
These are Block Magic by Nancy Sebro-Johnson (?). These are self-portraits of herself (Heidi) and her daughter (pink one on right). They had a lot of fun designing them.
Hope you enjoyed these photos. Would love to see your photos of what you accomplished this year!
Hope you enjoyed these photos. Would love to see your photos of what you accomplished this year!
Your Guide to: Washing and ironing your stitching
1. Add a mild detergent to some lukewarm water and let your stitching soak in it for several minutes. Don't be temped to rub the fabric -- simply let it lie there.
2. Once your stitching has soaked, swish it around gently, then rinse thoroughly in cold water.
3. Keep rinsing until the water runs clear, and all the soap is washed out.
4. Don't wring out your stitching, as this can stretch the fabric. Instead, lie it on a towel, then roll it up so the towel absorbs the water.
5. There are certain marks that are harder to remove, such as those made by a hoop. To get rid of these, try a stain remover. Even better, bind the edges of your hoop with cotton fabric, or remove your stitching in between sessions to prevent getting them in the first place!
6. Fabric and threads from the main manufacturers can be washed in a machine on a delicate setting. If you're bought budget fabric or threads, test your finished piece before you wash this way with scrap aida and thread.
7. Lay your stitching face down on a clean, fluffy towel -- this is particularly important if you've used embellishments such as beads, as it gives them something to sink into.
8. With a medium iron, gently press your stitching by holding the iron in the same position for about 15 seconds at a time. Make sure not to glide the iron across, as you can distort the fabric.
9. If your stitching is particularly creased, lay a damp tea towel over the top before you iron. The moist heat from the tea towel will help steam away any creases.
10. Be careful your iron isn't too hot, otherwise, you could end up with scorch marks -- not what you want after all your hard work!
(reprinted from Cross Stitch Crazy, August 2013 issue)
Wishing you all a Very Safe and Happy New Year!
November 26
Since Hanukkah arrives on Thanksgiving Eve, I cross stitched a card for some friends:
Since Hanukkah arrives on Thanksgiving Eve, I cross stitched a card for some friends:
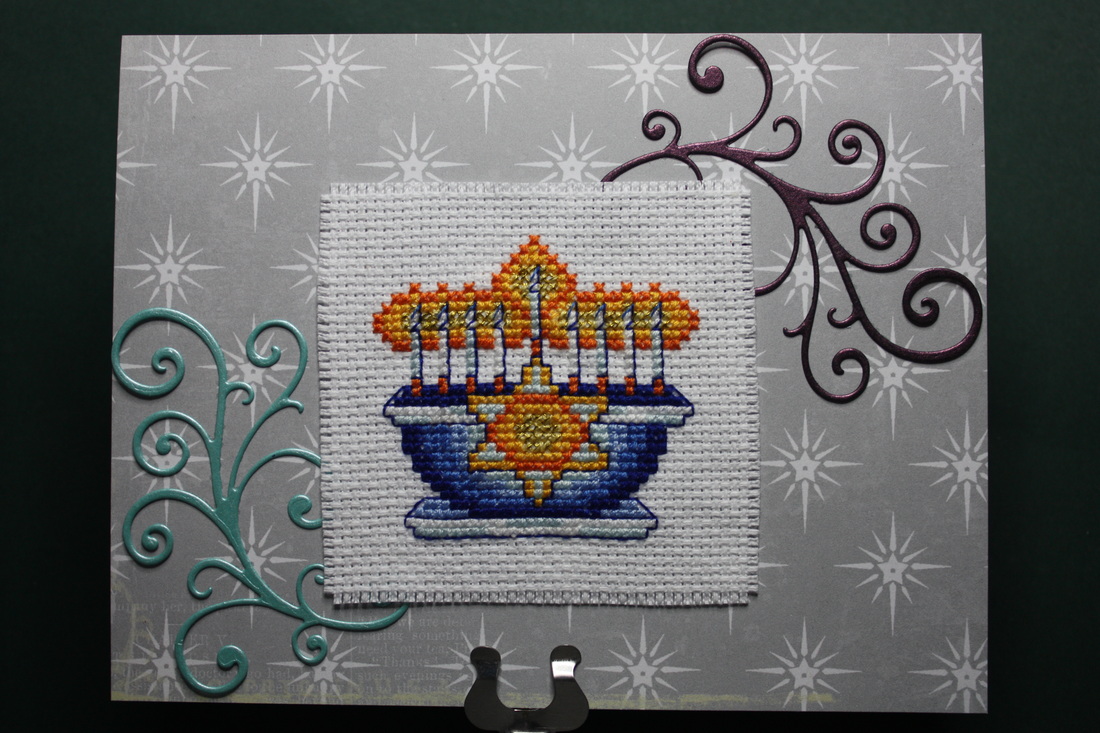
This is counted cross stitch in regular DMC cotton floss and gold metallic thread. Base paper is from Very Merry Christmas paper pack (Echo Park). I put in a request to DCWV to produce a Hanukkah paper pack and goodies for next year. My request was forwarded to the design team, so keeping my fingers crossed! The two Small Swirls (MyFavoriteThings) complete this simple, but cute Hanukkah greeting card.
To see more Hanukkah cards (though not cross stitch), pop on over to my Earth Dragon Creations greeting card blog.
Update on the baby bibs I did earlier -- The family received the bibs and love them. The baby is too small for them right now (6 weeks old), so I'm looking forward to some photos when he gets bigger.
I completed Unicorn and Pegasus designs for greeting cards, but they are too large. So, I have a couple of ideas. When completed, I will post photos, so stay tuned!
Now I'm working on a wedding sampler, then hopefully, I can get back to my Christmas table cloth I started two years ago!
November 19
Sometimes I see great tips in stitching magazines. Here are some great tips from October 2012 issue of Cross Stitch Crazy on Interfacing:
1. Always lay your fabric shiny side down, and iron over the non-shiny side.
2. Do not use steam when ironing on interfacing.
3. Use white interfacing behind pale fabrics and black interfacing behind dark ones, to blend in the holes.
4. Use interfacing to hide messy stitching on the back.
5. Do a test run using a sample of your chosen fabric and interfacing, before experimenting on your actual stitched piece.
6. Iron interfacing onto the back of your stitching before you start to work the backstitch, to hide trailing threads.
7. If stitching through the interfacing, use a sharp needle to pierce it cleanly.
8. Back small designs with interfacing before cutting out, to prevent fraying.
9. Avoid using interfacing on pieces featuring metallic threads, which cannot be ironed.
10. Use heavyweight interfacing to add stability to aida band and other floppy fabrics.
Have you used interfacing on any of your stitching projects? Have a few more tips to add to the above list? Let me know and I'll post them.
Also, in reference to #3 above, where can I get black interfacing? I have never seen anything other than white.
Check back in a few days and I will have hints and tips on washing and ironing your stitching!
November 6
I have loads of items on my desk waiting to be uploaded to the website to show off. As I slowly go through the pile, you will get to see them here.
First off, a couple of months ago, I picked up at my local drug store the premier issue of Stitch-It...today (click on magazine title to go to their website). This magazine is printed in the United States. It is designed for the beginner -- tips and techniques in cross stitch, embroidery, applique, plastic canvas and more. Even though I've been stitching for many years, there are still helpful items in the magazine. Designs and patterns are helpful to everyone. Advertisements showing the latest are a must for everyone. It is a nice starter magazine, so pick up a copy wherever magazines are sold and give it a look-over.
Secondly, I'm sure you have heard of and probably even purchased items from Janlynn.com. Did you notice they have free charts to download? (Click on company name above to go to their free charts area.) Besides cross stitch, there are also patterns and designs for card making, floss and jewelry designs. Give it a look, there are lots of cute designs, and print off what you need for your next few projects. I printed off 9 designs I'd like to do over the next year.
If you live in Washington state, have time on your hands and would like to volunteer, the non-profit Clothing and Textile Advisors aims to promote sewing and needle and textile arts through educational and charitable activities within the community and it's membership "one stitch at a time". They have periodic eight-week CTA training orientation sessions in Everett. They offer hands-on classes throughout the year for youth and adults, including their annual youth program, Camp Stitch-a-Lot. There are other events they are involved in. If you would like to join their program, contact Carla Peery 206-595-9717 or [email protected] (information The Everett Herald, March 12, 2013).
If you do not live in the area, is there a similar program in your area?
Thirdly, I have added a new word search puzzle under Puzzles & Games. Enjoy it!
Lastly, do you create cross stitch greeting cards? You have probably seen many of mine over time on this website which I give as gifts or sell to supplement my disability income. If you do not do greeting cards, or do not have time to stitch them, but would like to get a handmade greeting card for family members and friends, I have a number of cards available at I Did It Creations. This is a new on-line crafts company (opened October 1); it was designed for crafters to sell their wares other than Etsy as Etsy has become so large. If you would like to sell your crafts on-line and cannot get a foot in the door at Esty, contact Robyn at I Did It Creations. Monthly fees are low. To view my cards, they are listed under Earth Dragon Creations.
All for now. Have a great week!
October 23
We had our second October meeting last night. Everyone was present, including my husband. The following are photos of what members are currently working on:
We had our second October meeting last night. Everyone was present, including my husband. The following are photos of what members are currently working on:
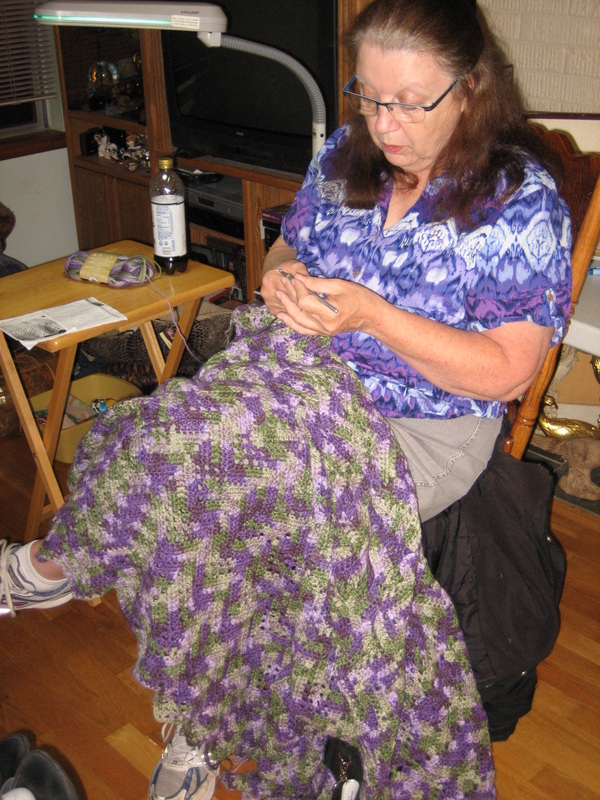
Wendy working on an afghan for her granddaughter for Christmas.
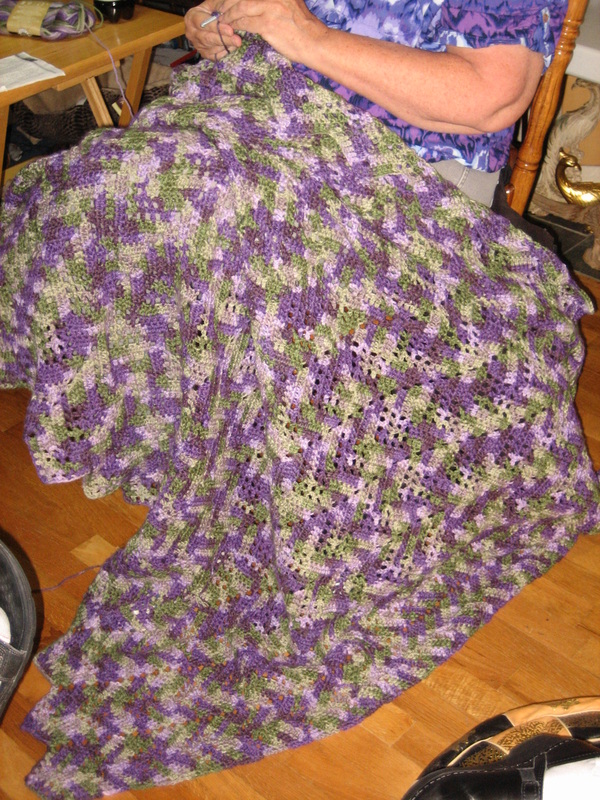
Don't you just love these colors?!
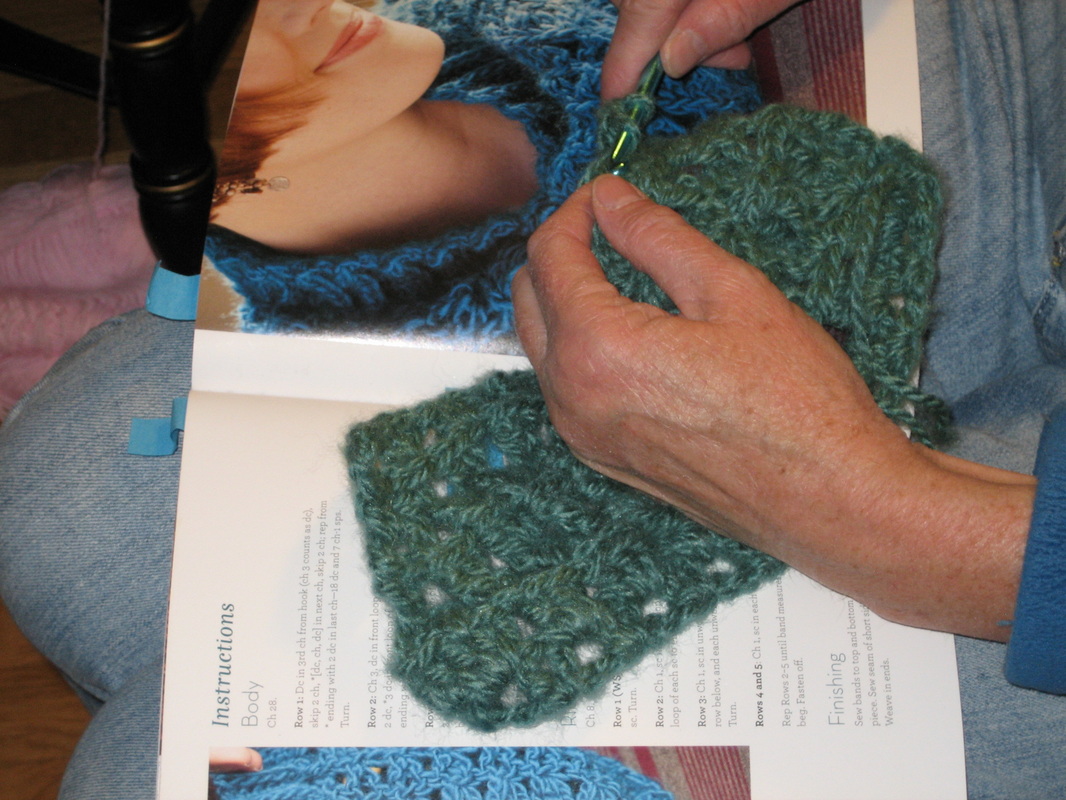
Carol Ann working on a project -- I believe it is another hat.
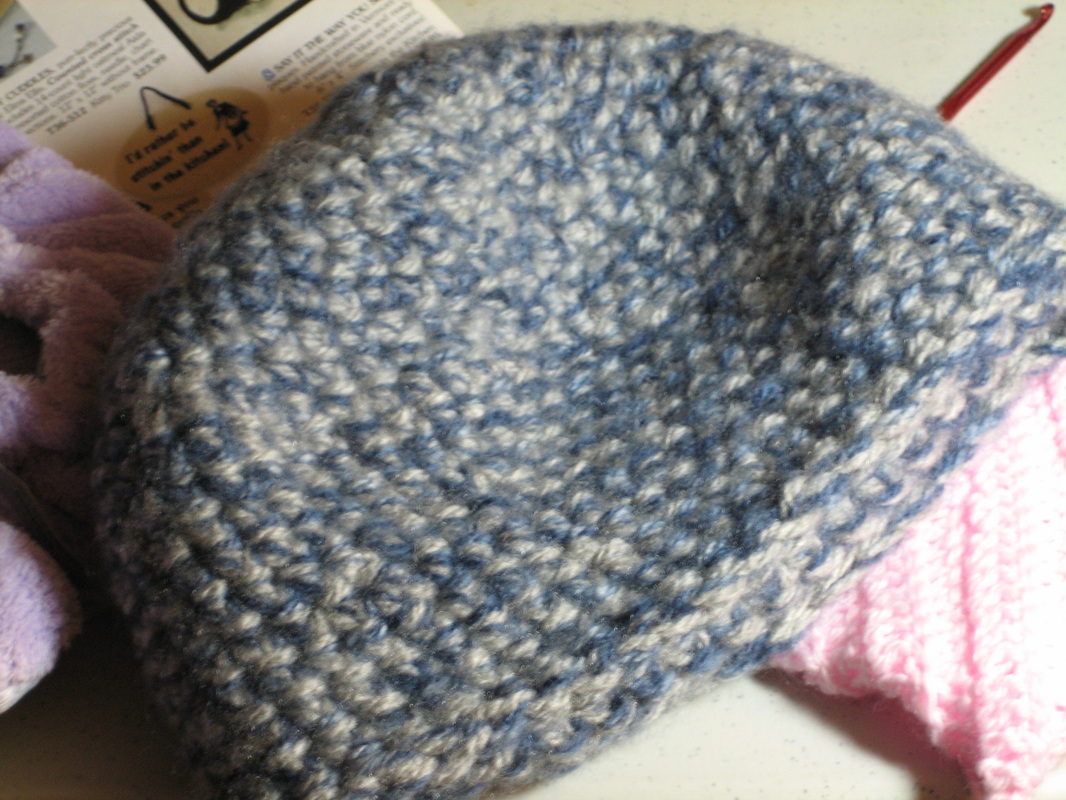
A snug little hat that Carol Ann made. Member Kimberly loved it so much she bought it!
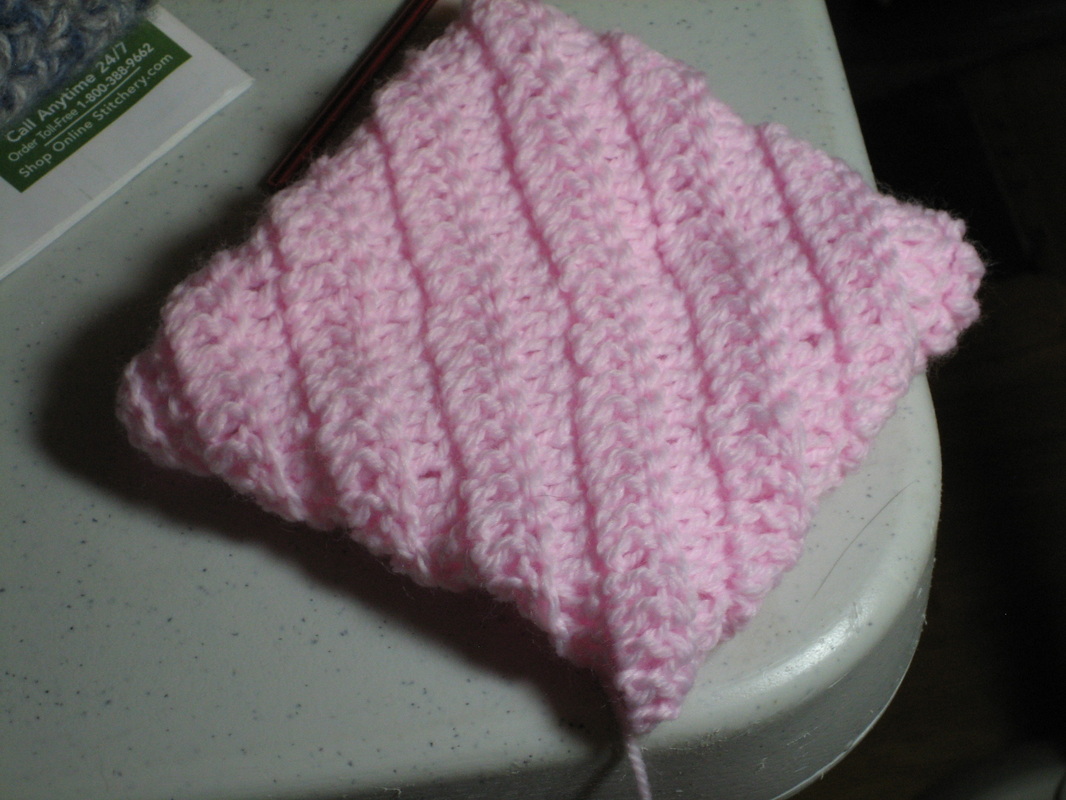
A pillowcase that Kimberly made for one of her granddaughter's doll's pillows. She is now working on the blanket. Gifts for Christmas.
A beaded felt project my husband Keith is working on. Will he finish it for this Halloween? The Ghost is almost finished.
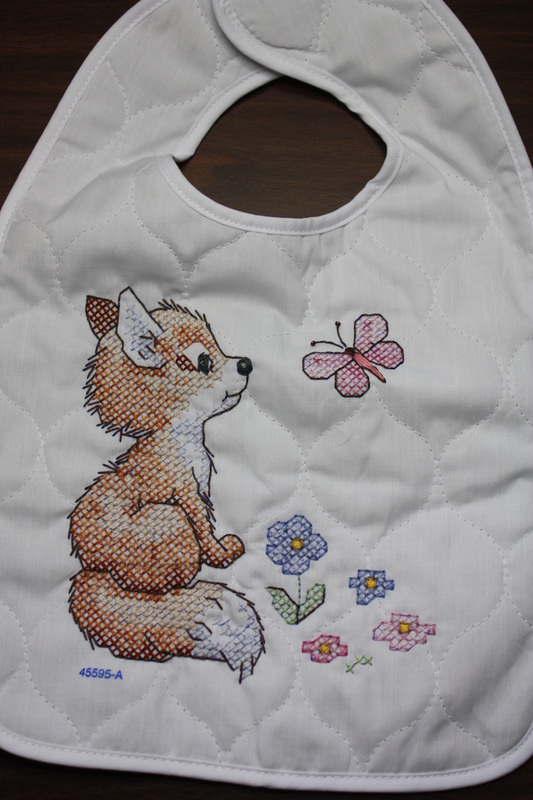
A baby bib for a long-time friend's first grandchild -- a boy.
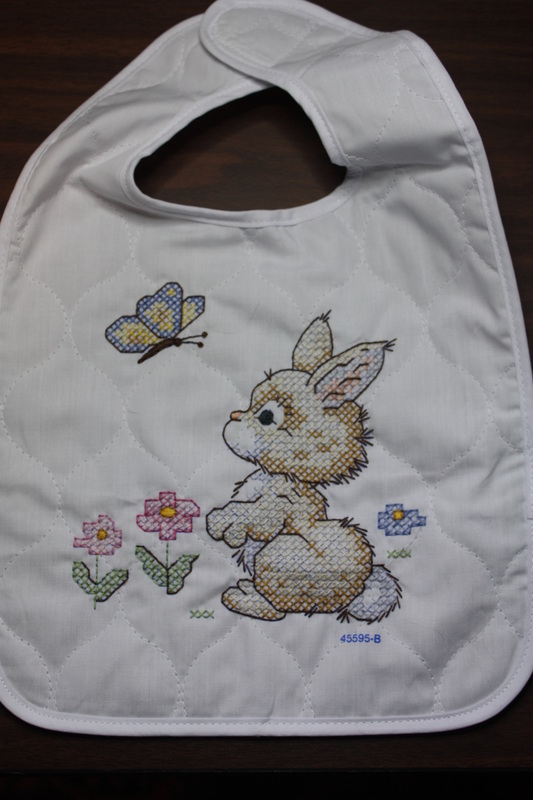
The second baby bib of the set. I will wash them today (which is why you can still see the control number on the bibs -- this will wash out). I completed stamp cross stitching these bibs almost exactly 12 hours before the baby was born. That's cutting it close! Now to wash and get it to them.
I am now counted cross stitching a Hanukkah card for close friends.
What have you worked on lately?
I am now counted cross stitching a Hanukkah card for close friends.
What have you worked on lately?
October 9
Treasure in the Closet
Look what member Kimberly found in her closet:
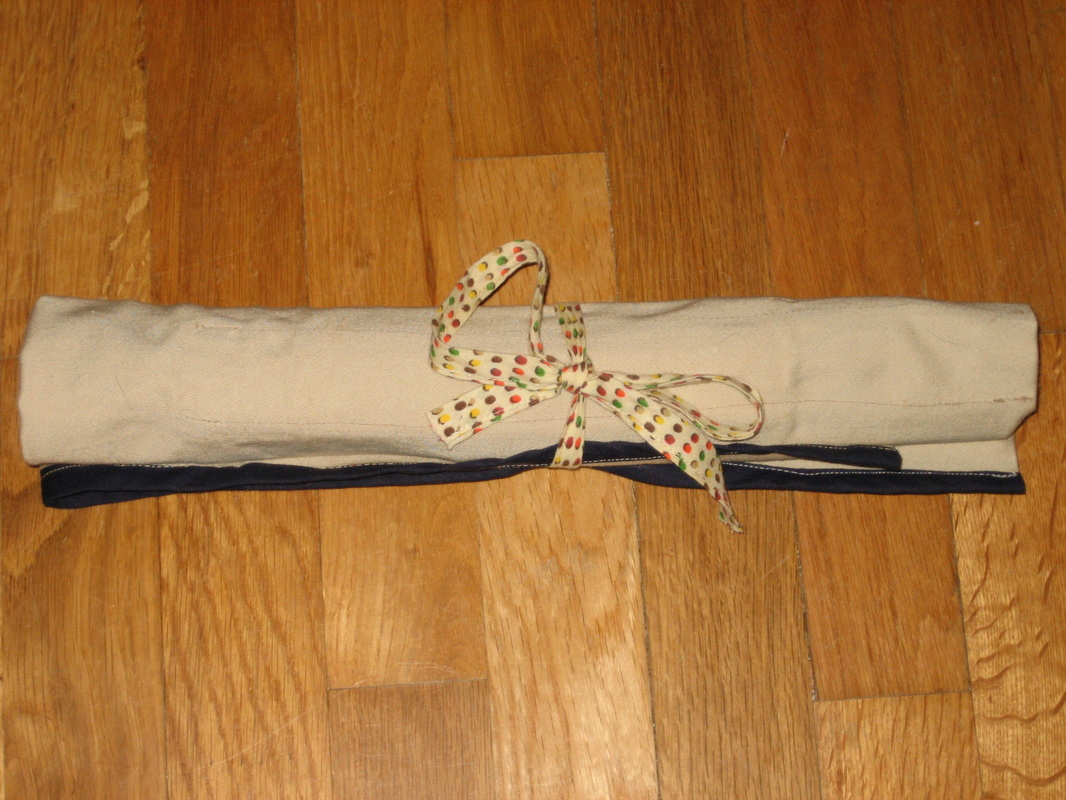
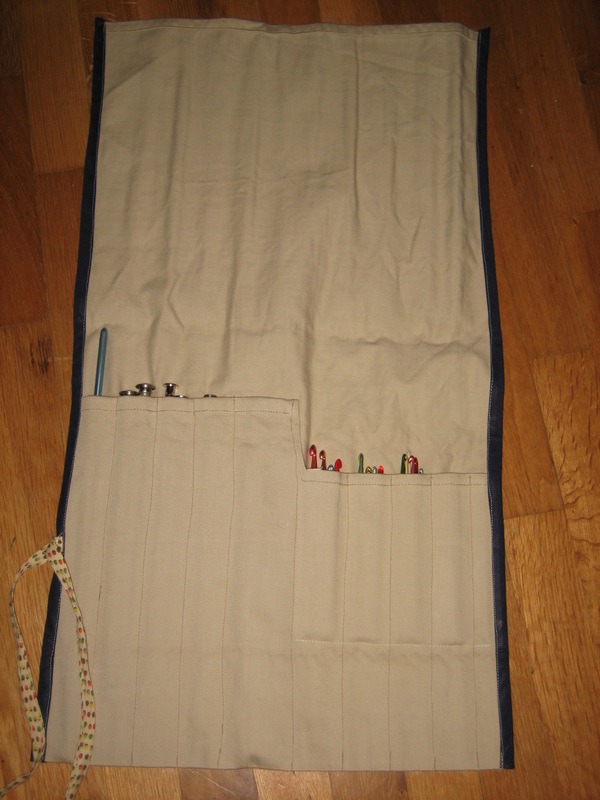
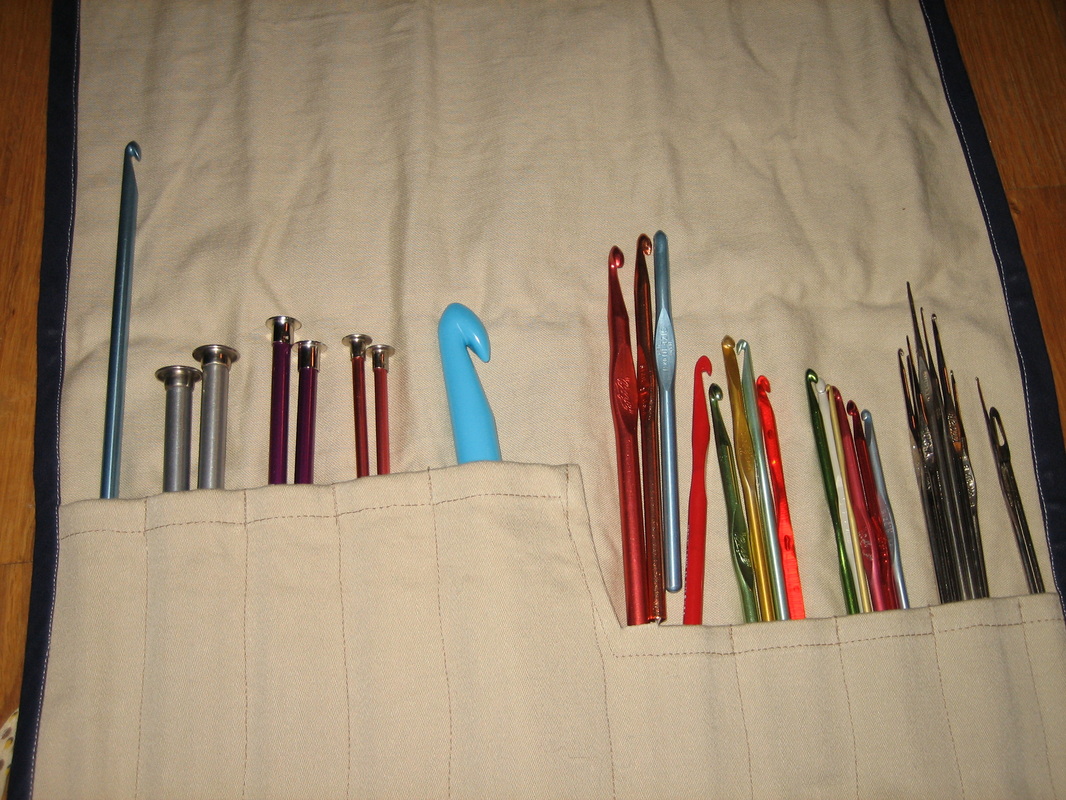
Kimberly's grandmother made her "tool kit" as she called it in the early 1970's. Kimberly inherited it, complete with 6 knitting needles and 27 crochet hooks, all of varying sizes. I remember the thick hook (blue) in high school! The hook at the far left is very long -- I've never seen them that long! Antique hooks are also included in this kit.
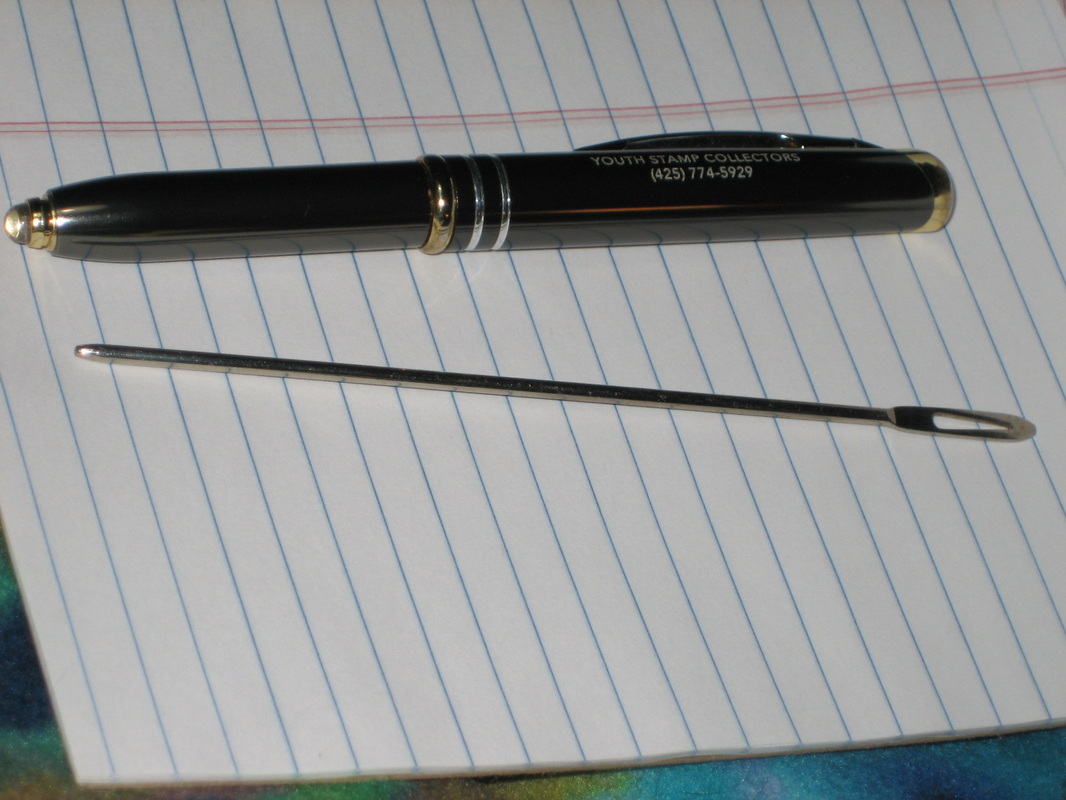
Kimberly and I have no idea what this hook is. Anyone know? The pen is for size comparison.
What treasure(s) have you found in your closet lately?
What treasure(s) have you found in your closet lately?
September 30
As promised in August, here are the greeting cards I have been working on:
As promised in August, here are the greeting cards I have been working on:
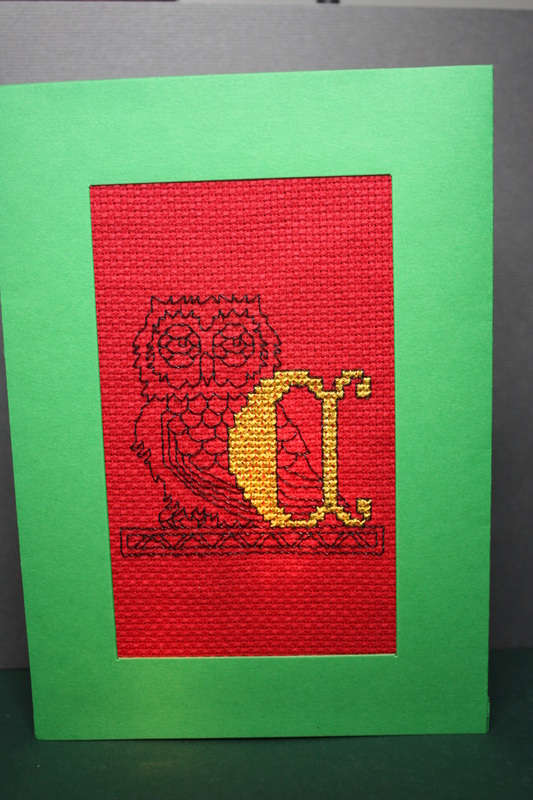
This Gothic Owl alphabet "C" was actually quite easy to stitch.

The Gothic alphabet "N" Dragon was a little more difficult to stitch, but he still turned out great.
Since the Owl and Dragon (and alphabet letters) are the main focal points of the cards, I decided not to decorate the card stock. Both are stitched in Metallic Gold with Yellow Cotton blend, and a Metallic Black.
Since the Owl and Dragon (and alphabet letters) are the main focal points of the cards, I decided not to decorate the card stock. Both are stitched in Metallic Gold with Yellow Cotton blend, and a Metallic Black.
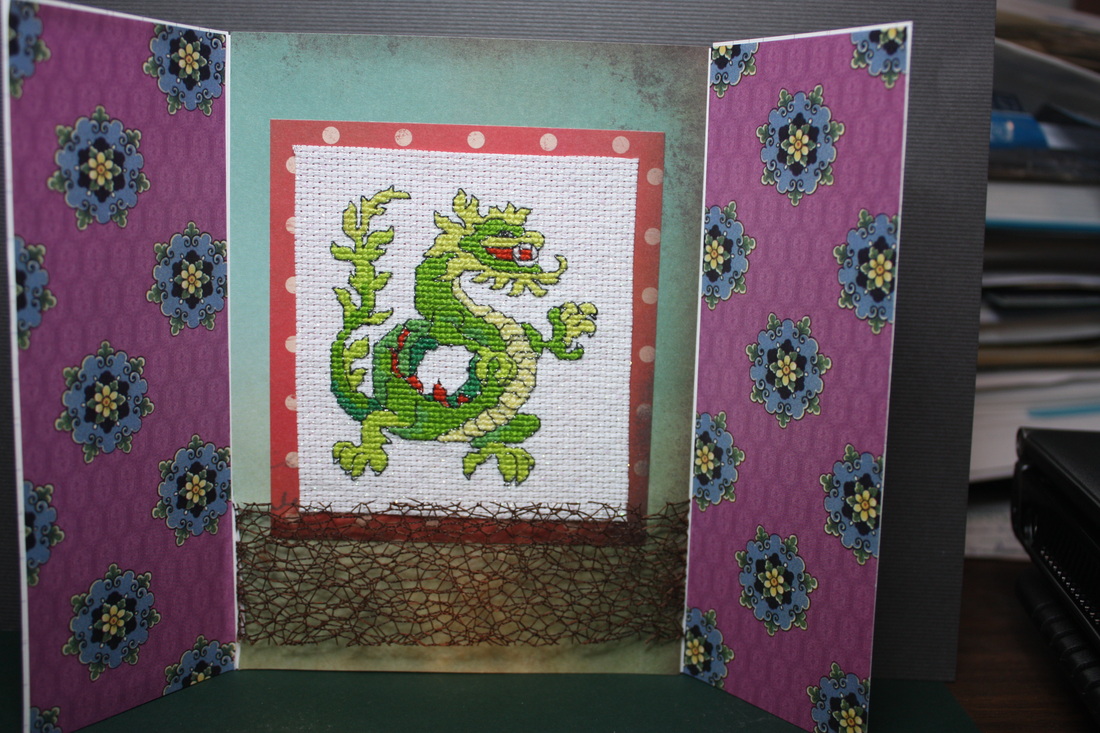
|
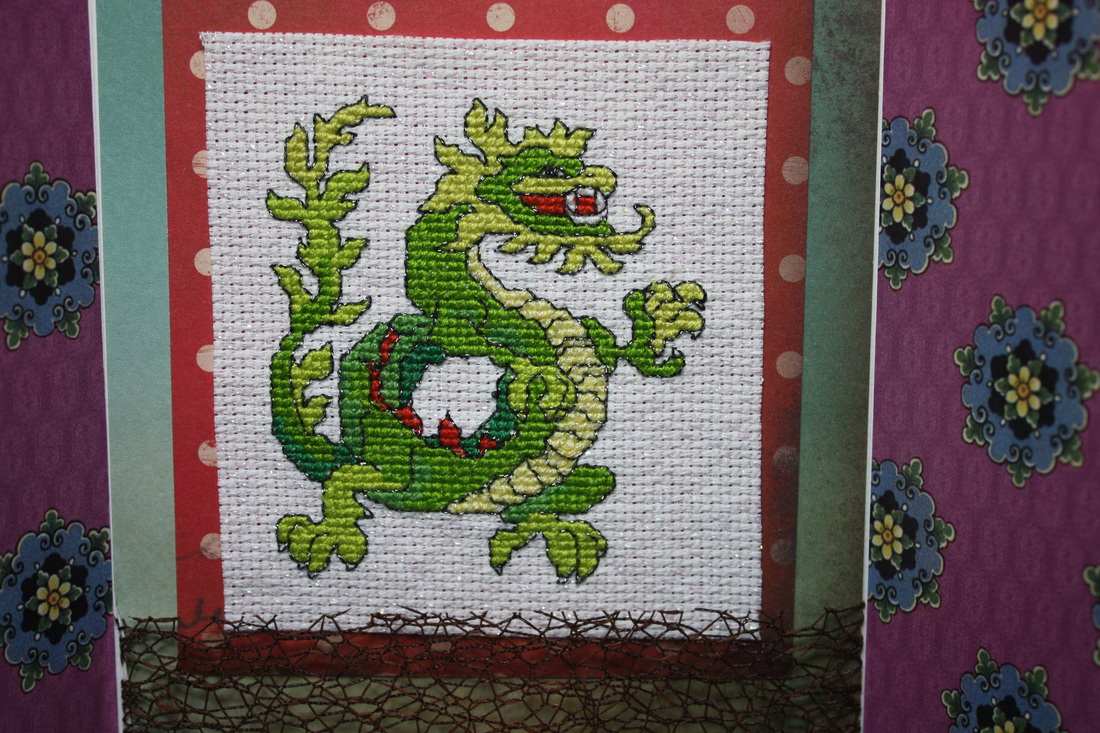
|
This Dragon was a huge pain to do, but he turned out terrific! There were a lot of quarter stitches in the design. The fabric has sparklies in it, which adds to the design (sorry, you can't see it in the photos). A nice Asian paper is on the front outside of the card, open it up, and see the dragon. Turned out very nice!
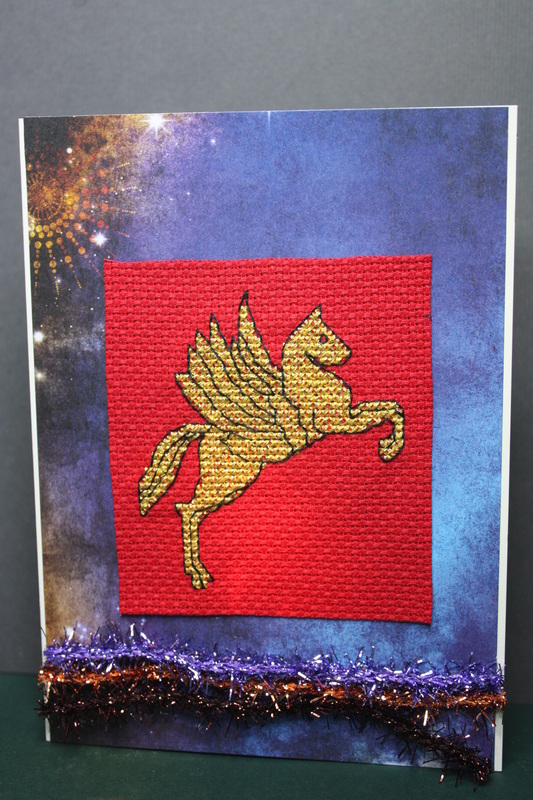
This Pegasus was quite easy to do. It didn't look like much until I did the backstitching. Backstitching makes all the difference in the world! Again, he is done in Metallic Gold and Cotton Yellow blend, and Metallic Black.
Some of my stitchers hate doing the backstitch, but I love it! It brings out the design -- and means I am at the end of the project!
Here is something my husband just finished:
Some of my stitchers hate doing the backstitch, but I love it! It brings out the design -- and means I am at the end of the project!
Here is something my husband just finished:
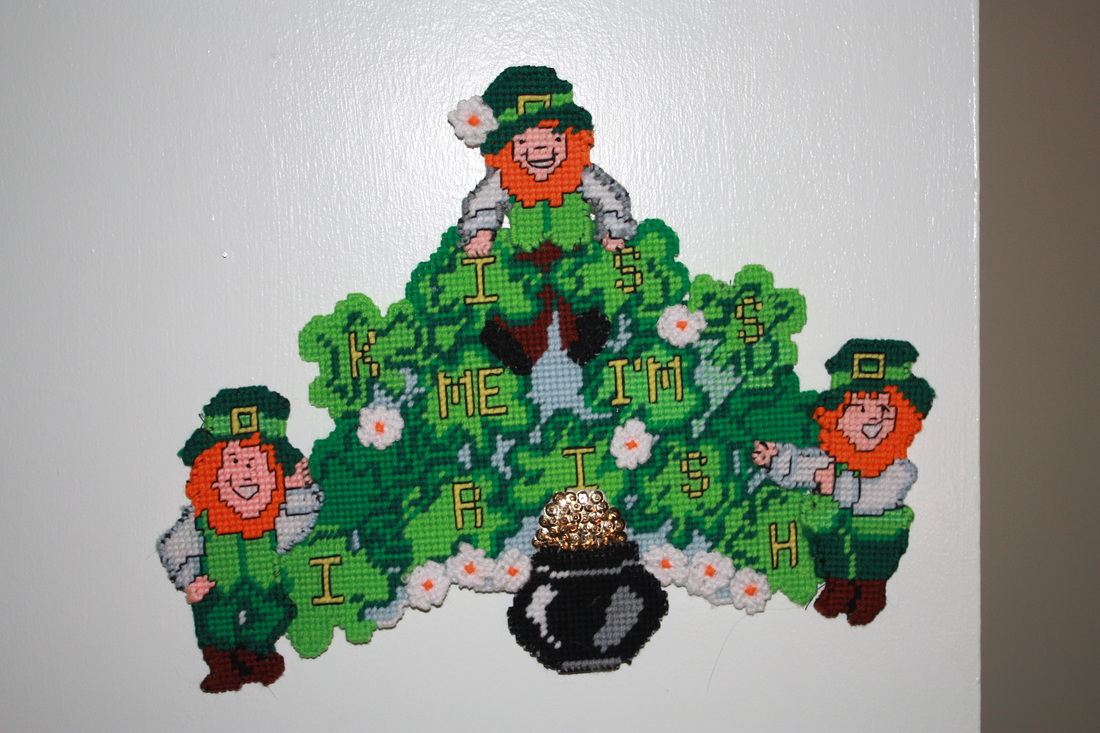
Keith's mother did canvas needlepoint up until her passing in 1997. We often see so many nice designs in the catalogues that we would buy for her if she were still around, so Keith decided to start doing the canvas work in honor of her. This is his fourth (?) project. Great job, Keith!
I should be starting back on my Holiday tablecloth, but it looks like I need to do a couple of baby bibs. Looks like a friend's first grandchild may be arriving somewhat early. Pray the little guy does well.
See you next time!
I should be starting back on my Holiday tablecloth, but it looks like I need to do a couple of baby bibs. Looks like a friend's first grandchild may be arriving somewhat early. Pray the little guy does well.
See you next time!
August 19
Several family members were visiting for about two weeks in late July/early August with a couple others popping in and out, so I did not get a lot done on stitching. Then I caught a summer cold (first in many years) -- and then gave it to my husband. I am back to stitching and finished some nice little pieces:
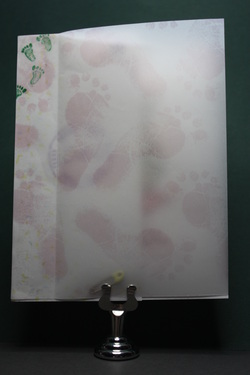
Front cover of card...
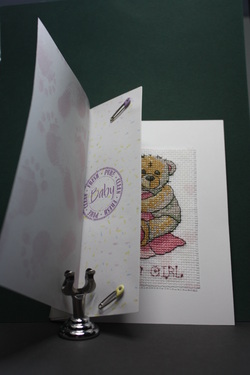
Lifting the cover to find a half page and a peek at the inside...notice the two diaper pin brads.
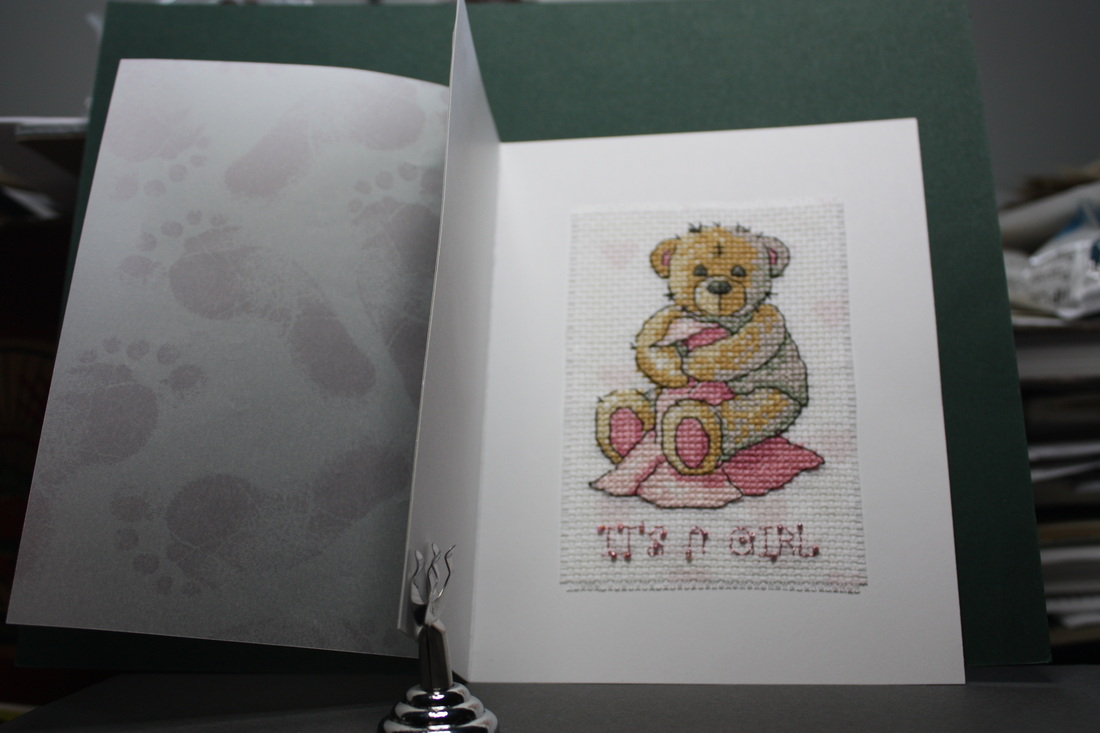
The inside of the card...
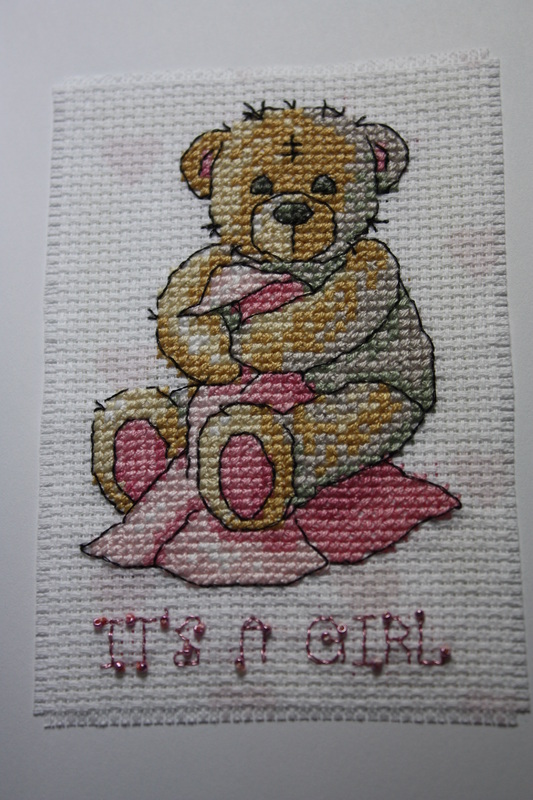
...close-up of design. Notice the "It's a Girl" is done with beads. The words are in pink metallic thread and the beads are sewn on with varigated cotton floss. This Baby card went to my veterinarian who had her baby in early July. The pattern came from "Teddy Bears in Cross Stitch" by David & Charles. I've done several bears from this book for various occasions; it has the perfect designs!
I also did a Baby card for my personal physician who had a baby girl in mid-July...
I also did a Baby card for my personal physician who had a baby girl in mid-July...
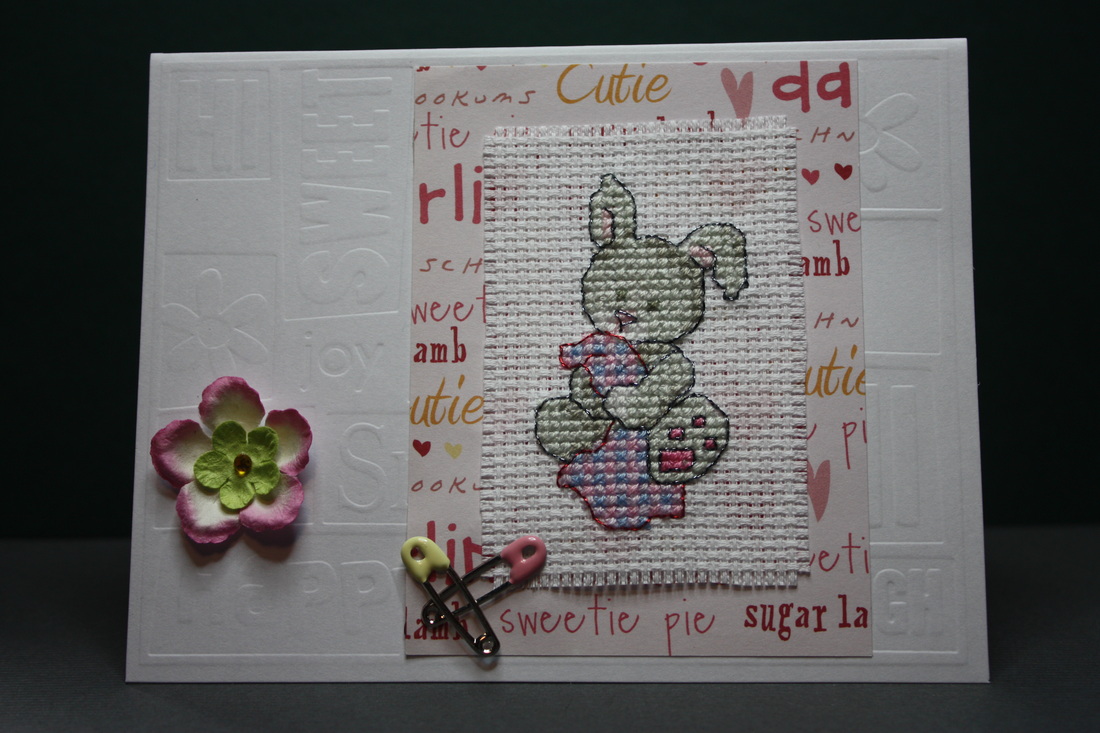
Again, I used diaper pin brads to dress up the card a little. I found this design in the May 2008 issue of "Cross Stitch Crazy".
Now, for some reason, I was thinking one of them had a boy, and after making additional phone calls, found out they were both girls. But I had this card already completed....
Now, for some reason, I was thinking one of them had a boy, and after making additional phone calls, found out they were both girls. But I had this card already completed....
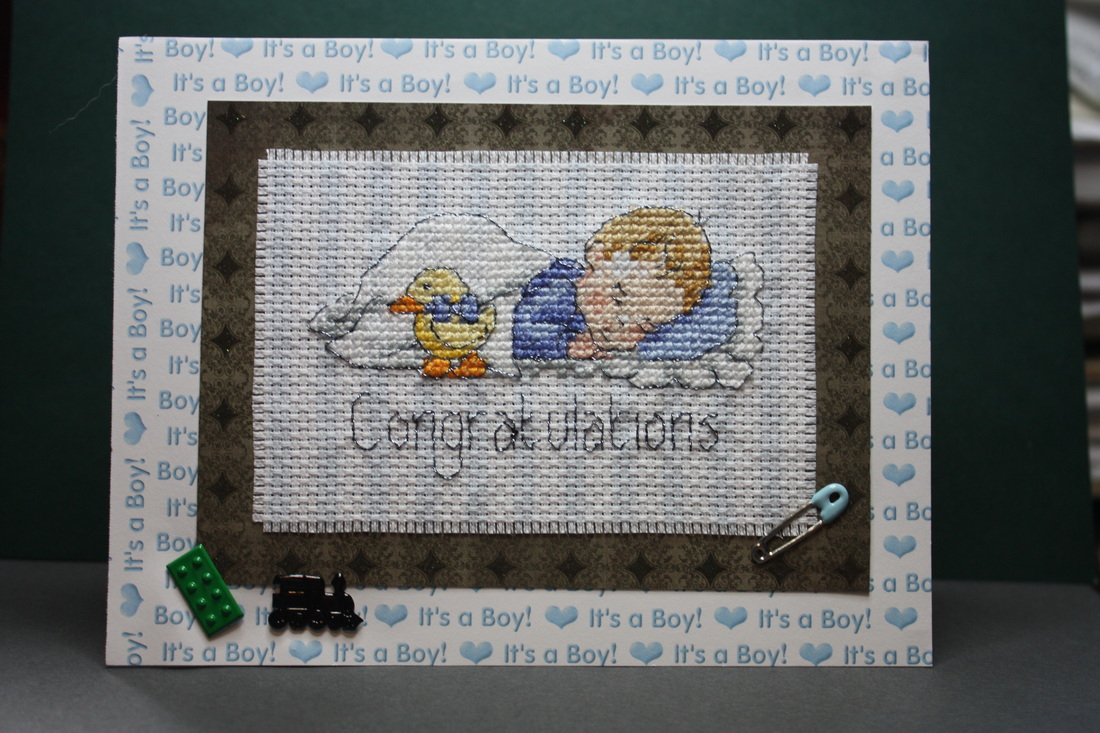
The design is from "Cross Stitch Cards 100" book by Joanne Sanderson. Since I completed this card and do not have anyone to give it to, I will add it to my craft show stock to sell.
In the meantime, a friend of mine loves "The Lion King" just as much as I do. I found this cute little design in the May 2008 issue of "Cross Stitch Crazy:
In the meantime, a friend of mine loves "The Lion King" just as much as I do. I found this cute little design in the May 2008 issue of "Cross Stitch Crazy:

I had fun stitching it, and my friend will love receiving it!
I plan on doing a few more greeting card designs, mainly to sell at my craft shows. Then it is time to get back to the next section of my tablecloth. I will post photos when I finish the greeting cards.
I plan on doing a few more greeting card designs, mainly to sell at my craft shows. Then it is time to get back to the next section of my tablecloth. I will post photos when I finish the greeting cards.
July 23, 2013
I finished the second corner of the table cloth I've been working on since January 16, 2013. It has taken 40 hours to do EACH corner thus far, and 6 hours and 40 minutes to do the one side design.
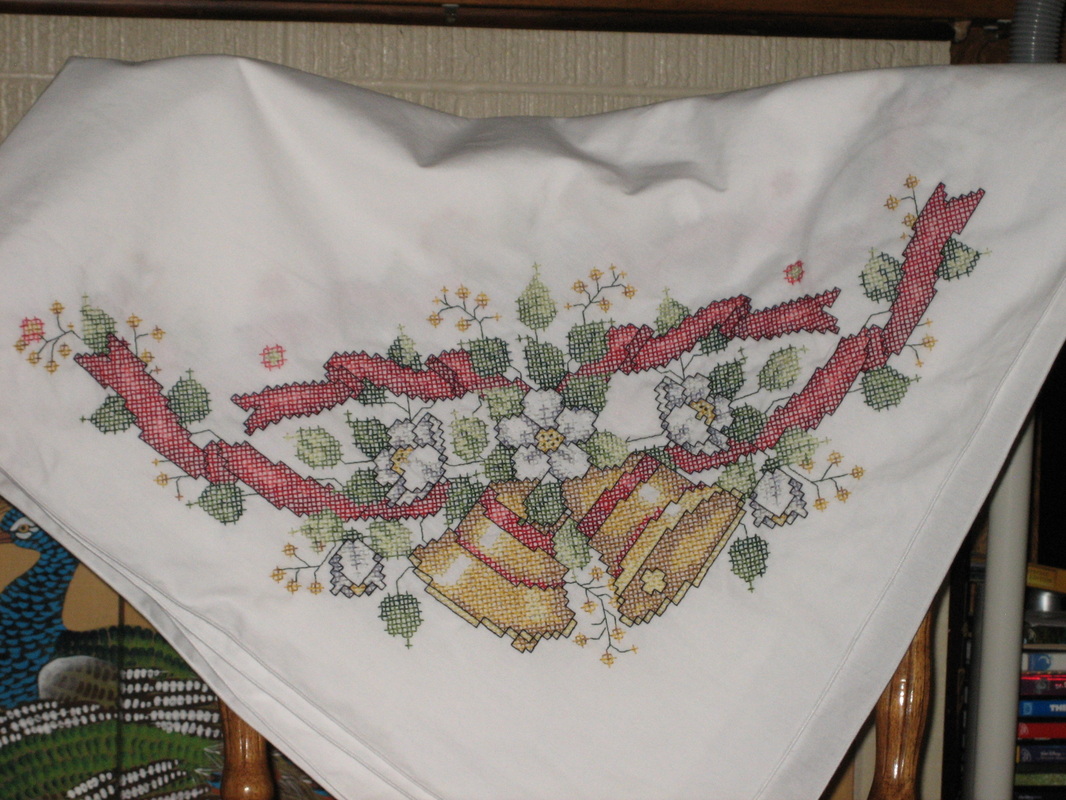
Two more corner designs, a second (long) side design and then the center of the tablecloth is what I have yet to finish. Last year, I did the table table place mats and the napkins that go with this tablecloth. Can't wait to use them all! Cannot say if I will have it finished for this holiday season or not.
Now off to do a Baby greeting card.
Now off to do a Baby greeting card.
July 13, 2013
Well, is it hot enough for you? Depending on where you live, you could be experiencing 75 degrees F or 109 degrees F temperatures. Just stay cool, and stitch!
I worked on some short projects a little bit ago:
I worked on some short projects a little bit ago:
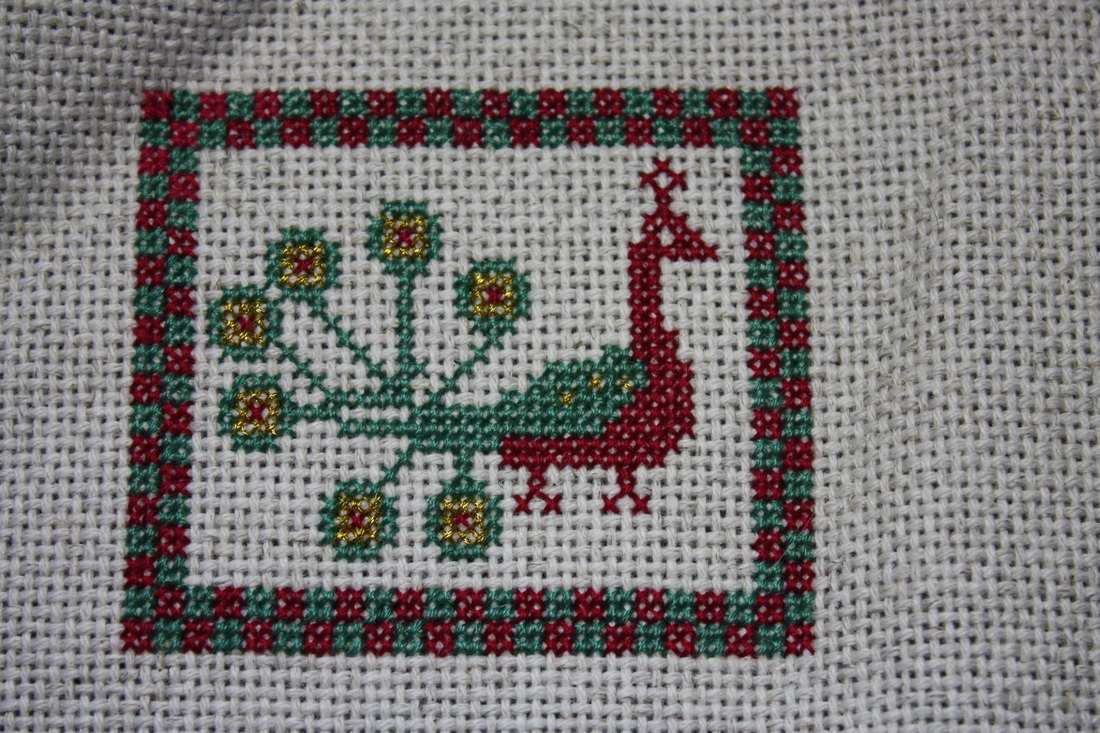
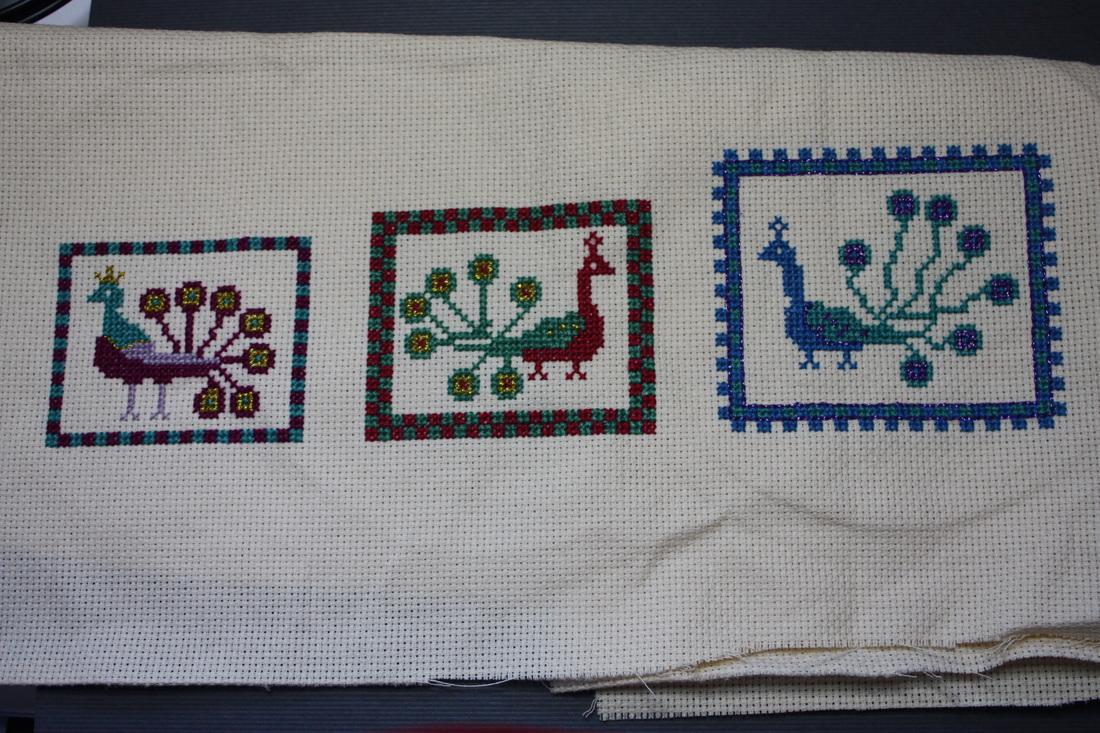
I did the first one on 14ct Aida just to see what it would look like. Well, it turned out to be too large for a greeting card. Then I did the trio, thinking I could frame them. But they are different sizes! So now what do I do with them? The pattern is Peacocks Three Ornaments by Of Female Worth. Yes, each design has some metallic thread. I will post a photo when I decide how to finish them.
Then I returned to working another section of my table cloth. I am almost finished with the second corner. I have one corner and one side design already finished. I am doing small projects between sections of this large project. I'll take a photo so you can see what I've been working on the past few months....
In the meantime, Carol Anne brought some interesting yarn to Stitchery Club on July 11:
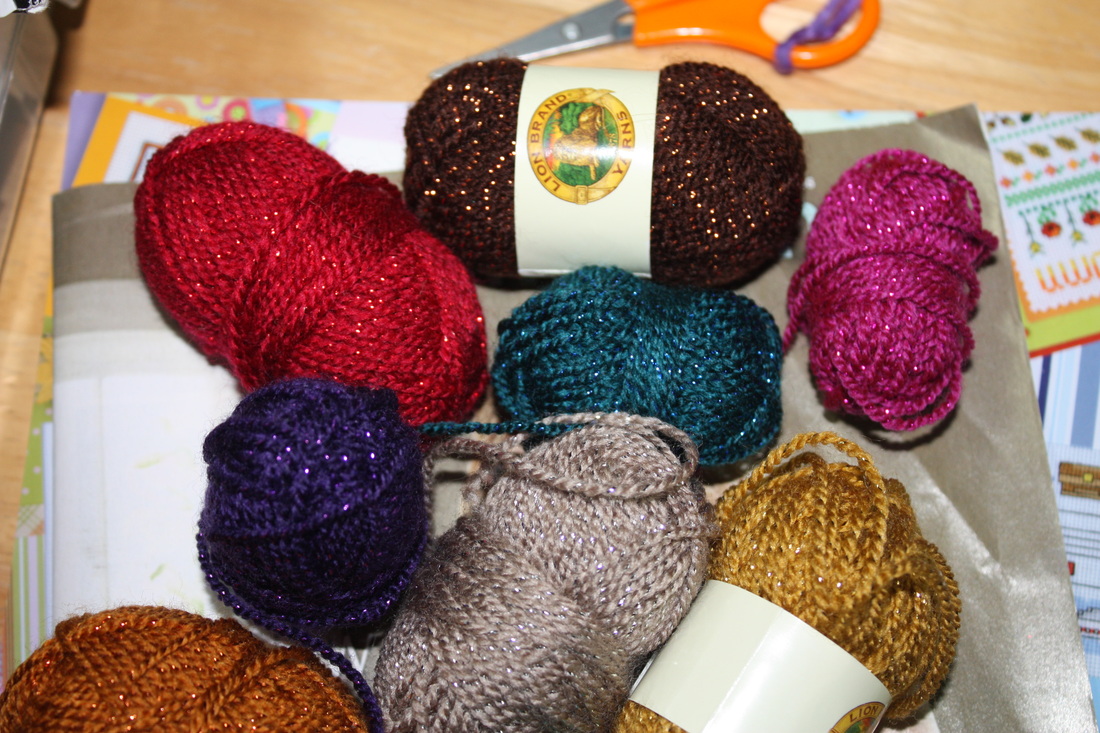
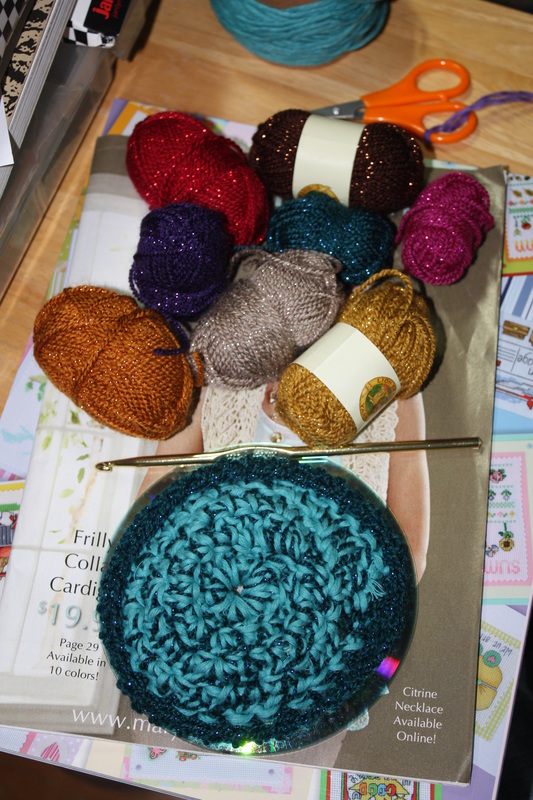
Look at these itty-bitty skeins of Lion Brand yarn! They are so cute! And the colors -- I love the metallics in them! The standard crochet hook shows you how small the skeins are and the project Carol Anne is crocheting -- a cover for an old used CD to use as a Christmas ornament. Interesting idea.
All of our stitchers have been busy working on projects for birthdays, weddings and Christmas -- yes, some of our members have started their Holiday stitching! I need to do a Baby Cross Stitch Card when we find out if the couple had a boy or girl -- they wanted to be surprised.
The other day, my brother-in-law called and told my husband he was getting married. So now I need to find a nice Wedding Sampler -- once they determine whether it will be a Garden or Wiccan wedding. Does anyone have a nice design for a Wiccan Wedding sampler?
It's a girl! Will post the cross stitch card when I complete it.
July 3, 2013
Happy 4th of July everyone (USA)! The past several months have been quite busy with life -- family deaths, health issues and doctor visits, and gardening. Our gardens are flourishing, we've been eating fresh strawberries, blueberries and raspberries right off the bushes. This year is the first time we've tried to grow lettuce, and it is delicious! We planted bush beans, tomatoes, zucchini's, and bell and hot peppers, but they are not producing yet. We are keeping our fingers crossed. My new rose garden (completed last fall) is doing beautifully! The Irises were simply gorgeous! We are quite pleased with the way our gardens are doing so well, but as always, there is plenty more to do.
As for stitchery, The Northwest Stitchery Club still meets 2nd and 4th Tuesday evenings each month. Even though some members have been on vacation, we still meet. I am still working on a tablecloth, but working on smaller projects as I finish a section (corner, side design, etc.).
Here is the latest small(er) project I have worked on:

After I had completed a corner of the tablecloth, I did one of these Penguin hand towels. Then I did a side design on the tablecloth, and came back and stitched the second stamped cross stitch Penguin hand towel. I made these for long-time friends (from college that we recently got in touch with again through Facebook). They were in the States for a year, then had expected to return to Papua. After I had completed stitching the towels, they put out the word that they would not be returning to Papua, at least any time soon. I still wanted them to have the hand towels, so once it looked like we may not be able to get together over the summer, I shipped the towels. She got them a couple weeks ago and love them! No matter where this family is in the world, when the weather is hot and muggy, they can bring out the towels to remember their fun in the snow when they were here in the States this past winter! (They could be moving to the east coast where they may end up with lots of snow anyway! Maybe I'd better do a set of summer Penguins!)
I am now back to working on a second corner of the tablecloth. Our stitchers haven't completed anything new in a while -- they are all still working on projects.
I've done a couple of small Peacock designs. Come back soon and see those photos -- I haven't taken pictures yet!
Happy Stitching this summer!
April 18 -- Threadneedle Street
I love to visit needle art stores; they often have so much more than what you have heard. I have heard about a stitchery store in Issaquah, Washington, USA, for several years now. One of my stitchers, Wendy, needed to pick up some fabric and thread, so we drove over together yesterday. It was a gorgeous sunny day, perfect for working in our flower beds. Instead, we drove to Threadneedle Street in Issaquah -- and what a lovely drive it was!
After tripping over the front step (watch that first step), I followed Wendy into the store, and went "oh...my.......". Such a wonderful little store to peruse! So many things to look at....
I finally started with the books...
After tripping over the front step (watch that first step), I followed Wendy into the store, and went "oh...my.......". Such a wonderful little store to peruse! So many things to look at....
I finally started with the books...
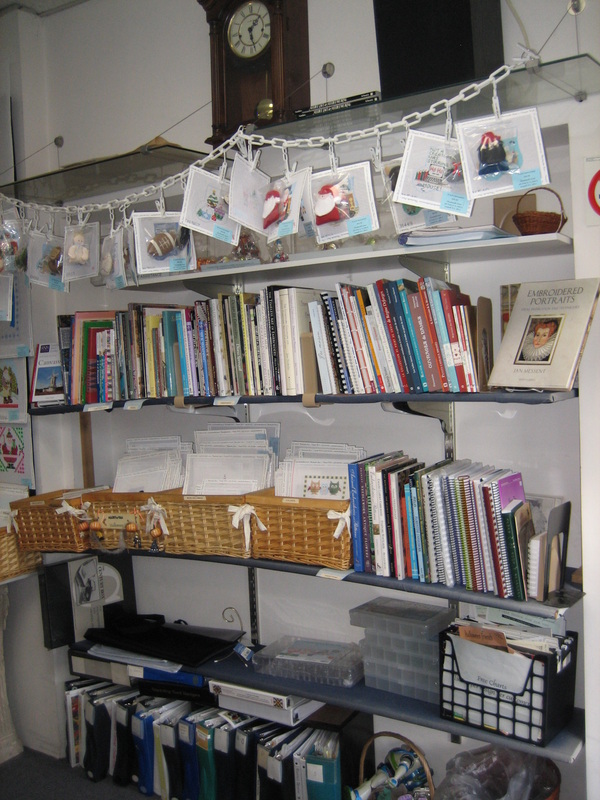
There are not that many books, but the titles are quite interesting. I will probably go back another time to pick up some books when I get ready to do some more needle arts research. (Oh yes, I will definitely go back. I also bought a chart that uses specialty floss which are in stock here.) There are books for just about every needle arts topic.
Of course, when you walk in the door, you cannot help but notice the Needlepoint designs all over the walls in this corner...
Of course, when you walk in the door, you cannot help but notice the Needlepoint designs all over the walls in this corner...
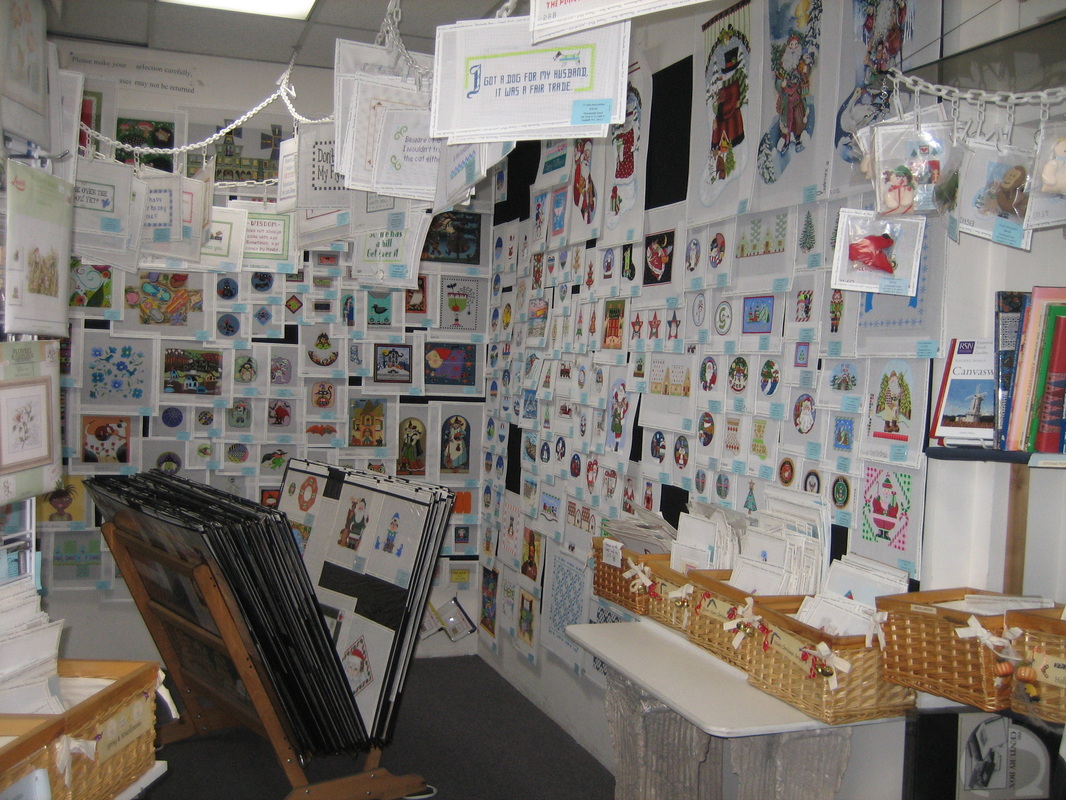
Notice the large folders in front left. They are full of more painted Needlepoint canvases. I even found a large White Peacock for over $200.00. Well worth it, but it will have to wait for another day...if and when I decide to take up Needlepoint.
I did not get a photo of the large White Peacock canvas, but I did take a photo of this Japanese Peacock Komono...
I did not get a photo of the large White Peacock canvas, but I did take a photo of this Japanese Peacock Komono...
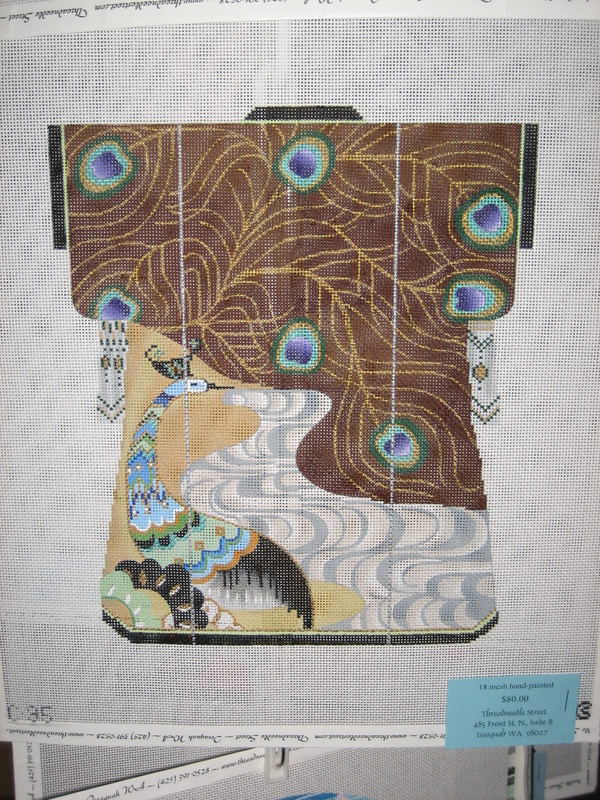
Can I get this in Cross Stitch, please?
Whenever I go anywhere, I tend to start at the left hand side of the store/expo/whatever (maybe because I am left handed?). To the left coming in the door are lots of Counted Cross Stitch pattern charts and books...
Whenever I go anywhere, I tend to start at the left hand side of the store/expo/whatever (maybe because I am left handed?). To the left coming in the door are lots of Counted Cross Stitch pattern charts and books...
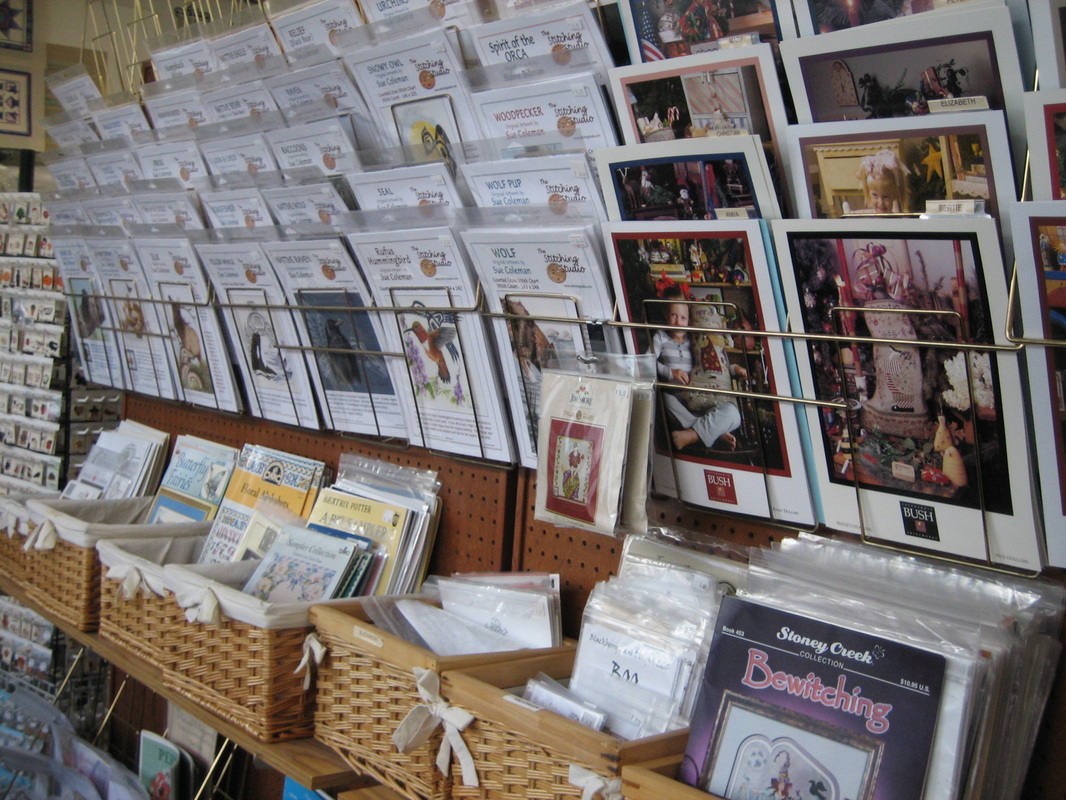
There are more than what is shown in this photo -- on both sides of the aisle. I did purchase a couple charts.
At the end of the aisle are the beads, beads and more beads...
At the end of the aisle are the beads, beads and more beads...
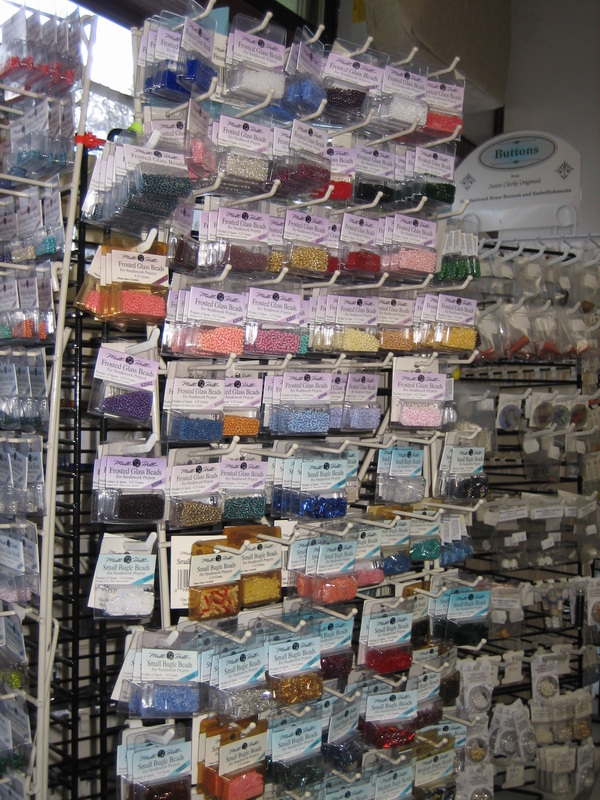
...and next to these are the Fancy Buttons and Embellishments...
I'd point out the Peacock buttons to you, but I bought them. I also bought a couple of Owls for my husband. On a third rack, I found strawberries.
At the end of this row are large pieces of hardanger and linen fabrics...
At the end of this row are large pieces of hardanger and linen fabrics...
Notice the various colors! The owner has so much more in stock than this, so be sure to check them all out!
I found smaller packs of Aida, Linen and Hardanger fabric on the other side of the row of Cross Stitch Charts shown earlier...
I found smaller packs of Aida, Linen and Hardanger fabric on the other side of the row of Cross Stitch Charts shown earlier...
Wide variety of fabric colors are available; this photo only shows a portion of them. Beneath these shelves are blank canvas, again in various colors. At the far right of the bottom row are packs of perforated paper. I really need to try that one of these days.
At the left end of these fabrics are more bins of Cross Stitch charts. I noticed some of the charts are designs you stitch on Jewelry/Keepsake Boxes, Pin Cushions, etc., such as is quite popular in England....
At the left end of these fabrics are more bins of Cross Stitch charts. I noticed some of the charts are designs you stitch on Jewelry/Keepsake Boxes, Pin Cushions, etc., such as is quite popular in England....
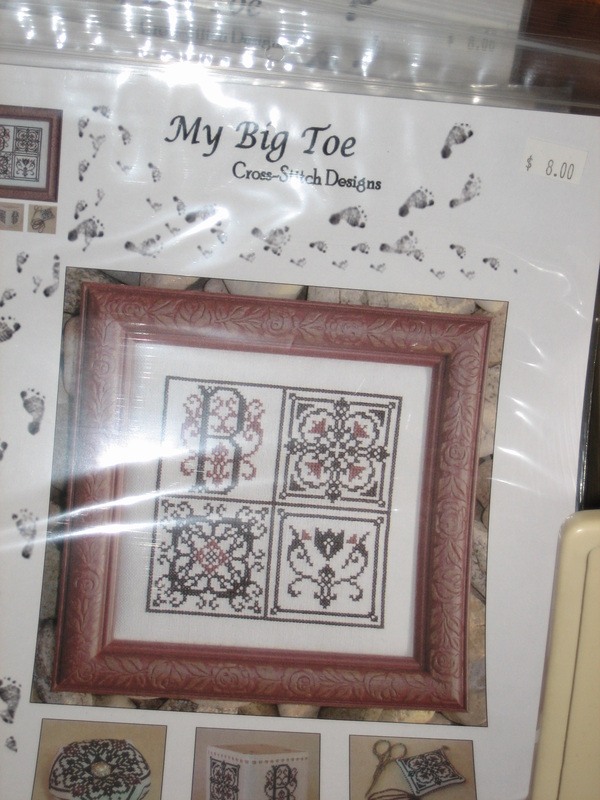
AND Threadneedle Street carries the boxes...
There is not a big selection of the boxes, but more than what is shown in this photo. At least someone carries these items in their store and we do not have to order from overseas -- woo hoo!
If you cannot find stitchery frames and need different lighting than your choices at JoAnne's, Michaels or Hobby Lobby, you really do need to visit this store...
If you cannot find stitchery frames and need different lighting than your choices at JoAnne's, Michaels or Hobby Lobby, you really do need to visit this store...
If you need to replace a hoop or other supplies...
...she has that, too!
Now, what is a needle art store without floss and thread...
Now, what is a needle art store without floss and thread...
She carries DMC and so many other brands...
Look at the colors!
Look at the colors!
And Variegated colors!...
Anchor colors! I haven't seen an Anchor display in years!
And to help get your creative juices running, definitely look at the sample pieces on display...
And to help get your creative juices running, definitely look at the sample pieces on display...
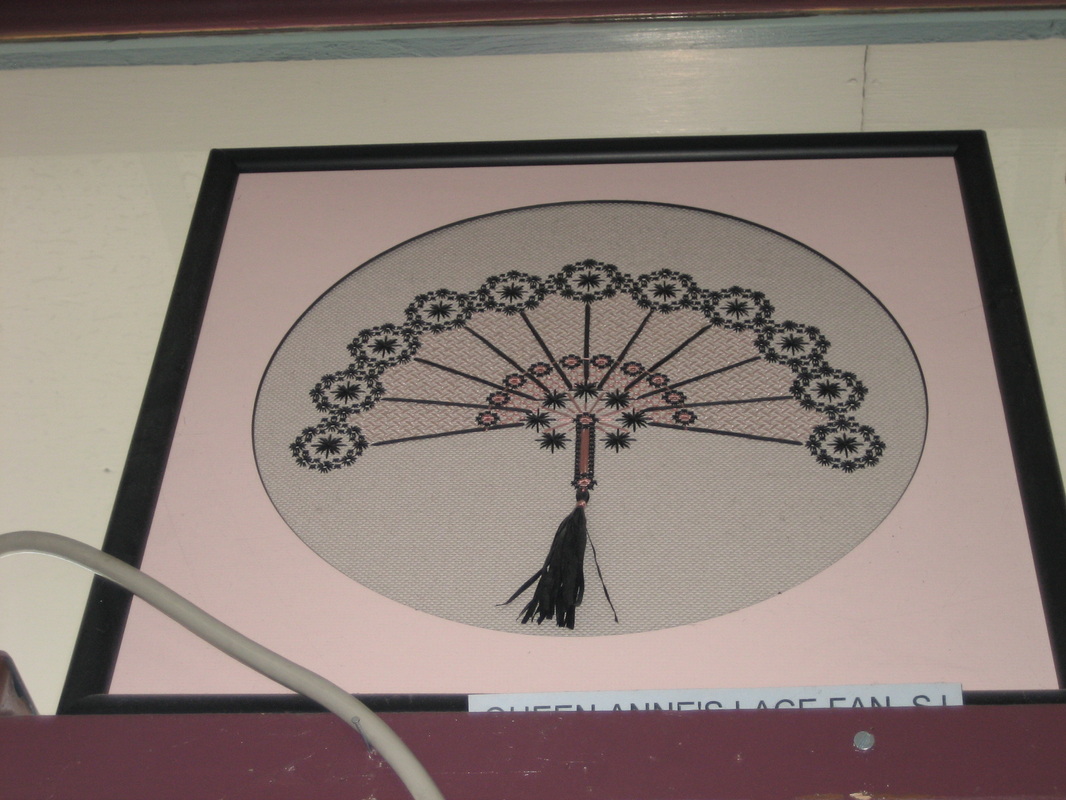
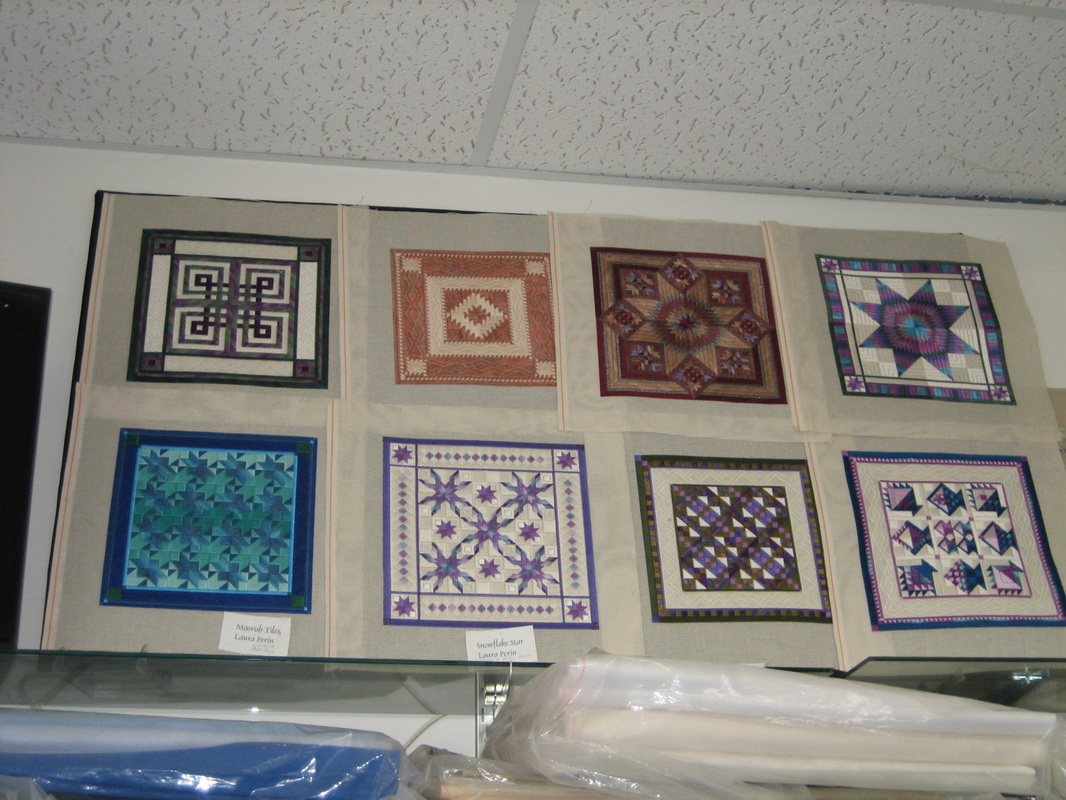
There is so much more to see in this store, so when you are in the area, do stop in and visit. They are just off Highway I-90 to Seattle. Be sure to have cash, credit card or debit card with you as it will be difficult to leave without buying something.
I hope you enjoyed our tour of Threadneedle Street in Issaquah, Washington. If you cannot get to the store, you can order on-line -- the owner ships all over the world!
Oh, when you pop over to look over her website, before you leave the site, be sure to sign up for her e-newsletters. I just did.
On the way home from Threadneedle Street, Wendy and I stopped in at Boehms Chocolate store, just up the street....
April 10
The photos are up! Pop on over to the "Library Displays photos" to see what we have this year. If you are in the area, be sure to stop by the Mountlake Terrace Library to see our display in person.

Top Tips for Wedding Cross Stitch
- Research the couple's tastes first, so that you know your stitching will be displayed proudly in their home!
- Set yourself enough time before the big day to finish your chosen design.
- Add to the WOW factor with a matching card and gift tag.
- Specialty threads, such as satin and silk, will add extra luxury to a special design.
- Likewise, linen or evenweave is a more sophisticated choice than aida.
- Consider adapting hair colours and skin tones to create a really personal picture.
- Use charms and beads for a bit of extra bling!
- When personalising with backstitch lettering, be careful not to trail your thread across the back -- keep it neat.
- want to give a practical gift? Turn your stitching into a ring pillow instead.
- For laid-back, casual weddings, choose a simple design in one colour.
~September 12, Cross Stitch Crazy
April 4
Water soluble canvas? See this video http://dmc-threads.com/learn-dmcs-water-soluble-canvas/ to find out how it works.
Northwest Stitchery Club display is now up in the Mountlake Terrace City Library Entrance Display Cases. The display is full and looks great! Be sure to stop in and view the exhibit!
Not much to report right now. Lots of sales going on at Mary Maxim and Herrschner's websites, so if you need something for a wedding or baby shower gift, pop over and take a look. In the meantime, club members are busy working on their projects trying to get them completed so they can move on to another project.
Below are photos of the Sunflower Table Runner I cross stitch for a friend for her wedding. I completed it in December, added the leaf buttons and her and hubby's name and wedding date in early January, then shipped it to India.
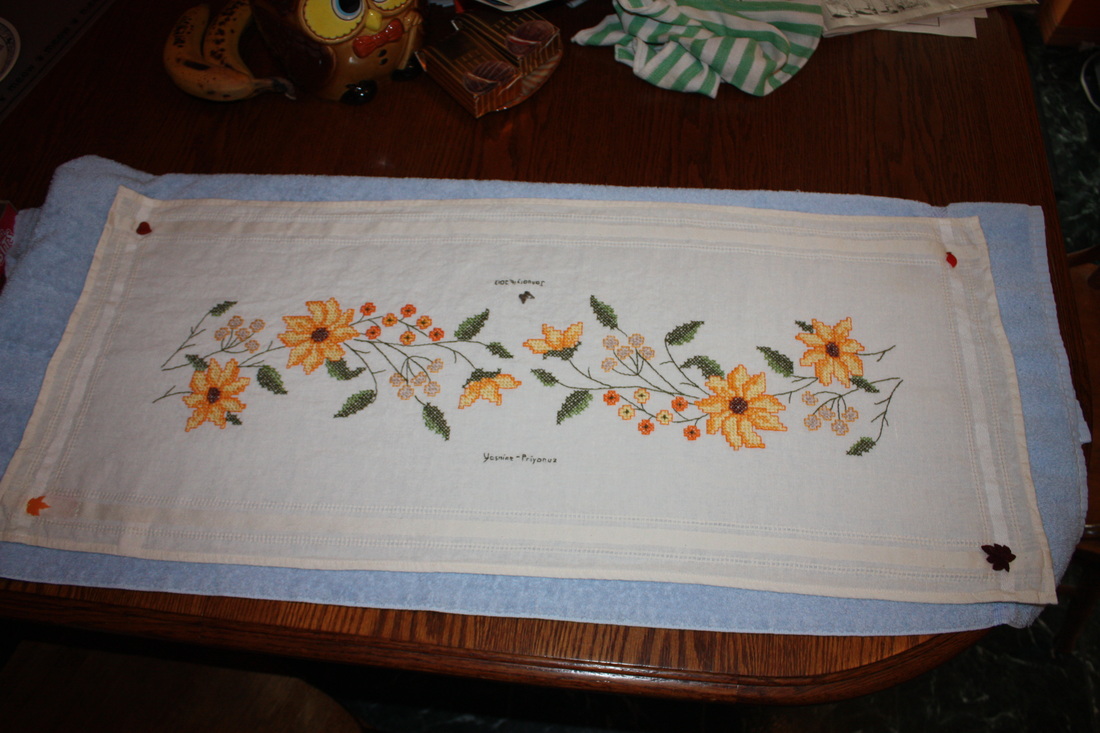
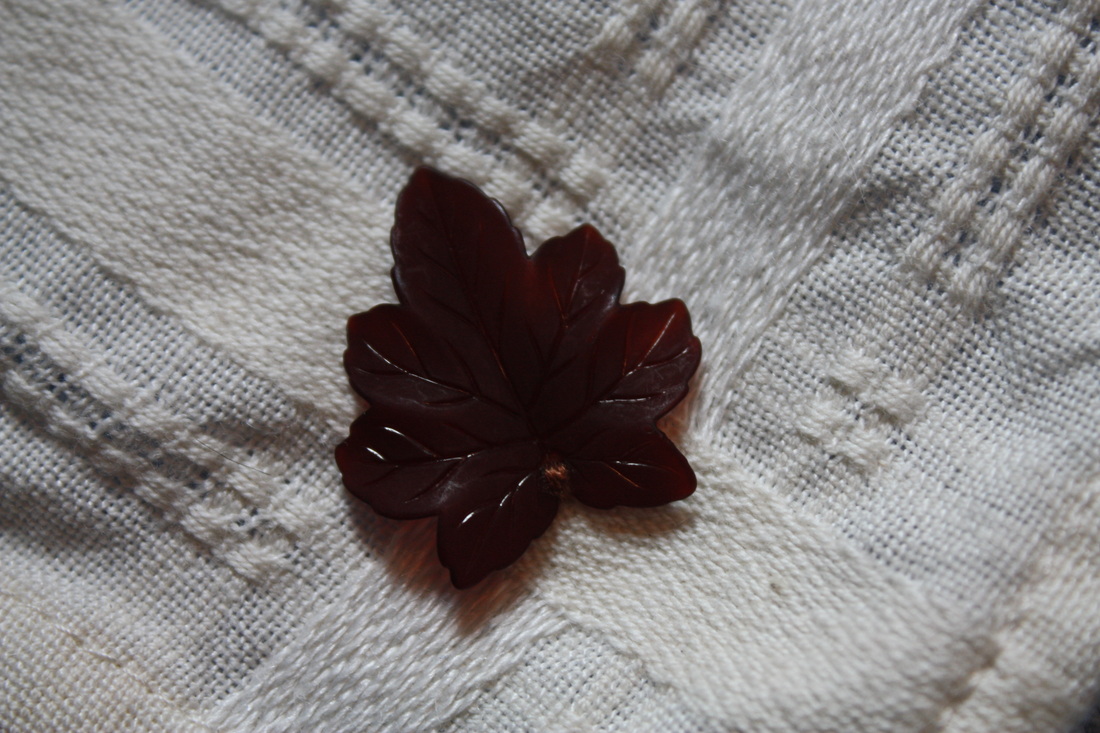

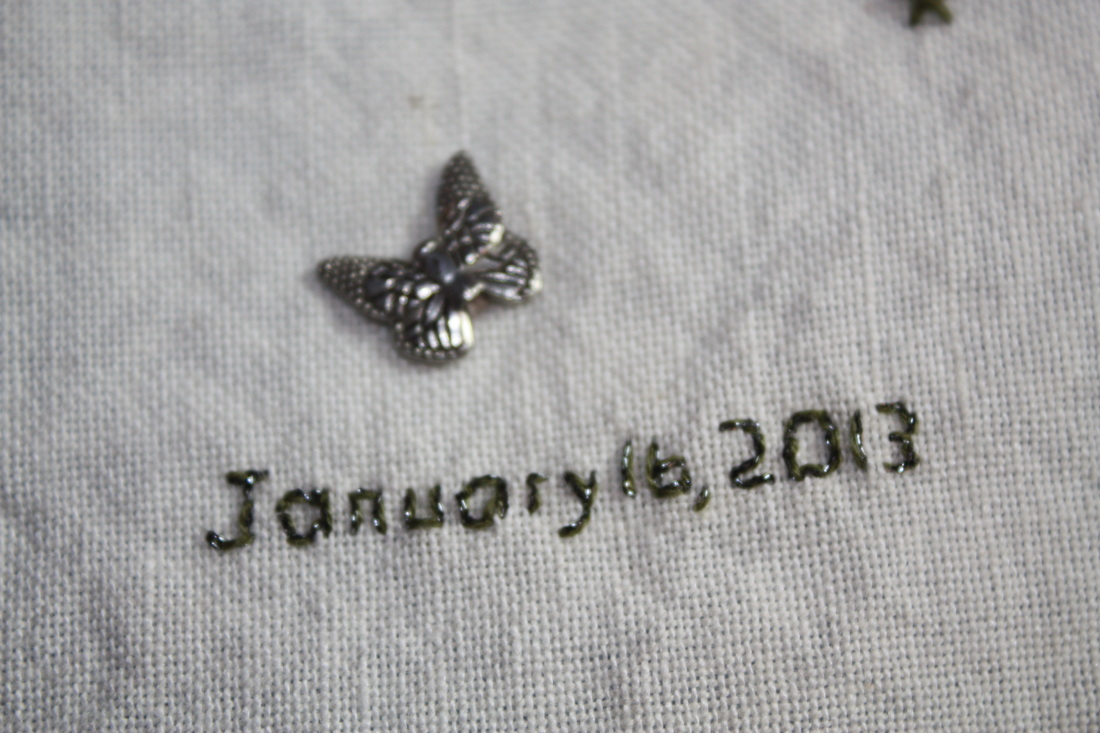
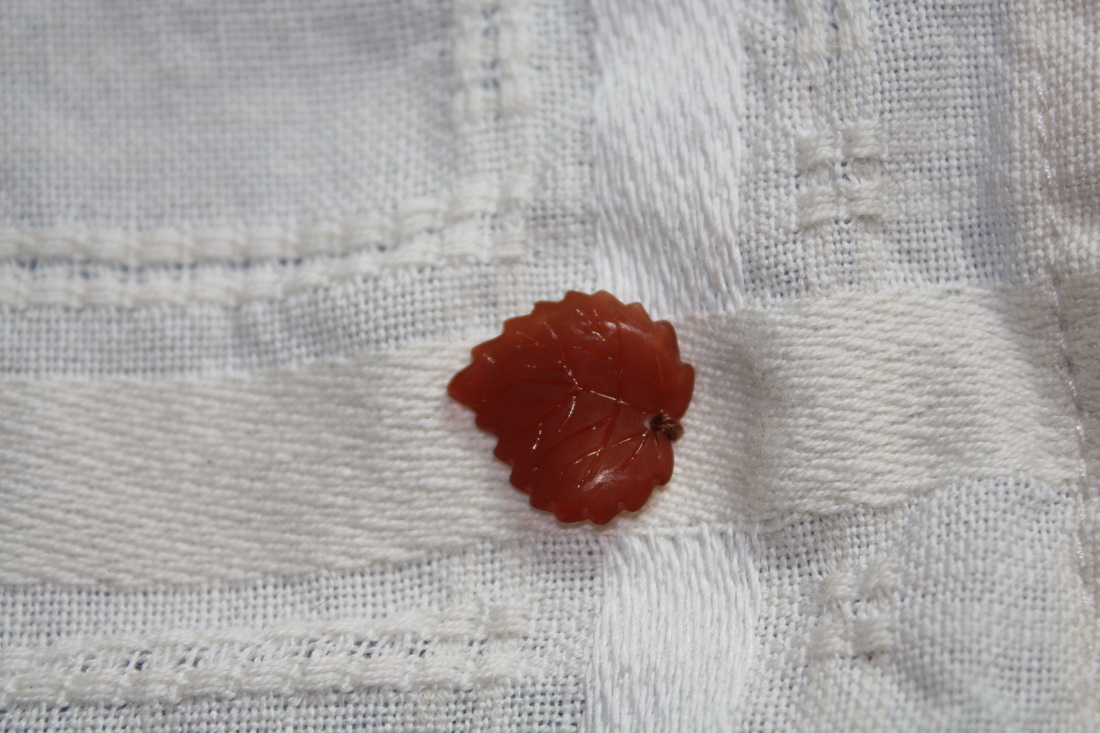
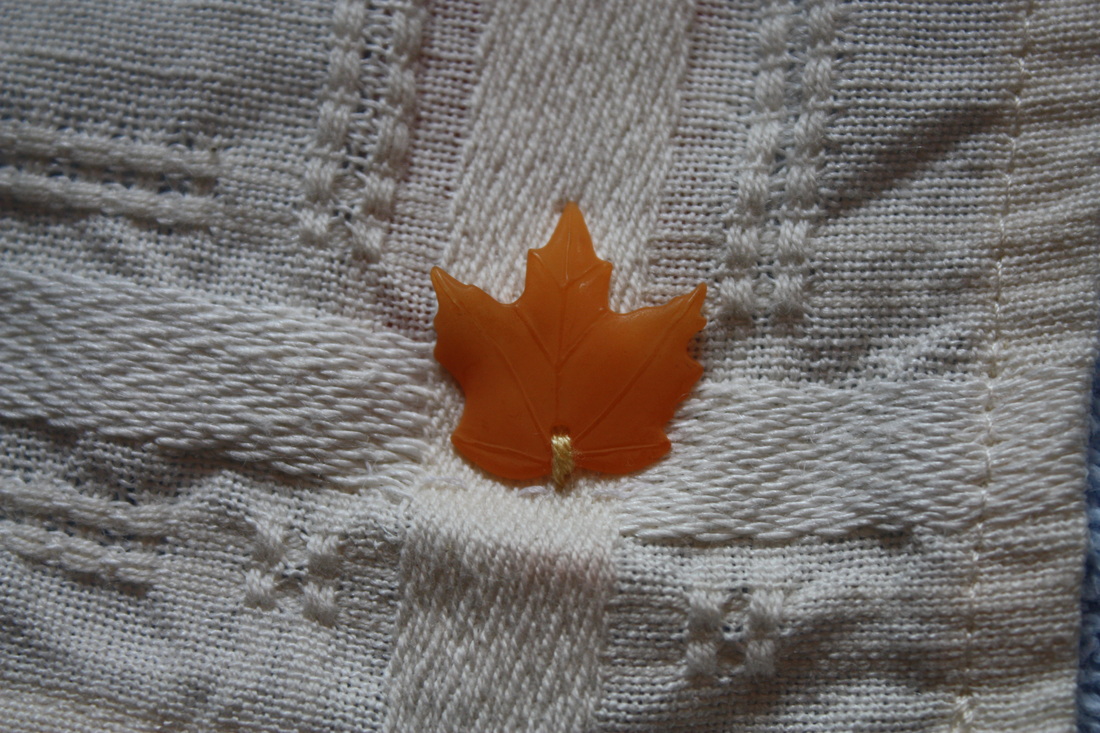
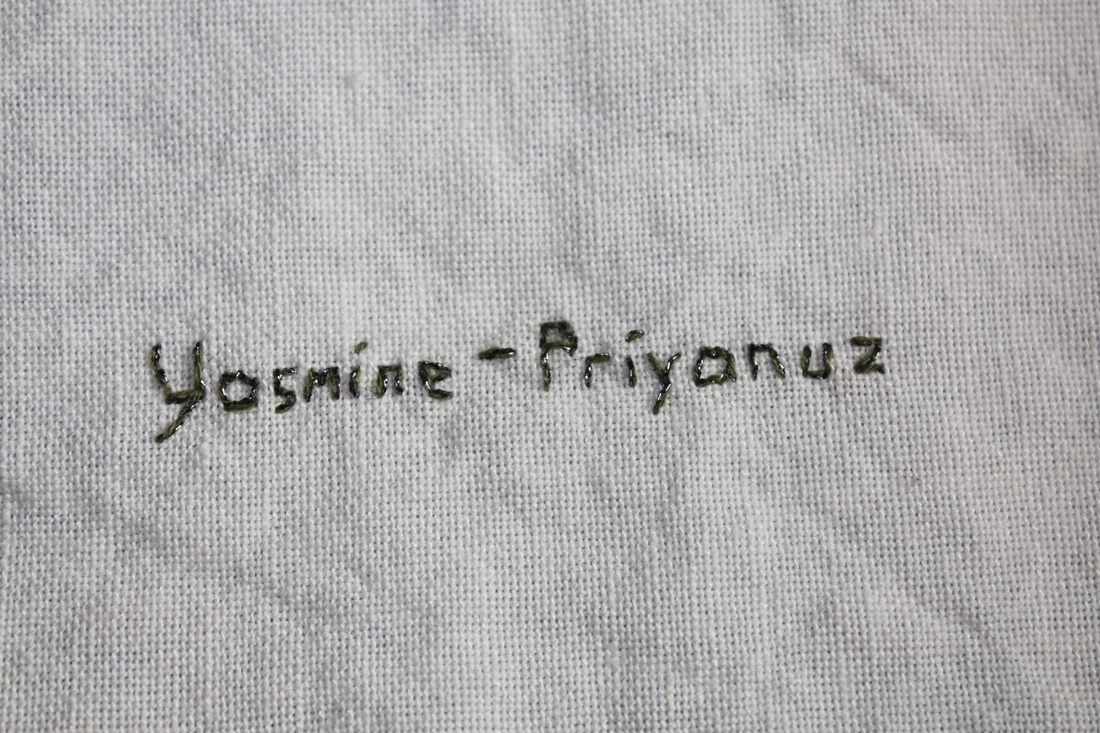
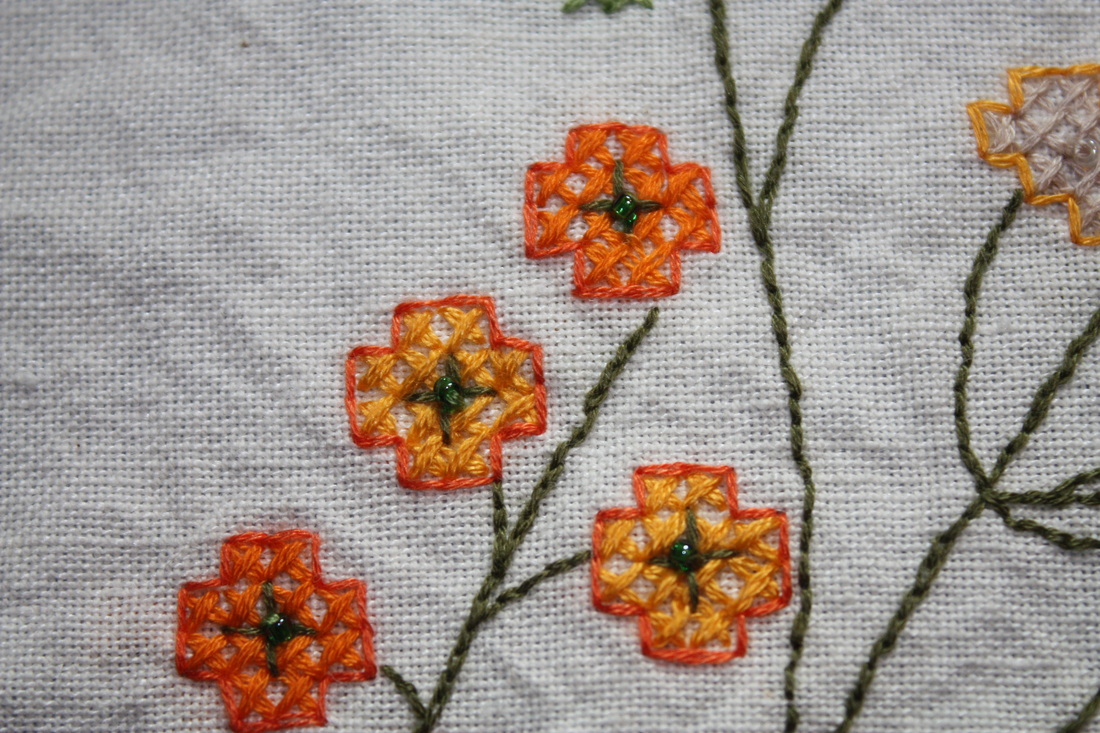
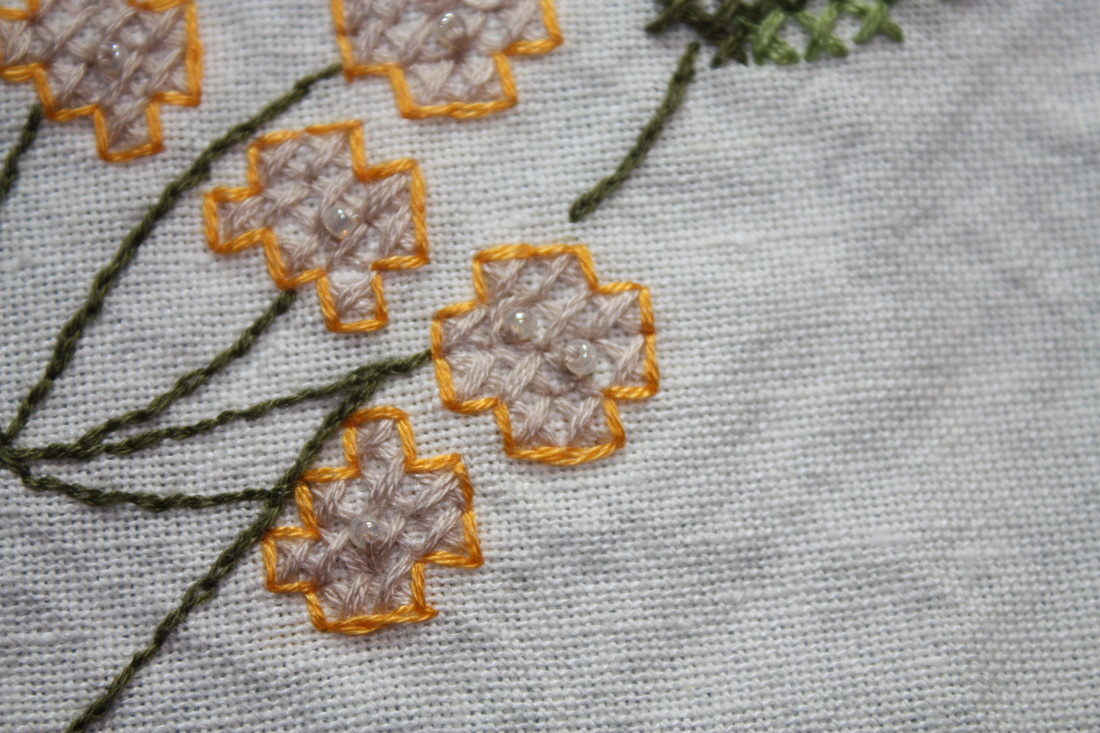
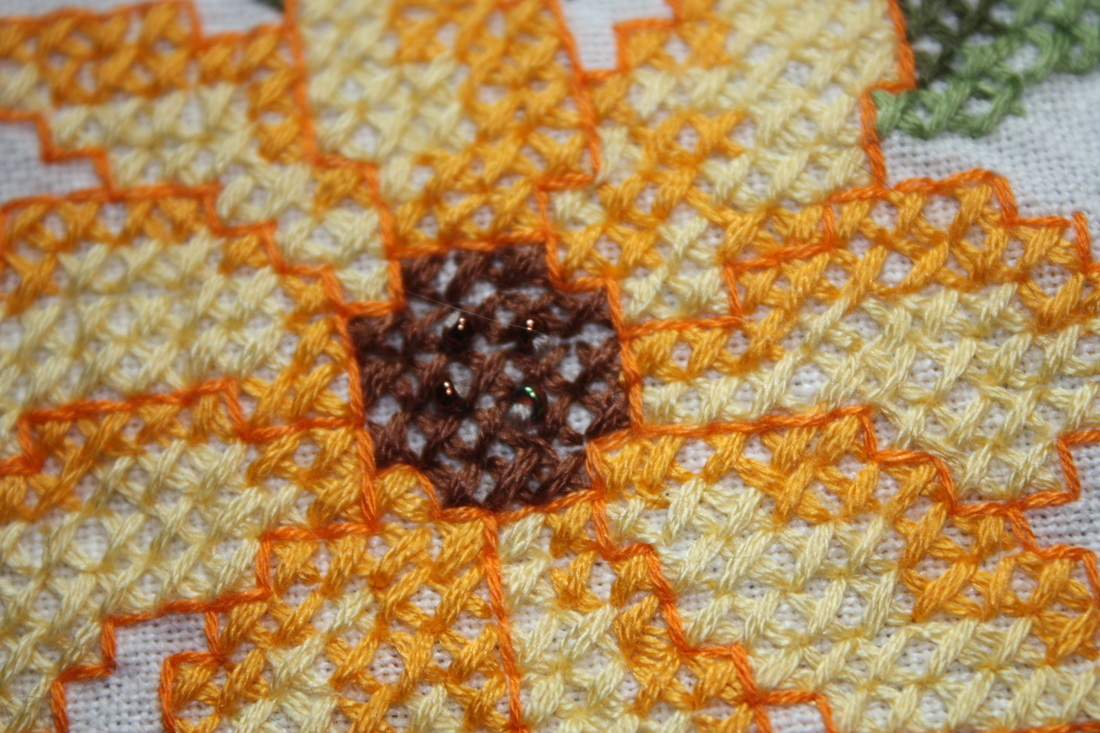
Difficult to see in these photos, but I used black and light grey beads on the flowers instead of French knots (you know how much I hate those knots!). Beads just simply add something to a completed project!
The Leaf buttons I picked up at a bead show years ago; nice touch with the table runner.
What have your completed lately?
The Leaf buttons I picked up at a bead show years ago; nice touch with the table runner.
What have your completed lately?
March 8
Newest member Carole Ann sent me photos of some of her cross stitch and embroidery work.
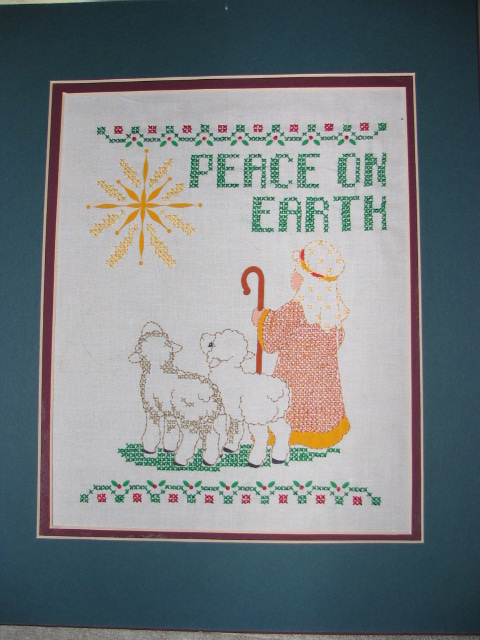

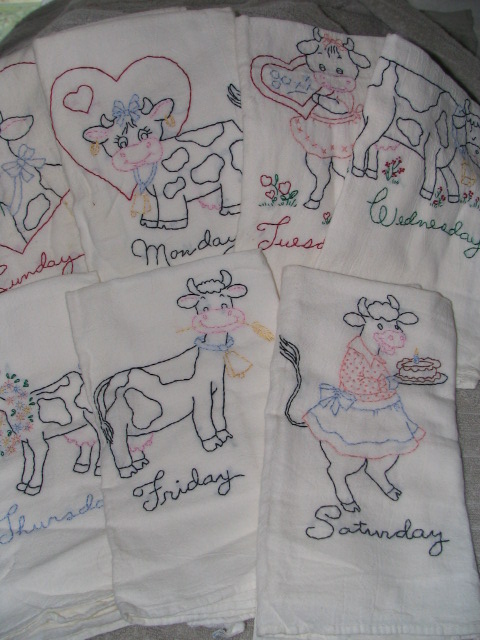
Very cute and well done, Carole. Thanks for sharing!
Remember to send me photos of your finished work so I can post on our site for others to enjoy!
It has been awhile since I critiqued a stitchery magazine or catalogue. Received the latest Mary Maxim catalogue earlier this week and finally got to sit down last night after dinner to review it. There are some pretty cool items in this issue:
On the cover is a lovely rainbow of colors Entrelac Blanket. You will need to go to their website to find out what it is! There are so many new patterns and yarns for crocherters and knitters.
Patterns:
Yarns:
Or you can crochet The Lord Is My Light throw featuring the verse and a lighthouse on a cliff. Very attractive!
There is so much more packed into this catalogue I could fill my entire web space telling you about it!
For the Cross-Stitcher, there are several new stamped cross stitch quilts for the newest baby in your life (whether the baby is yours, a relative's or a friend's). One that caught my eye is Pet Friends Ensemble, but I do not have anyone right now who is expecting.
If you are strictly into (hand) embroidery, there are some sweet Christmas pillowcases and Table Cloths on sale right now -- perfect for gifts!
Mary Maxim also carries a load of stitchery supplies as well as other crafts -- latch hook rugs, beading, stained glass quilts, plastic canvas work, etc. Hop on over to their website and order your catalogue! Start your wish list this month!
Have a great stitching weekend, everyone!
And, Happy Craft Month!
Remember to send me photos of your finished work so I can post on our site for others to enjoy!
It has been awhile since I critiqued a stitchery magazine or catalogue. Received the latest Mary Maxim catalogue earlier this week and finally got to sit down last night after dinner to review it. There are some pretty cool items in this issue:
On the cover is a lovely rainbow of colors Entrelac Blanket. You will need to go to their website to find out what it is! There are so many new patterns and yarns for crocherters and knitters.
Patterns:
- Bavarian Lyllaby throw
- Black Diamond Prism throw
- Scalloped baby blanket
- several varieties of Ponchos
- Kimono Wrap
- Aran Sampler throw
- Buttoned Cuff Boots
- Lace Pineapple throw
- Crocheted Earrings
- Pineapple Fanfare, Butterfly, Kittens, Sunbonnet Sue and Pineapple Blossom dolilies!
Yarns:
- Eucapyltus
- Mohair glitter
- Ultra Mellowspun
- Starlette and Starlette Ragg
- Aran Irish Twist & Tweed
- Marble Chunky
- Titan Bulky yarn
- Sashay Metallic
- Bamboo stripes
- Twinkle Toes
- Sugar 'n Cream Cotton
Or you can crochet The Lord Is My Light throw featuring the verse and a lighthouse on a cliff. Very attractive!
There is so much more packed into this catalogue I could fill my entire web space telling you about it!
For the Cross-Stitcher, there are several new stamped cross stitch quilts for the newest baby in your life (whether the baby is yours, a relative's or a friend's). One that caught my eye is Pet Friends Ensemble, but I do not have anyone right now who is expecting.
If you are strictly into (hand) embroidery, there are some sweet Christmas pillowcases and Table Cloths on sale right now -- perfect for gifts!
Mary Maxim also carries a load of stitchery supplies as well as other crafts -- latch hook rugs, beading, stained glass quilts, plastic canvas work, etc. Hop on over to their website and order your catalogue! Start your wish list this month!
Have a great stitching weekend, everyone!
And, Happy Craft Month!
March 3
My sister-in-law Marcy and I attended the Sewing & Stitchery Expo at the Puyallup Fair Grounds (Washington state) on Thursday, February 28. WOW as usual! For some reason, it took us several hours longer than normal for us to get through the show, but that did not bother either of us. We really enjoyed ourselves again this year -- and we both stayed within budget! If you are interested in attending the Expo next year, be sure to sign up for their e-newsletter via their website.
What is the Sewing & Stitchery Expo? It is exactly what it's name implies -- the perfect all-in-one shopping place for people who enjoy sewing, quilting, knitting and crocheting, and cross stitch and embroidery (by hand and machine embroidery). There are numerous classes and workshops, several sewing challenges and runway events, as well as a Quilter's Night Out; something for everyone!
Generally, the show does not allow photography as the vendors are protective of their displays (many of the quilts and clothing are their own designs). This year, however, the Expo allowed photography as a way to encourage bloggers to post photos on their sites. I asked permission from vendors before I took photos of their booths, even providing them with a business card with our website address. I did not take photos of every booth or it would take me a week to post them all -- and I would have to buy more space for this website. So, here are my favorite items from the Expo:
First up -- Bernina:
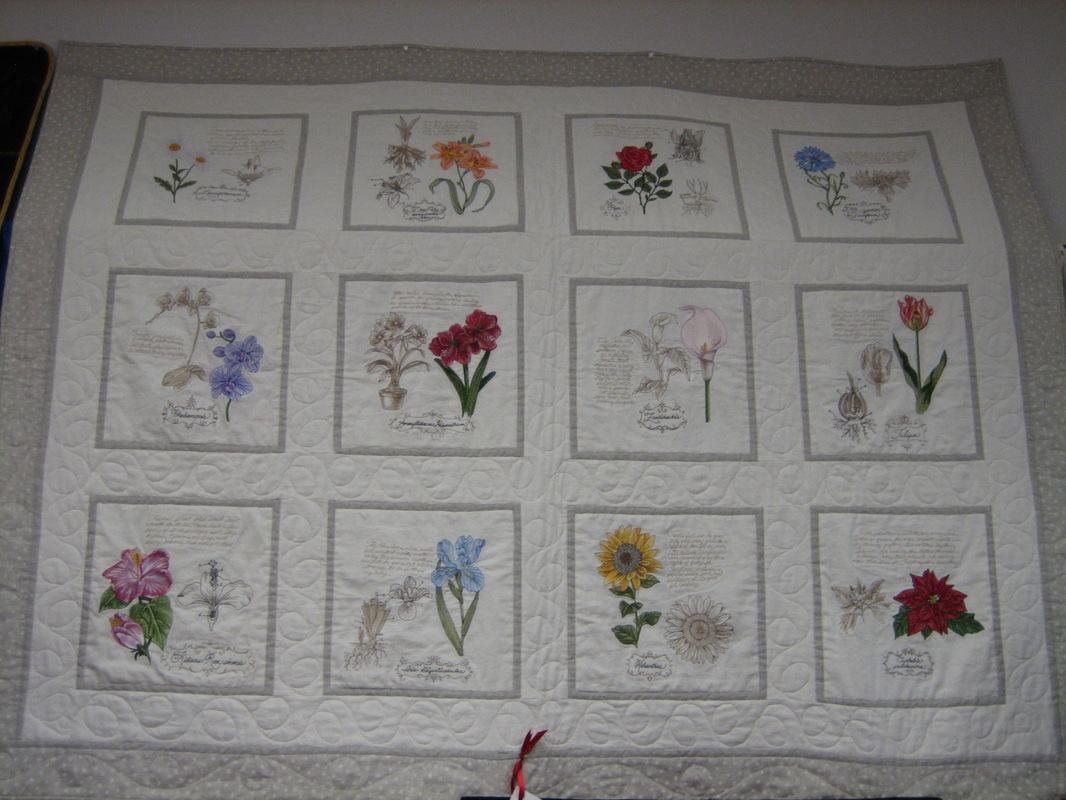

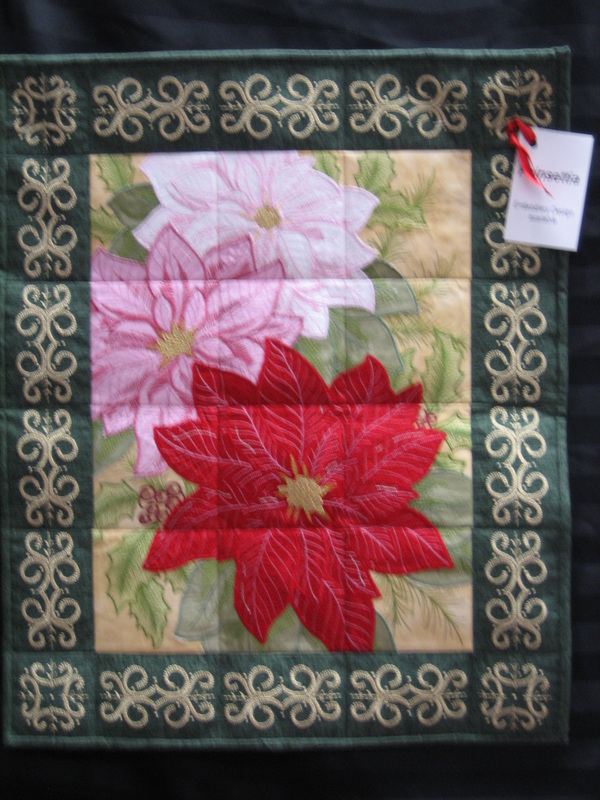
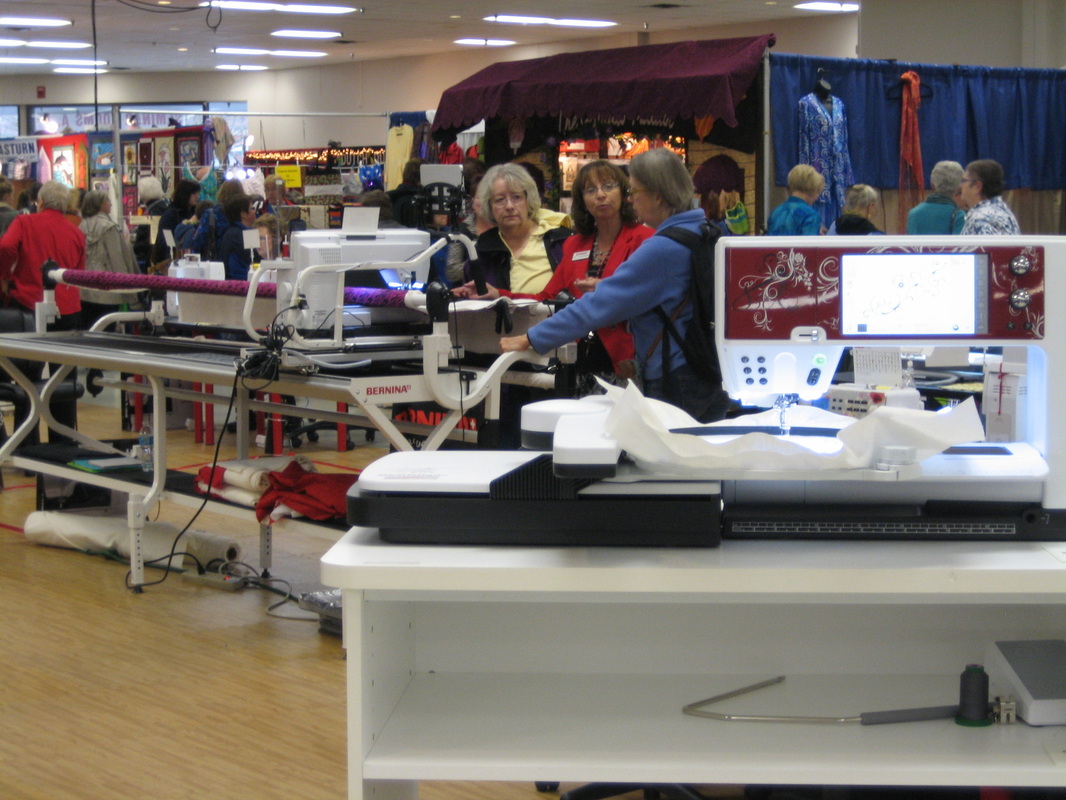
Bernina had two large booths -- one for fabrics and notions, the other for their sewing machines. Since I do not quilt, I love looking at the completed quilts on display. I was looking for a particular fabric though, but unfortunately, no vendor had it available at the show.
Next, Calico Country from Lynden, Washington:
Next, Calico Country from Lynden, Washington:
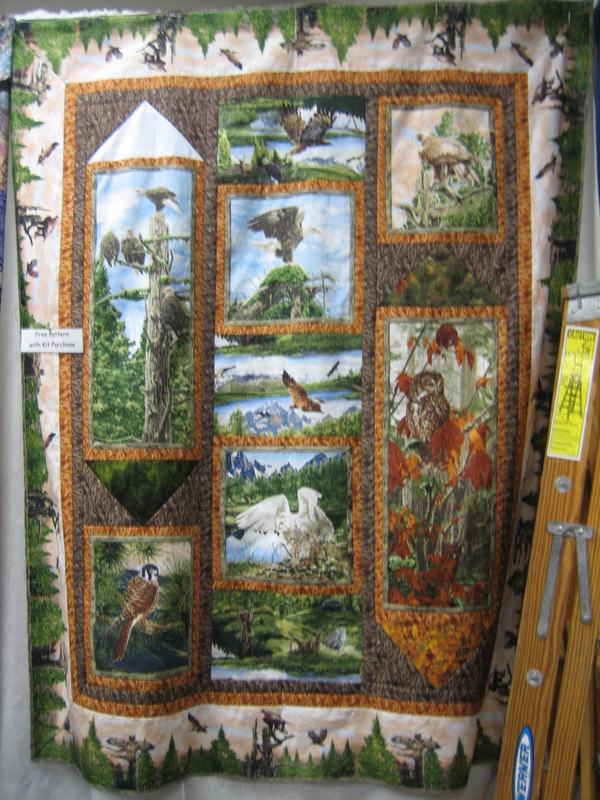

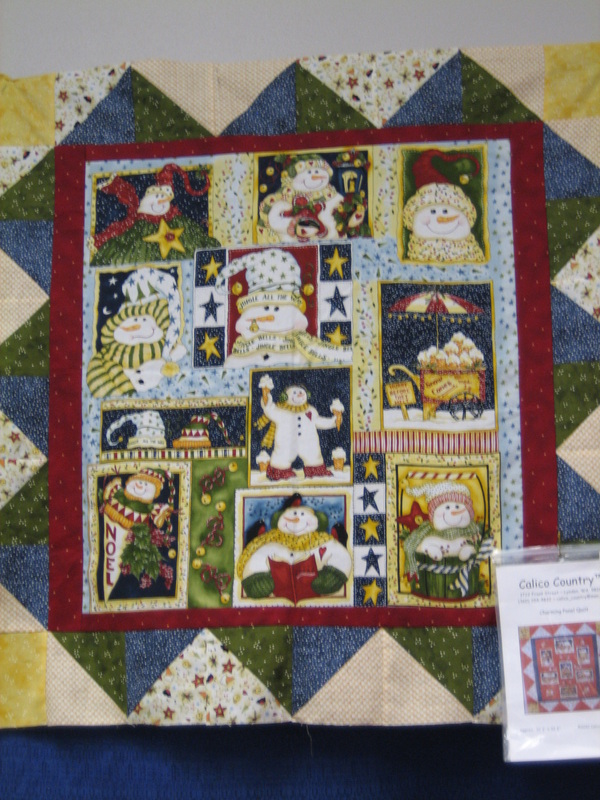

Calico Country quilts are so cool! Just love them! And look at all the choice of fabrics you can choose from! This is only a portion of what there was available at the Expo.
Next, Herirloom Quilts & Fabrics from Poulsbo, Washington:
Next, Herirloom Quilts & Fabrics from Poulsbo, Washington:
I am also a Stamp Collector, so was thrilled to find these fabrics depicting stamps at the Heirloom Quilts & Fabrics booth (at least 4 different stamp fabrics). Some of our stitchers are also stamp collectors, so they may be just as interested in seeing these fabrics as I am.
Fibers, Etc., handwoven from Tacoma, Washington:
Fibers, Etc., handwoven from Tacoma, Washington:
Look at all these gorgeous custom weaved, hand dyed yarns at Fibers, Etc., Handwoven. There are so many varieties, weights, colors and styles, it was a bit overwhelming! They do not have a website, but you can find their store at: 11922 A Street South; Tacoma, Washington 98444; 253-531-3257. They offer knitting, weaving and spinning lessons.
The Quilted Trillium of Monroe, Washington:
The Quilted Trillium of Monroe, Washington:
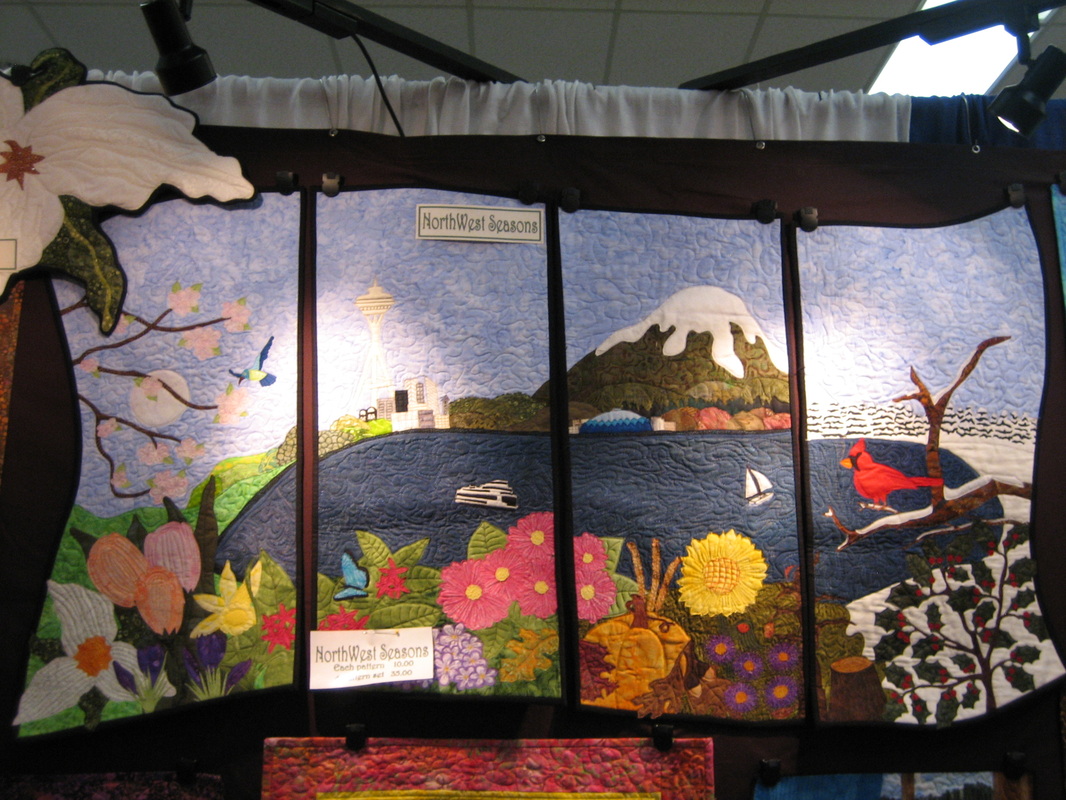
Some of the vendors go all out to decorate their booths. When I first saw The Quilted Trillium, I loved it! It was simply adorable, cozy and inviting! This quilt was their prominent display piece, and why not? It perfectly represents the Pacific Northwest of the USA. This Northwest Seasons piece is Raw Edge Applique.
Next, Indonesian Batiks from Anacortes, Washington:
Next, Indonesian Batiks from Anacortes, Washington:

Batiks are very big this year at the Expo. Everywhere you looked, someone had Batiks, and such a bright array of colors and designs. Indonesian Batiks probably had the largest selection to choose from.
Momo-dini Embroidery Art from Brooklyn, New York:
Momo-dini Embroidery Art from Brooklyn, New York:
Machine Embroidery is a big part of the Expo. The owner of Momo-dini Embroidery Art is modeling one of her latest designs, a Peacock.
Lastly, Bobbie G Designs of Mission Viejo, California:
Lastly, Bobbie G Designs of Mission Viejo, California:
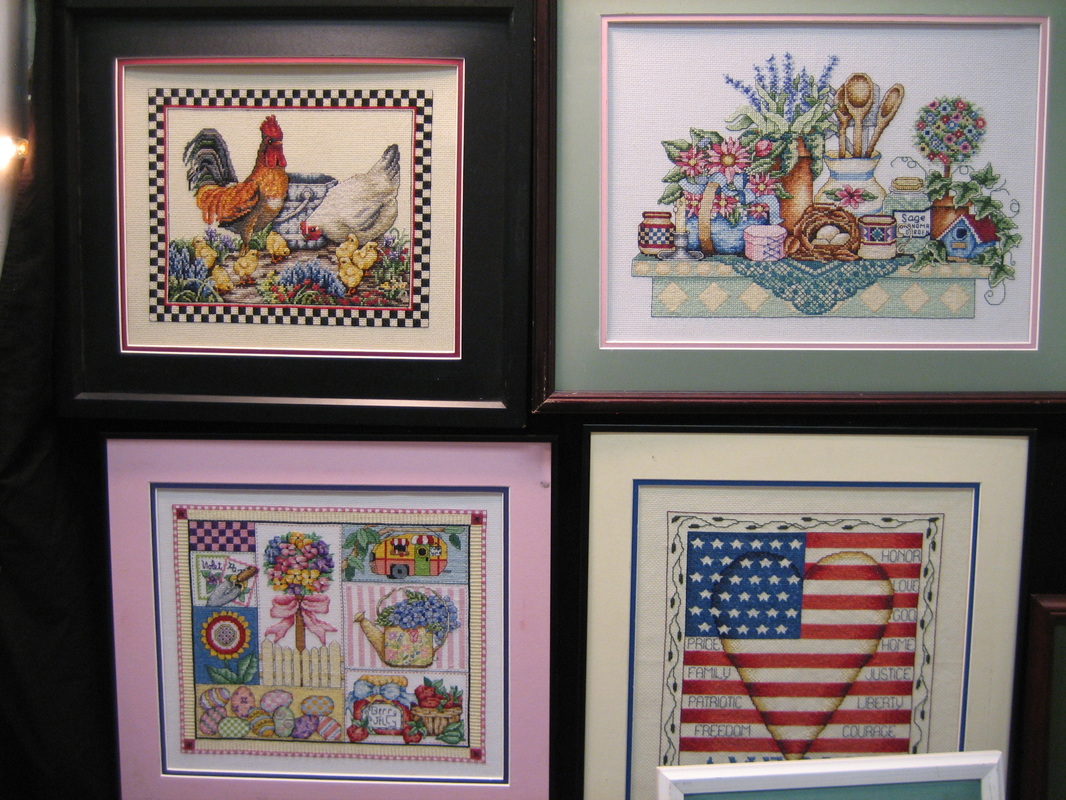

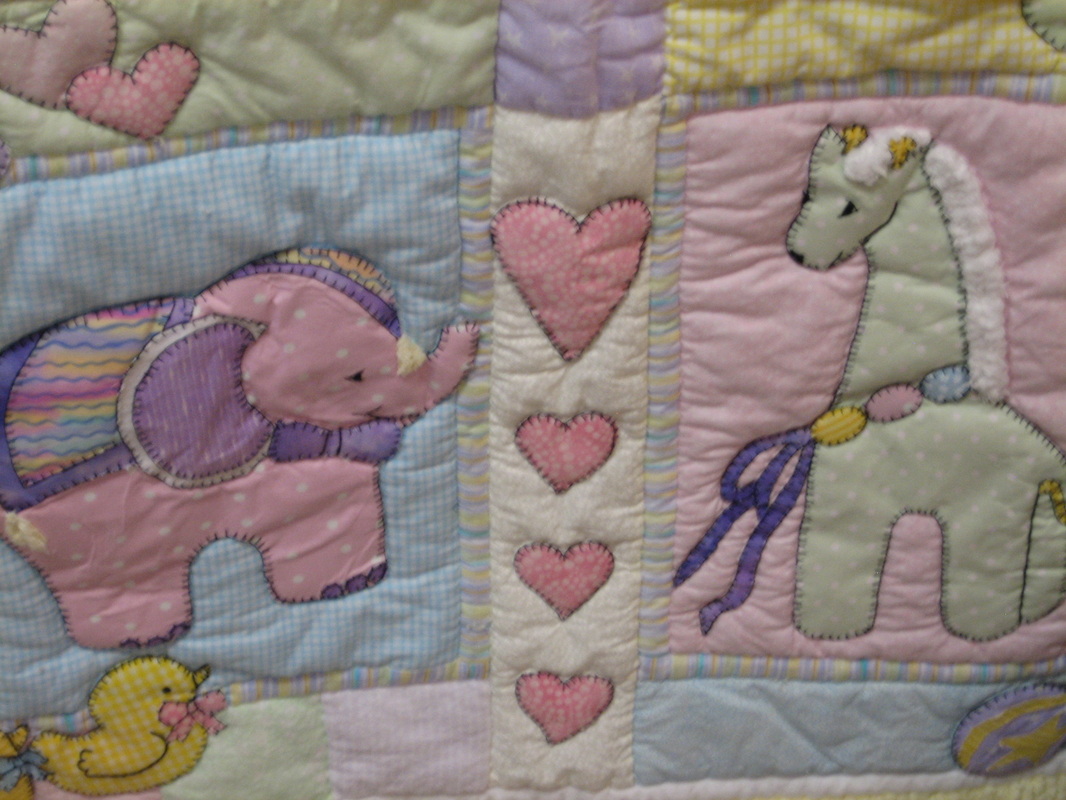
Not to leave out cross stitchers and hand embroiderers, Bobbie G Designs again provided a well laid-out booth with lots of projects waiting for new homes. I bought two kits and Marcy bought two.
If you enjoy using lace, ribbon and buttons on your stitchery, there are a couple of vendors with a good selection of buttons and lace/trim/ribbon. I picked up a few pieces of lace and ribbon to go on my handmade greeting cards, and picked up some lace for a younger sister for her greeting cards.
Longbranch Fibre Farm had a booth at the Expo selling wool hats and accessories gleamed from their Alpacas. If anyone is interested in Fibre Farm Tours, here are several ideas:
http://www.olypenfiberfarmtour.com/
http://paradisefoundfiber.com/
http://www.whidbeyfiberquest.com/
The dates for 2014 Sewing & Stitchery Expo are: February 27, 28, March 1 & 2. There are tons of stuff to look at, so wear comfortable walking shoes, wear layers of clothing (outdoors between the two buildings and usually raining), and bring snacks (or extra money for food) and tote bags (no rolling carts). You will be exhausted at the end of the day, but your head will be filled with loads of fun ideas to try! Look forward to seeing you next year!
Remember to click on the Links to go directly to the vendors' websites.
February 20
Remember, you can access Stitching Guides on Annie's Catalog site -- Knitting, Crocheting, Quilting, Beading, Sewing, Cross-Stitch and Plastic Canvas. Even if you have done your craft for years, it does not hurt to see what is new. Check them out!
Some helpful information from the June 2012 issue of Cross Stitch Crazy:
Top Tips for Ironing Cross Stitch
Some helpful information from the June 2012 issue of Cross Stitch Crazy:
Top Tips for Ironing Cross Stitch
- Ironing your fabric before you start can make it much easier to see the holes in the aida.
- Iron interfacing onto the back of projects to stop fraying.
- Only wash your stitching if it has become soiled.
- If you have washed your project before ironing, sandwich it flat between two dry towels, then roll and press lightly to remove excess water.
- Always set your iron to its lowest warm setting. If in doubt, use the setting for rayon.
- Place your project face-down on top of a clean towel, to protect the stitches on the front.
- If you have tangles on the back of your work, place another towel over the top and use the next highest heat setting.
- Always iron your work before adding beads or buttons.
- Keep the iron constantly moving to avoid burns and scorch marks on your fabric.
- If you haven't used your iron in a while, practice on a scrap piece of fabric first.
February 13
Last night was stitchery night. It is so nice to see a full house! Some members brought projects for the Mountlake Terrace Library display case -- and we discovered that I had never downloaded the photos from 2011! Those are now posted, so pop on over to Library Display Photos.
Wendy was showing off some of the work that her and Kimberly have been doing the past couple months. Kimberly wanted to learn Hardanger, and she has been meeting at Wendy's home to learn. Look at what stitches Wendy has taught her thus far:
Wendy was showing off some of the work that her and Kimberly have been doing the past couple months. Kimberly wanted to learn Hardanger, and she has been meeting at Wendy's home to learn. Look at what stitches Wendy has taught her thus far:
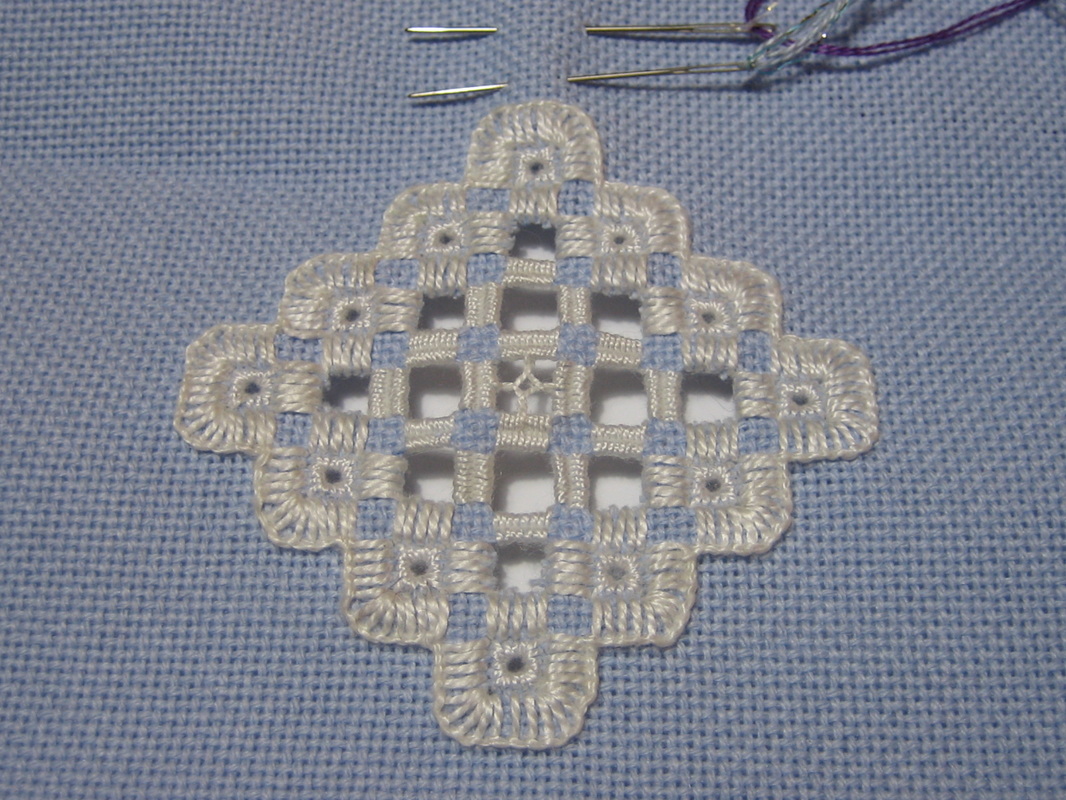
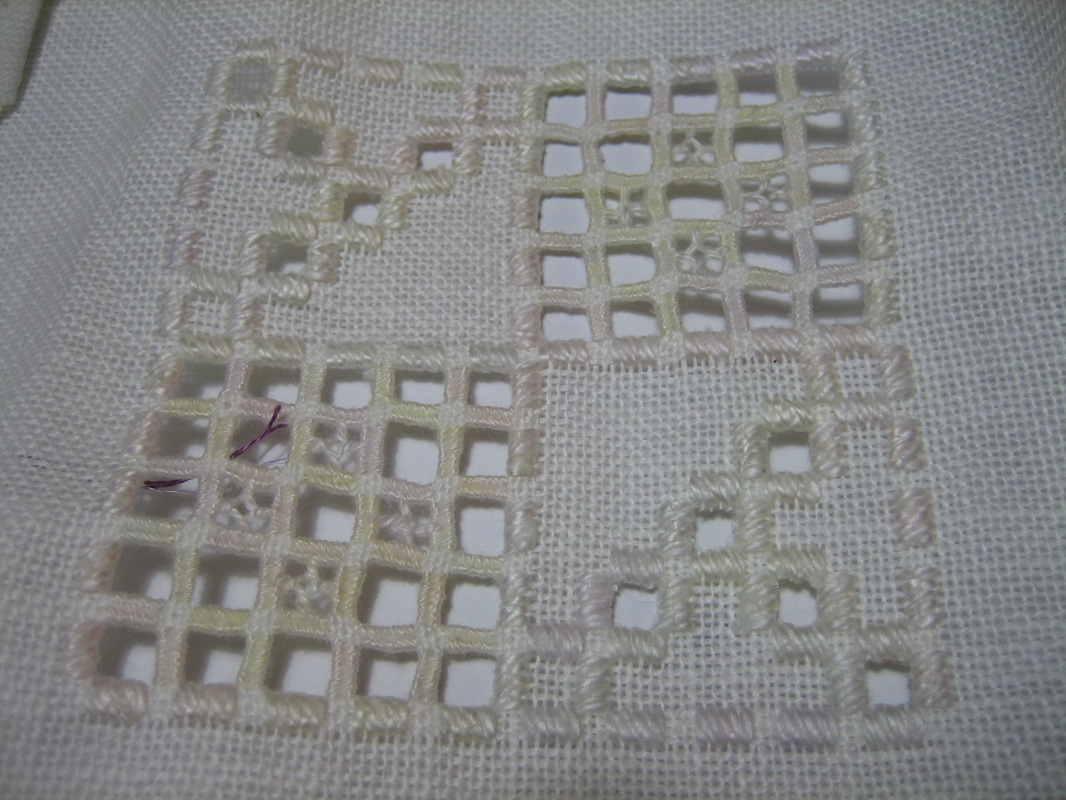
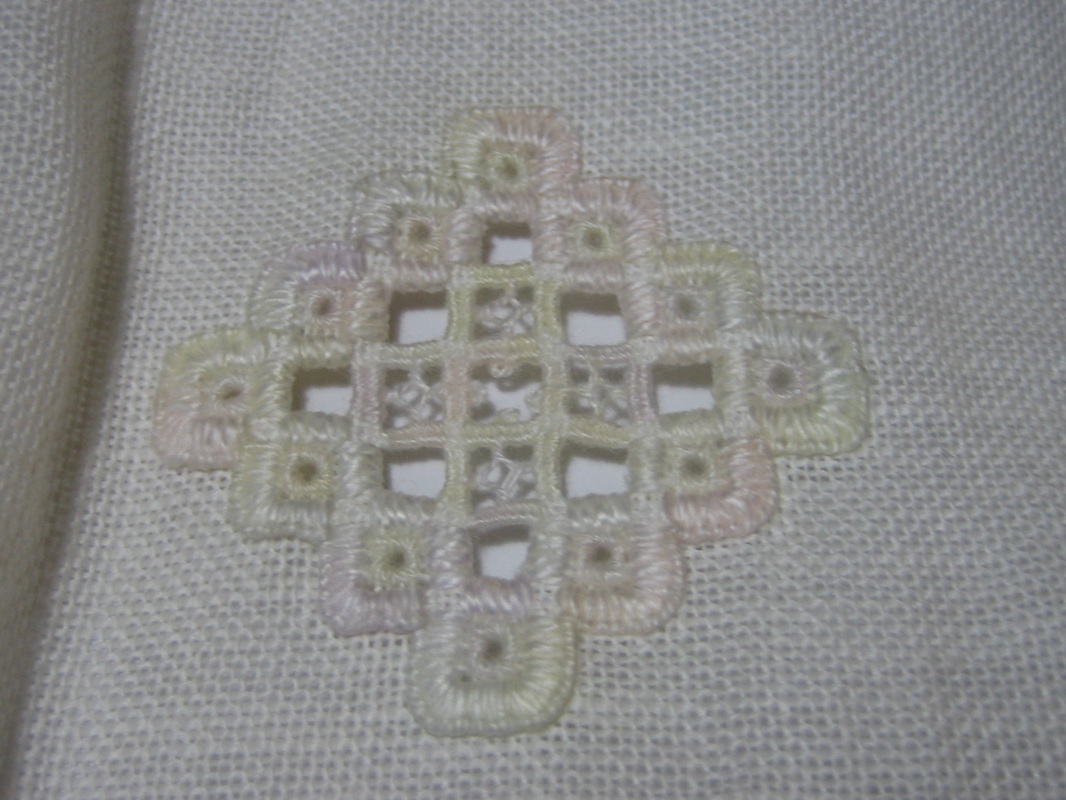

Very nice work, ladies!
Kimberly also brought in a baby sampler she's been working on for her newest grandchild.
Kimberly also brought in a baby sampler she's been working on for her newest grandchild.
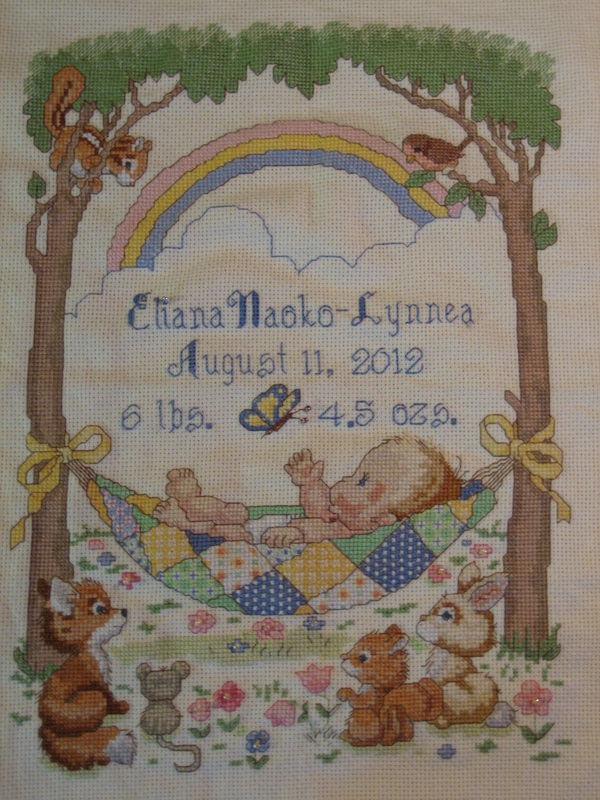
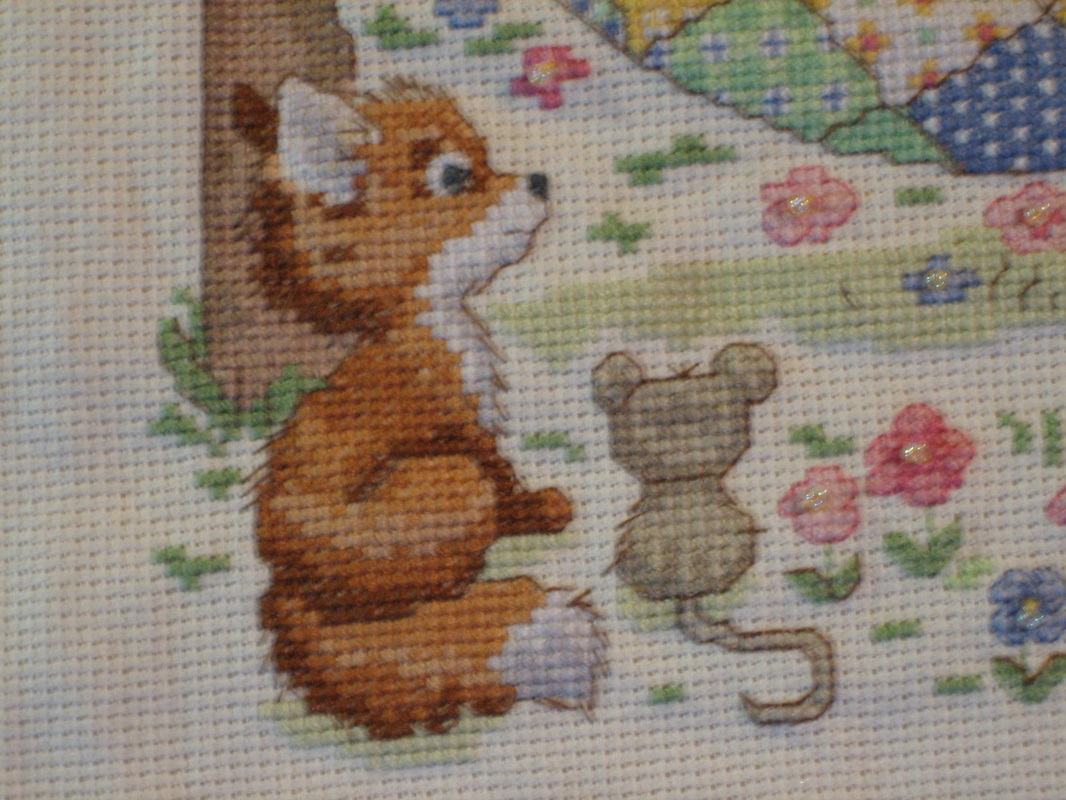
The father is of Japanese descent, thus the adorable name. Kimberly did a great job!
We come up with some interesting conversations on Stitchery nights. Found out one of our members has never made fudge, another has simply never been able to make a good batch, and there are several ways to make fudge -- I stir my fudge, another member Never! So on Saturday, March 9, those interested are gathering at my place to learn how to make a good batch of fudge (Keith and I never got around to finishing our fudge at Christmas time). We will work on stitchery projects while the fudge sets. Yummy!
We come up with some interesting conversations on Stitchery nights. Found out one of our members has never made fudge, another has simply never been able to make a good batch, and there are several ways to make fudge -- I stir my fudge, another member Never! So on Saturday, March 9, those interested are gathering at my place to learn how to make a good batch of fudge (Keith and I never got around to finishing our fudge at Christmas time). We will work on stitchery projects while the fudge sets. Yummy!
February 11
Today, I have a special treat for our Quilters!
Over the weekend, my husband Keith and I went to Country Village in Bothell (Washington) for their Chocolate Tour! 25 stores of the 45+ stores participated. We haven't toured the entire Country Village in a year or two, so we were quite surprised to see so many NEW stores.
One store, who has been there for many years, is so much fun to go into! Next time I need backing fabric for a cross stitch quilt, I will definitely shop at this store! The store owner Julie was in, and she gave me permission to take photos to post on my website. So come along on my tour of Keepsake Cottage Fabrics: (click on photos to see captions and other photos)
Keepsake Cottage Fabrics' address at Country Village is:
818 238th Street S.E.
Bothell, WA 98021
Keepsake Cottage Fabrics now conducts classes. Click on Keepsake Cottage Fabrics name in paragraph before photos to be directed to their website for more information.
There is another store in Country Village that would be of great interest to our knitters and crocheters. Once I have permission to take photos, I will post them here, so be sure to keep checking back.
Remember, our Display at the Mountlake Terrace Library entrance is coming up soon. I will post photos when I have the display set up.
January 30
This month has gone by so fast! Can't believe tomorrow is February. As my husband would say, the year is one-twelfth over!
Speaking of which, the Sewing & Stitchery Expo in Puyallup, Washington, USA, is coming up fairly quickly! I just purchased tickets for my sister-in-law and I to attend. We are planning on Friday, March 1 (that's her birthday, so extra fun day!). If you haven't gotten your tickets yet, they are $10.00 each person for any day. If you get them at the gate, they are $12.00. You can order your tickets on-line (I've done it previously and never had a problem) or you can visit one of their sponsoring stores: Calico County; Fabric Etc.; Fabric Depot, Inc.; Quilters Junction; Quiltworks Northwest; Rochelles Fine Fabrics; Sequim Sewing & Vac; Shibori Dragon; The Needle & I; The Quilt Barn; and select locations of Pacific Fabric, Hancock Fabrics and Quality Sewing. Please call the store before you leave home to make sure they still have tickets available. I got our tickets at Pacific Fabric in Everett. My husband went with me. After I paid for the tickets, I turned to leave, but the husband had disappeared. I went looking for him and came across the store's ribbon area -- ho boy! I left with $30 of ribbon for my greeting cards!
This year, the Expo brochure states we can take photos of the displays. I was hoping so as I wanted to post photos on our website -- which is why they are allowing photography this year! Of course, always ask permission from the vendors before you take photos!
So get your tickets and see you at the Expo! Send us photos of you at your favorite vendor or in a class. If you win a door prize, would love to have that photo too! Have fun!
The purpose of our website is to encourage others to start, return to or continue working on their needle-arts projects. We try to let you know when Sewing/Stitchery Expos are going on, what's happening in stitchery journals, classes/workshops, and, of course, to show off the wonderful items our members have stitched. Every once in a while one of our members will give us a review of what they've come across. Here is what member Heidi recently shared with me:
Hello! Here is a my review of some quilts in a magazine.
There is a current magazine out, Winter 2012/2013, called McCall's Quilting America Loves Scrap Quilts. It has some very nice quilts. The top quilts that I like from it include
1. Leymone Star quilt with log cabin, pinwheel, and a little bit of rail fence. I didn't like their name for it. It reminded me of Homeland Security. This quilt is a beautiful quilt with very tricky things, not for beginners. Rail fence is beginners. The others are things I'm not good at. It says intermediate level for skill level. A Lemoyne star has 8 diamonds. Erin's (her sister) mother-in-law made a Lemoyne star baby quilt for Kyle. She is an expert at sewing and quilting. If I wanted to challenge my brain, then this would be the quilt to do it. The finished size is 68 1/2 in. by 74 in. This quilt has fewer major quilt blocks than other quilts--7 large log cabin quilt blocks, 9 large Lemoyne Star quilt blocks.
2. Snowflake Star quilt with some pretty miniature nine-patches. Their name for it was Rainbow Galaxy. I wanted to know if this was the same quilt as the patriotic quilt in the Quilty magazine with Marianne Fons that had Ohio Star quilt blocks and sashing and was simple and beautiful. It wasn't the same quilt, but it still reminded me of it. The only thing intermediate about this quilt is the flying geese parts of the quilt block. Once a person learns to use the flying geese rulers from Eleanor Burns, the flying geese will turn out perfectly.
3. House quilt with Kaffe Fasset fabrics. Their name was The House that Kaffe Built. When I tried to find it on the Internet, I found one in a June 2011 magazine that looked identical from McCall's Quilting. I didn't think you were supposed to repeat articles so often. Maybe that means this Scrap Quilts magazine is selected quilts from the regular magazine. This quilt is rated intermediate, and I've made this house block before. I helped out a lady at the senior center craft group in making a house....She used the house that I made in her quilt. The more pieces in a quilt block, the more chance there is of it not fitting the final size unless your seams are perfectly 1/4 in. I'd agree that it is intermediate level.
4. Hand pieced flag quilt with curved pieces. Their name was Charm Flag. It is small enough to be a table centerpiece quilt. It says confident beginner. I don't know that many people who like to hand sew anything. That's why they don't like to applique. It says "Make this folksy all-American quilt wherever you are, from children's sporting events to doctor's offices, with easy, portable hand piecing. Step-by-step photos show you how!" The curves need to be clipped to lie flat. This quilt has seven rows and seven columns. I think it is pretty.
5. Saddle quilt that was all about the color of leather and piano keys. Their name was Saddle Tramp. I thought this quilt could look good in other colors or the browns could be changed. It had so much rust. The skill level is confident beginner. It has flying geese. I agree that with the skill level.
6. Pinwheel quilt with nine-patch sashing cornerstones with the nine-patches as pretty as flowers and quilted matching pillowcases with the pillowcase pattern online for the pillowcases. Their name was Scrap Basket Bounty. It had some red and purple which brings the Red Hat Society to mind. I disagree with the skill level of confident beginner. Pinwheels are not easy because they need to look good in the center. Maybe for someone else this would be a beginner quilt, but it would not be one for me.
Thank you Heidi for your review of this magazine. If anyone has made one of these quilts, would love a photo for the website.
Remember our Stitchery Club Display at the Mountlake Terrace City Library entrance display case is March 31 through April 14. I need your display pieces before then.
Look forward to seeing you at the Sewing & Stitchery Expo in less than a month!
January 23
Stitchery night was last night. Several things were covered, including the latest issue of Cross Stitch Crazy, the meeting schedule for 2013, welcoming a new member, and the Sewing & Stitchery Expo in Puyallup, Washington February 28 through March 3.
New Member
Welcome new member Carole Mann. She retired a couple of years ago. Carole does sewing and cross stitch, though she hasn't done much of her crafts while working for many years as a Nurse. The below 2 photos shows what Carole worked on last year:
Barbies and Clothes
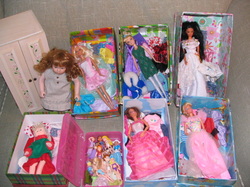
Carole bought from garage sales, eBay and second hand stores Barbies and other dolls in good condition. She purchases from same locale clothes for each doll, does any necessary mending so clothes are like new, then boxes up each Barbie with 10 outfits (other dolls less outfits), and gave them to charity.
More...
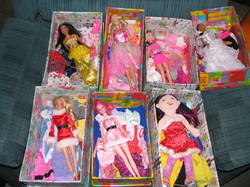
Carole fixed up 19 boxes of dolls and clothes.
Great job Carole! I'm sure there are 19 little girls out there who love their dolls and outfits!
Check out the Meeting Schedule/Events page for this year's meeting schedule and other things going on. This schedule will likely change as our regular members decide which month to hold stitchery at their homes. Keep an eye on the Schedule page for updates.
It is time for the annual Sewing & Stitchery Expo at the Puyallup Fairgrounds here in Washington State, USA. Admission tickets are only $10. There is a wide variety of sewing classes available at this Expo -- regular sewing, machine embroidery, quilting and sometimes cross stitch. There are contests and loads of door prizes! It is fun just to go down and look at all the cool quilt designs that designers have developed over the past year. I will be attending with my sister-in-law. When I am given permission, I will take photos and put on website. Hope to see you there!
Here is a new website I've recently come across: Choices Embroidery. They have patterns and fabric for just about any type of embroidery, including hardanger and blackwork. I am definitely going to have to explore them further.
Top Tips for Interfacing
Always lay your fabric shiny side down, and iron over the non-shiny side.
Don't use steam when ironing on interfacing.
Use white interfacing behind pale fabrics and black interfacing behind dark ones, to blend in the holes.
Use interfacing to hide messy stitching on the back.
Do a test run using a sample of your chosen fabric and interfacing, before experimenting on your actual stitched piece.
Iron interfacing on to the back of your stitching before you start to work the backstitch, to hide trailing threads.
If stitching through the interfacing, use a sharp needle to pierce it cleanly.
Back small designs with interfacing before cutting out, to prevent fraying.
Avoid using interfacing on pieces featuring metallic threads, which can't be ironed.
Use heavyweight interfacing to add stability to aida band and other floppy fabrics.
~from October 2012 issue of Cross Stitch Crazy
January 9
If you live in the Pacific Northwest area of the USA, check into attending the Sewing & Stitchery Expo at the Puyallup Fairgrounds over the February 28 - March 3 weekend. For the past 5+ years, I've been attending with my sister-in-law on Friday of the Expo. We make a day of it -- tour the entire show, take a class or two if there are any of interest to us, have strawberry shortcake or lunch, and if any time leftover, visit the Super Mall in Auburn or hit a scrapbooking store on the way home. Marcy quilts and has a table-top embroidery machine. I do stamped and counted cross stitch. We love to wander the show and see all the cool, vibrant and clever quilts that vendors have produced each year. She buys thread and software for her embroidery machine, and fabric for quilts she needs to work on. I buy cross stitch pattern books/charts and maybe a kit or two, and whatever else catches my eye. We rarely leave empty-handed.
I've already got my brochure for the show, and there are a couple of classes I'm interested in. Whether I take them or not, I haven't decided. Check out the website http://www.sewexpo.com/ and get your tickets soon. Classes sell quickly. There are nice hotels nearby if you are coming from a distance.
Hope to see some of you there!
Pin Cushions
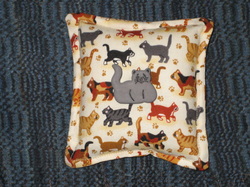
Ever wanted a clever pin cushion for all your stitching needles, but can only find the standard cushions at the stitchery/craft stores?
How about attending local craft fairs? Spring is coming, and there will be spring craft fairs. There are summer craft fairs and Farmers Markets (some with crafters). Of course, the holidays are abundant with holiday craft fairs/bazaars. Put on your wish list that you want a cute pin cushion. My husband surprised me with this cat pin cushion; he found it at one of the holiday craft bazaars we attended this past holiday season.
Would love to see some of your cute pin cushions.

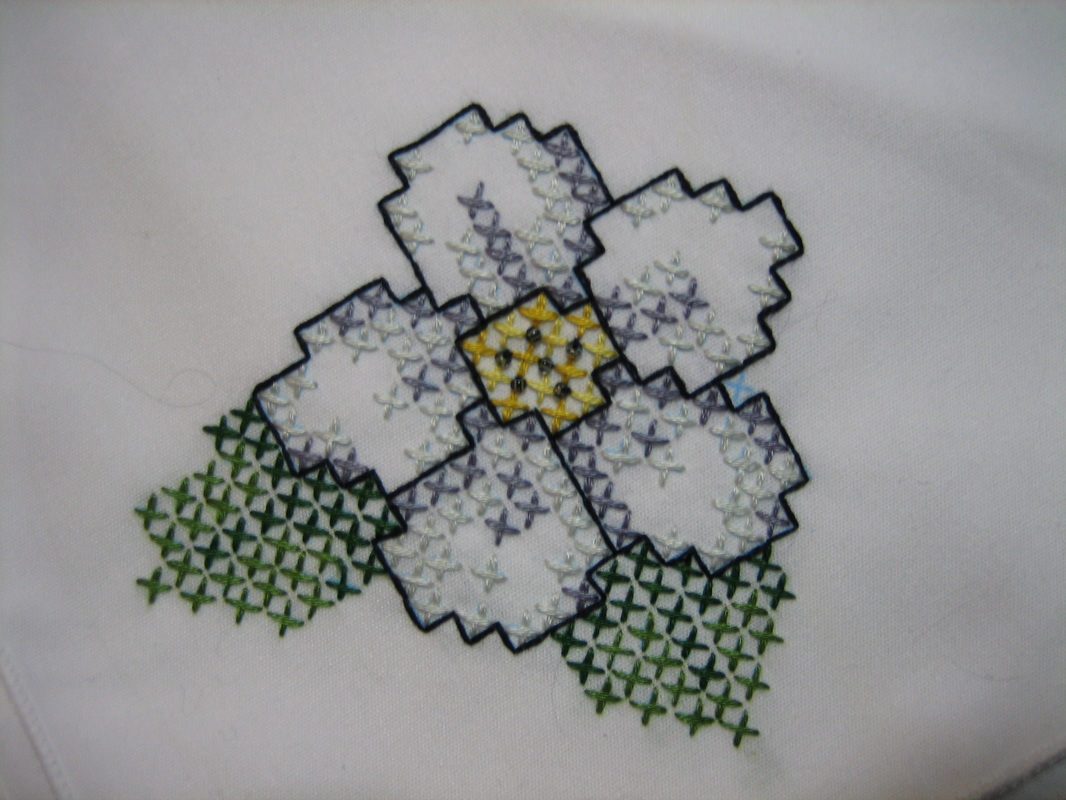
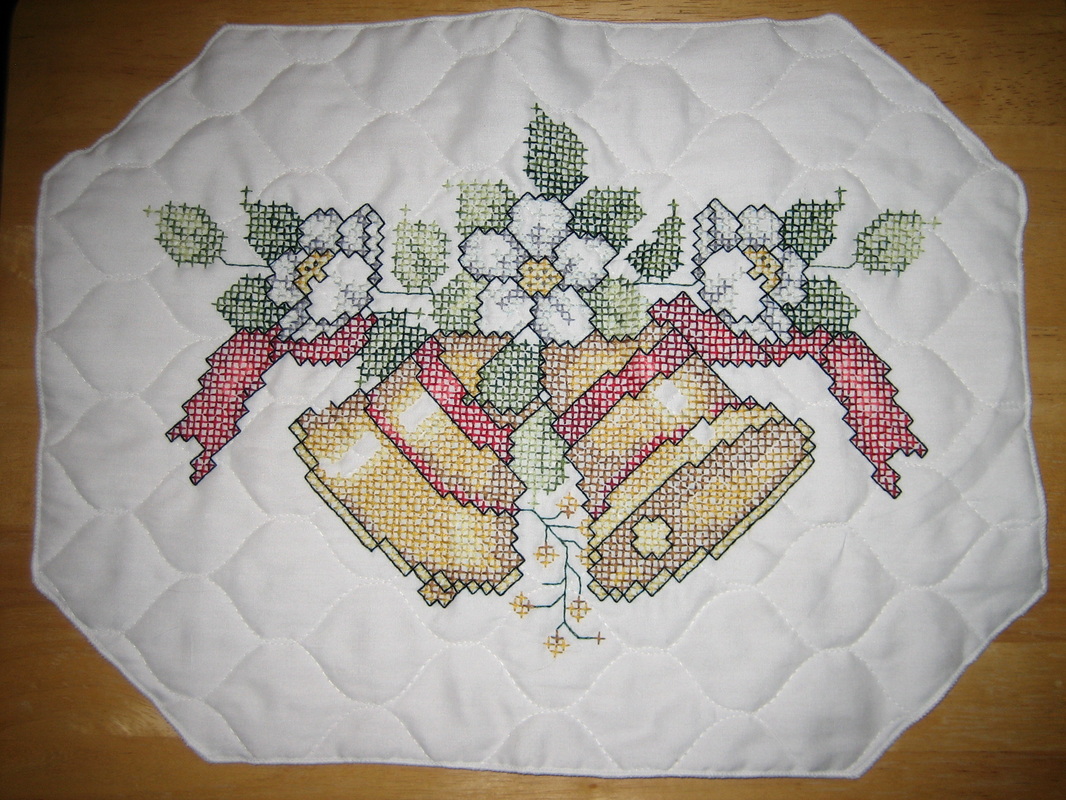
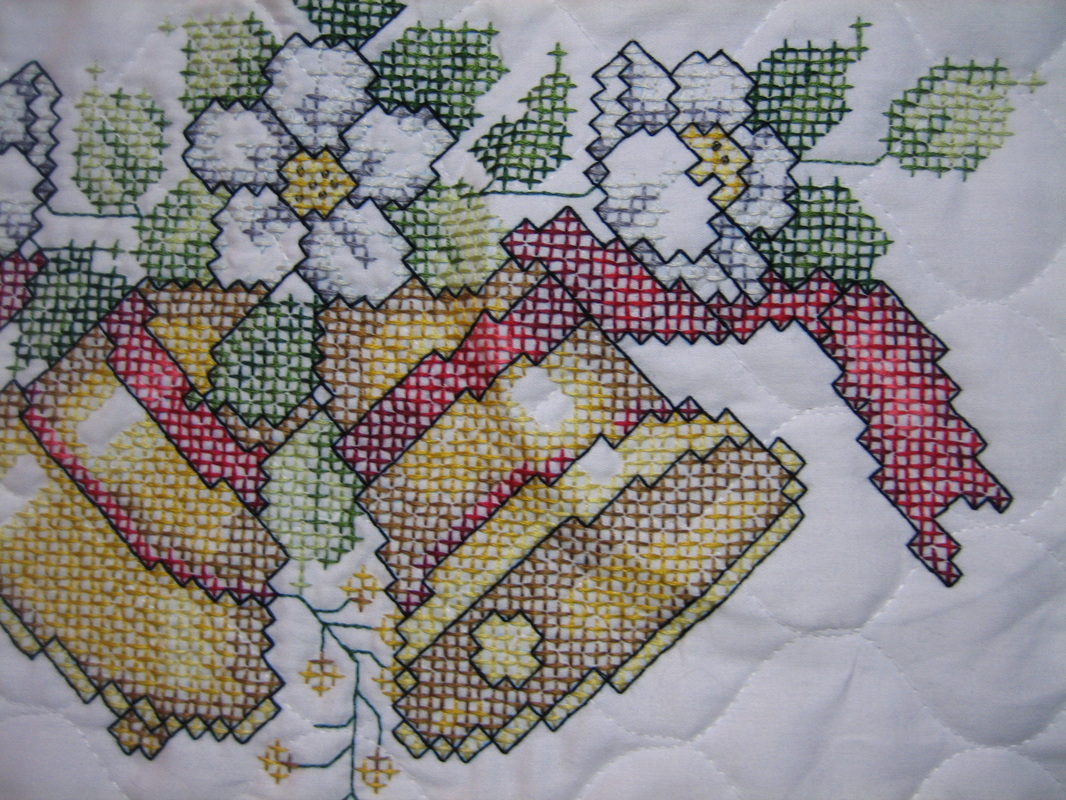
I started this stamped cross stitch Christmas Holiday Bells set back in August-September 2011. It took about 12 hours to do the 6 napkins. I did the first placemat September through December 2011. That mat took an estimated 20 hours, 15 minutes. I just finished the second placemat last night (which I started just after Christmas this year). It took 20 hours, 25 minutes. (I did other projects around this set, thus, the time gaps.) Now, I have the large tablecloth to work on; will post photos when completed.
I used beads in the flower centers on both the napkins and placemats, instead of French Knots. This set of Holiday table linens is for my husband and me. We expect to use it for Christmas 2013. The kit was made by Design Works Crafts out of Bohemia, NY. I believe I bought the kit from Herrschners.com.
I used beads in the flower centers on both the napkins and placemats, instead of French Knots. This set of Holiday table linens is for my husband and me. We expect to use it for Christmas 2013. The kit was made by Design Works Crafts out of Bohemia, NY. I believe I bought the kit from Herrschners.com.
Just for our Knitters
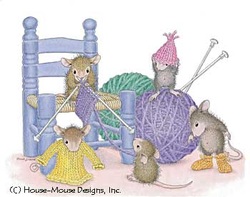
I also make greeting cards and love the designs by House Mouse.
Thought our Knitters would love this design. If you can't live without this design, check out their website -- you can sport the design around town on a T-shirt and tote bag.
Thought our Knitters would love this design. If you can't live without this design, check out their website -- you can sport the design around town on a T-shirt and tote bag.
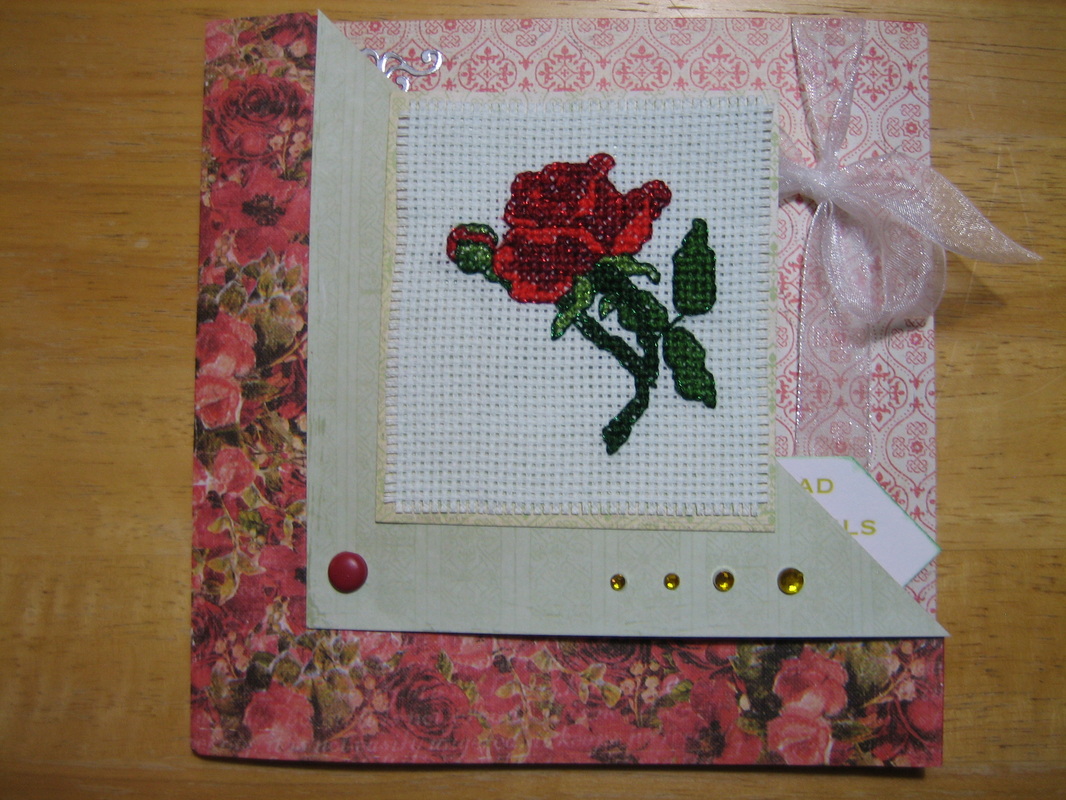
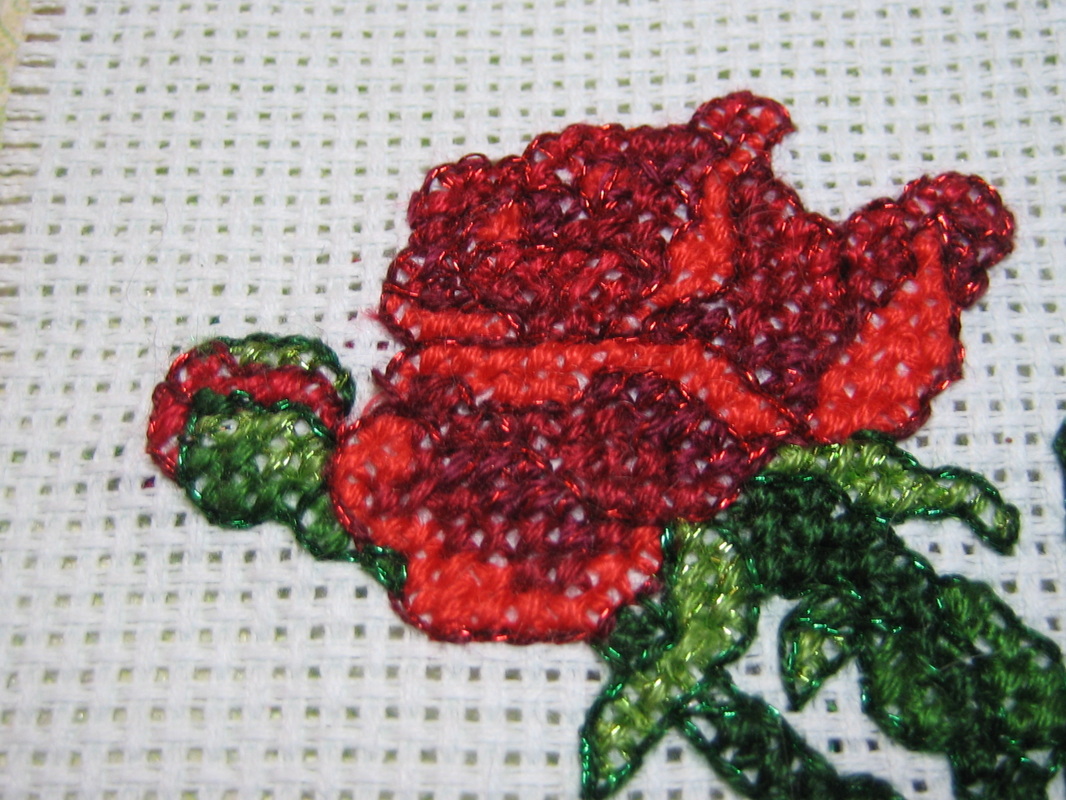
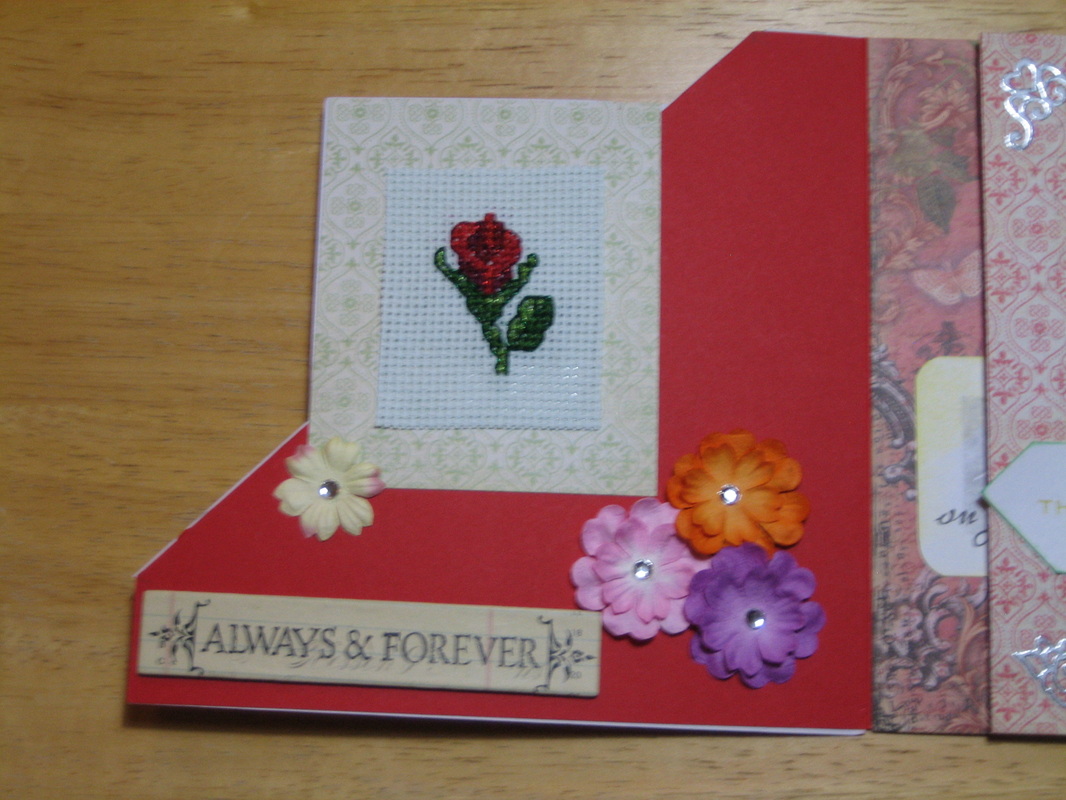

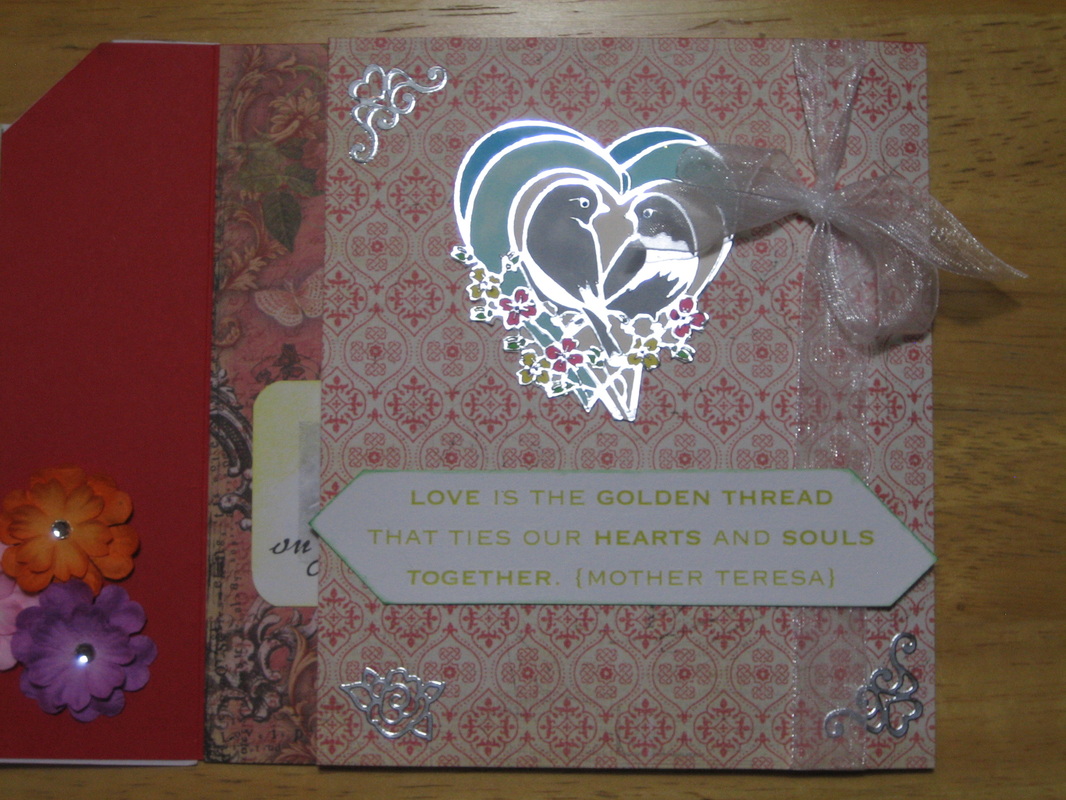
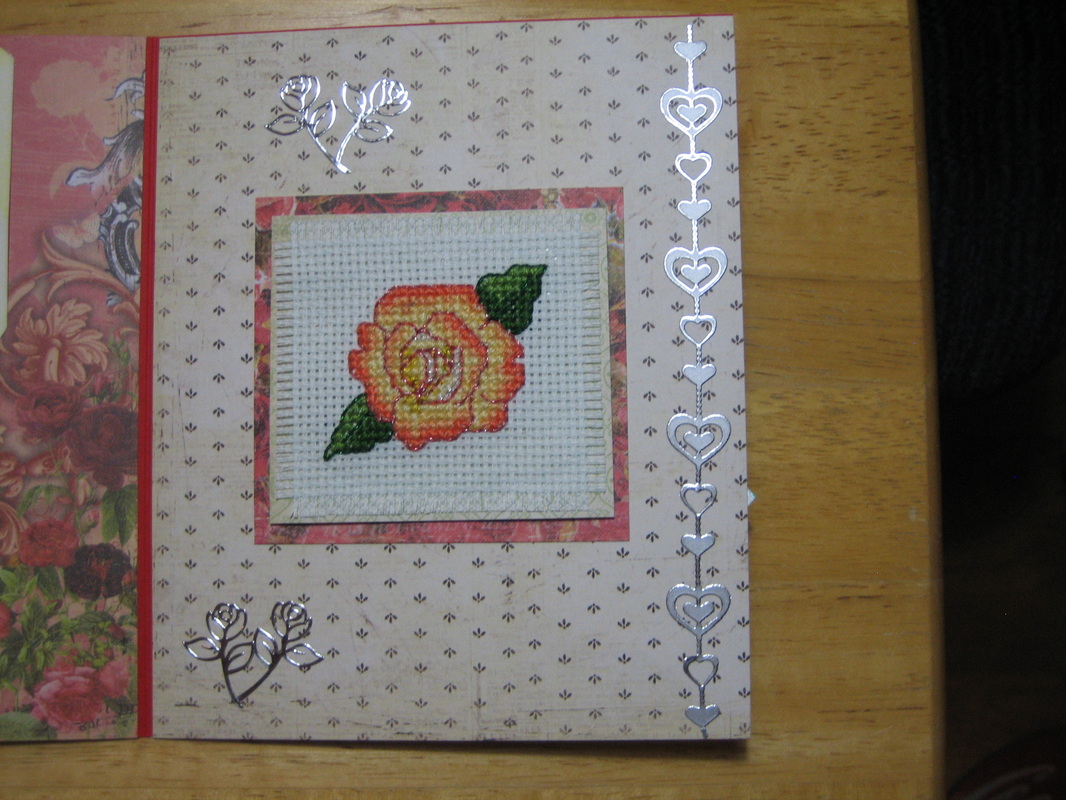
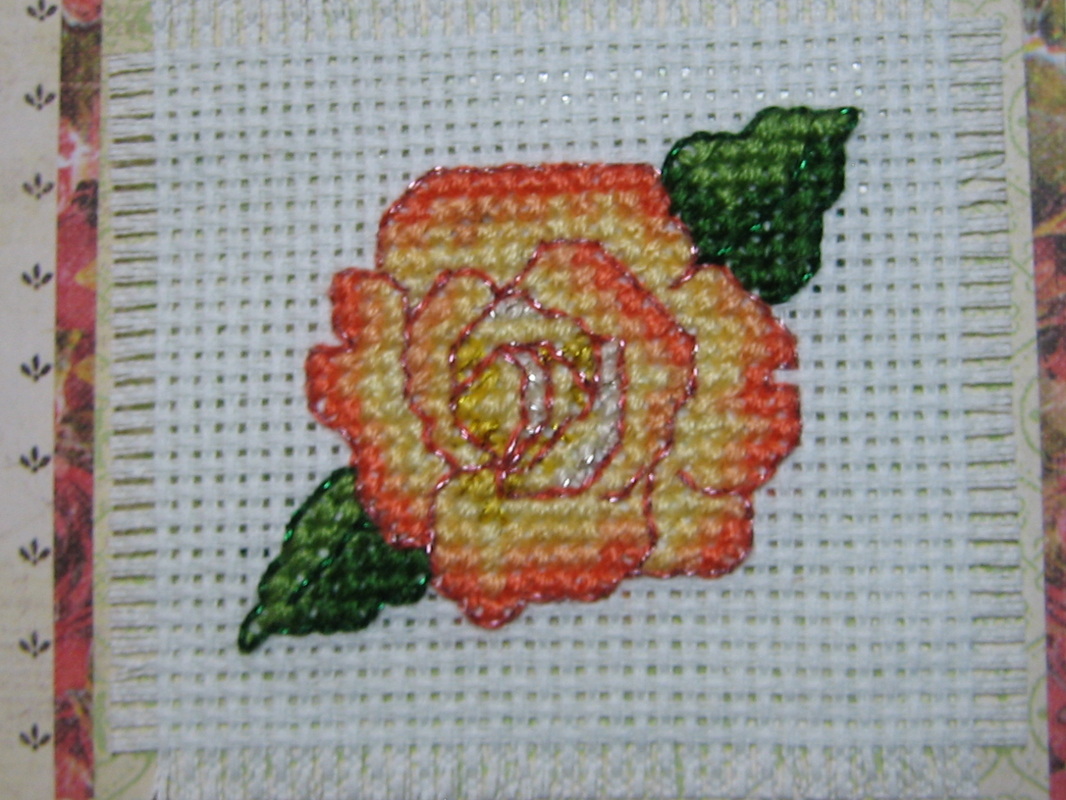
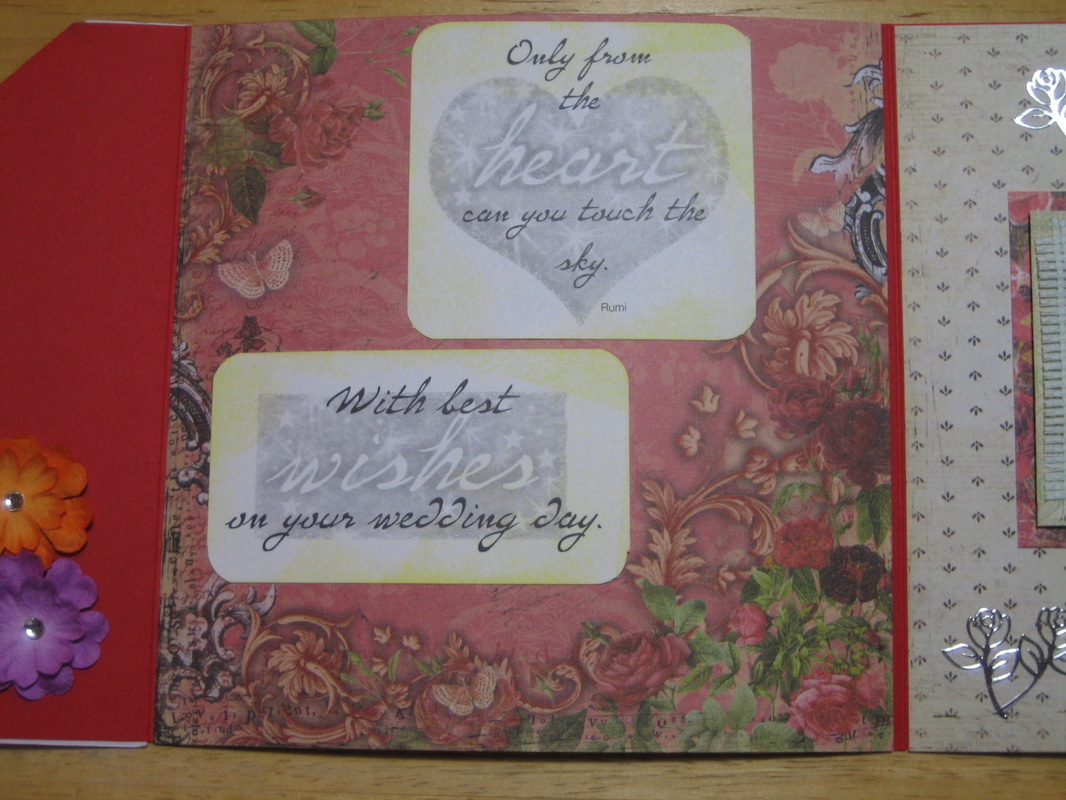
Wedding Card
The wedding card is finally completed! This is a tri-fold card. It took 4 to 6 hours each to (counted) cross stitch the larger Roses, and only 3 hours to stitch the smaller Rose. Let's walk through the photos:
1st photo -- Front of card with red rose. Used DMC Metallic Red on the outline of the rose. The light green of the leaves was a mix of DMC cotton and DMC Metallic light green. Used DMC Metallic dark green for outline.
2nd photo -- Close-up of rose stitching.
3rd photo -- Inside front of card with small red rose.
4th photo -- Close-up of small rose stitching.
5th photo -- Second flap of card using Dazzles.
6th photo -- Inside of second flap with Yellow Rose. Used DMC Metallic pink to outline rose and DMC Metallic dark green to outline leaves.
7th photo -- Close-up of Yellow Rose.
8th photo -- When second flap is opened, this is the center of the card.
Now, all I have to do is sign it, and it is on its way to India for the wedding.
The cross stitch rose designs were from Jeannette Crews Designs One Nighters 44 Roses chart. Love this chart! Roses are great for many occasions -- weddings, anniversaries, sympathy, mother's day, birthdays, and just because.
If you wish to know more details of paper, bling, etc., I used on this card, pop on over to my greeting card blog, Earth Dragon Creations, for the details.
Do you create Stitchery Greeting Cards? Would love to see some of them!
Another January 8
Just saw this on Facebook from DMC regarding their Herringbone Stitch'perimentation:
http://dmc-threads.com/herringbone-stitchperimentation/
Annie's also posted on Facebook:
Coming SOON -- FREE Tunisian crochet video teaching you:
*How to complete the Tunisian foundation row
*How to stitch the Tunisian Simple Stitch
Annie's crochet fans, stay tuned!
A few minutes later:
Click here to watch the free 5-minute video now:http://bit.ly/UHA6hj
Enjoy!
If you haven't Friended these two companies on Facebook, do so as it is a great way to find out the latest things -- I receive notices quicker than e-mail. You can also Friend me (Carol j. Edholm in Mountlake Terrace, WA).
January 8
If you love to stitch designs related to needlearts, then Bobbie G Designs has what you need! I love the Sewing Treasures design, so cool! So buy your kit(s) now before they sell out!
January 7, 2013
Happy New Year, Everyone! I hope everyone had a great Christmas, relaxing Hanukkah and safe New Years!
I caught that nasty bug that's been running around the past few months a week before Christmas and was relegated to spending 4 days of misery in bed (instead of baking, wrapping and getting the Christmas tree). I'm just glad we do our shopping all year long so there wasn't much we were not able to get in the way of gifts. We opted out of getting a Christmas tree as we didn't want it to irritate my asthma so soon after getting out of bed. So my husband took one of my greeting card stands and made a tree out of it. Of course, the cats were wondering where the tree was, but eventually, some of them settled down on the tree skirt under our "tree."
I caught that nasty bug that's been running around the past few months a week before Christmas and was relegated to spending 4 days of misery in bed (instead of baking, wrapping and getting the Christmas tree). I'm just glad we do our shopping all year long so there wasn't much we were not able to get in the way of gifts. We opted out of getting a Christmas tree as we didn't want it to irritate my asthma so soon after getting out of bed. So my husband took one of my greeting card stands and made a tree out of it. Of course, the cats were wondering where the tree was, but eventually, some of them settled down on the tree skirt under our "tree."
Christmas tree made from greeting card rack
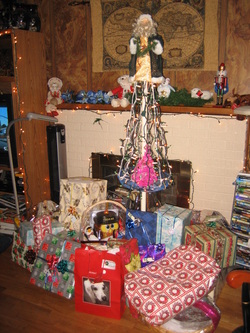
After my husband put together this Christmas tree from my greeting card rack, he grabbed my little purple tree and stuff it inside. It sits on a front tray from one of our floor fans (a very old fan). He did a very good job, and my asthma and end results of the bug were not irritated.
Cat under Christmas tree
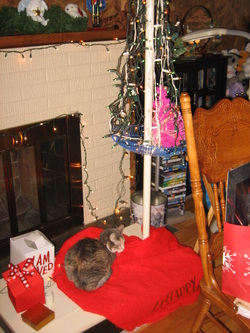
Crystal spent a couple days under the "tree" before another cat took over.
Holiday Stitchery
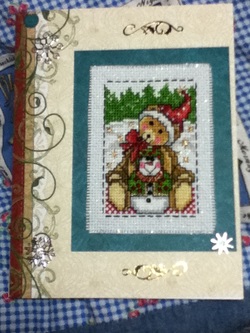
I did not have plans to stitch anything for Christmas for anyone, but I did need to do a birthday card in December for a college friend whom I just reconnected with over the summer after more than 20 years being apart. (See December 12 card.) While looking for a design for her card, I came cross this one and thought it would be just too cute for my husband.
Close-up
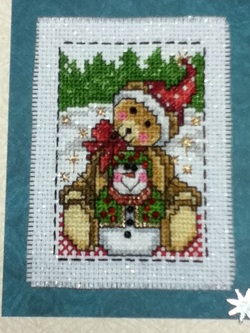
Yes, that is Kreinik metallic gold on the snowman's jacket and snow-flakes. I used beads for bear's and snowman's eyes, snowman's buttons and snowman's jacket and hat beads. French knots are my least favorite stitch, and I will use beads in lieu of them every chance I get.
I love the glitter in the base fabric. I got this piece from Stoney Creek and I have to get some more if they still carry it. It is just perfect for Christmas stitchery!
I love the glitter in the base fabric. I got this piece from Stoney Creek and I have to get some more if they still carry it. It is just perfect for Christmas stitchery!
Coasters
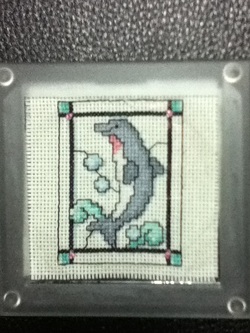
I stitched this dolphin from a tiny commercial kit I got at a store sale a few years ago. I was going to turn it into a card. After showing it to my husband, he whined....(you know how they whine when they want something). He loves Dolphins -- silly me!
Since he wanted it, what was I going to do with it? Then I remember a coaster set I had bought at Craft Mart or something several years ago. Yep, it fit perfectly. So, now to look for other designs for 4 coasters....
Since he wanted it, what was I going to do with it? Then I remember a coaster set I had bought at Craft Mart or something several years ago. Yep, it fit perfectly. So, now to look for other designs for 4 coasters....
Welsh Dragon
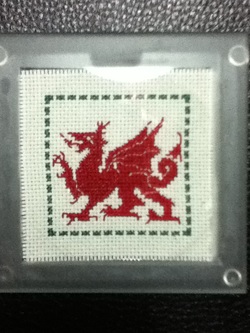
This Welsh Dragon is from another tiny store kit. It also fits the coaster perfectly.
Now I have to search my books and charts for two more small designs....
Leo
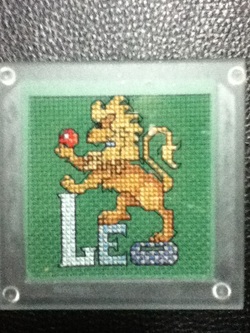
Since my husband is a Leo, and the design fit the coaster, perfect choice.
But what to put in the fourth coaster? Various camel designs are too large, no Owl design right size...
King Tut

Ah...King Tut. If I bring the border in closer, it just might work. Yes! Success!
As you can see, this design uses a lot of metallic gold. We all know that DMC metallic gold will quickly fray and tangle very easily when working on any size project larger than a few stitches. Back in September, I took a Kreinik class. I thought about their metallic gold. After I had stitched the other 3 designs, I finally decided to drive a half hour north to The Needlepointer to get a spool of Kreinik metallic gold thread (only one in our area to carry Kreinik). It is a little more expensive than DMC -- but oh my gosh!! It is so worth it! It did not fray as bad as DMC, did not tangle as bad, and -- just look at it! It is not as bulky as DMC! This turned out gorgeous because of Kreinik! So I used the Kreinik instead of DMC on the Christmas card. This thread makes a product look so much nicer!
By the way, if you are ready to get away from phones, computers, etc., and just stitch a weekend away, check out The Needlepointer's website for a stitching retreat!
These Holiday Photo Coasters are from Making Memories. I do not know if you can find these anywhere (did not see them on their website), but perhaps you can find them on an outlet website or estate sale. I sure wouldn't mind another set.
I have been a member of Crafter's Choice, a book club for stitchery and card making books (and periodically I find a nice gift book for a family member). If you are a quilter, you might want to check out this month's feature book -- The Civil War Sampler. I do not quilt, but if I did, this would be one quilt I would love to make.
If you have family members that have previously or currently serve in the military, a nice gift for them would be a quilt from the Quilts from the American Homefront. Any of the quilts from these two books would be a valued family heirloom. If you make one (or more), I would love a photo for the website.
Feel free to check out Crafter's Choice website for more books and charts on quilting, crocheting, knitting, cross stitching and a variety of other crafts. (I've picked up a book on wood burning for my husband.)
We have Stitchery Club on this Tuesday, January 8, and again on Tuesday, January 22, from 6:30 to 9:00 pm. Hopefully, we will have new photos for you (some other stitchery projects are finished and we have a new member).
Have a great year!


You can find some of my work on Pinterest!
